
Shortly after the quads turned three, we decided it was time to move them from toddler beds to twin beds. Originally we planned on keeping toddler beds until four, but the boys were driving me INSANE with bedtime shenanigans, but that’s another story. Switching to twin beds meant we’d need some new furniture and decor. Knowing that our boys had a history of destruction we had several guidelines 1. furniture and artwork would be bolted to the walls 2. furniture needed to be relatively small since the kids share tiny rooms 3. we weren’t going to break the bank buying things. After cruising Pinterest, I fell in love with the Jenny Lind style beds seen on many design sites. I had a huge problem with the price tag, however.
Though it was a long shot, we started skimming Craigslist ads and local antique stores for vintage Jenny Lind beds. Every antique dealer we spoke with told us finding a matching pair of antique beds was slim and four was highly unlikely, but we kept searching. One afternoon, I spotted dismantled Jenny Lind cribs (I thought they were twin beds) outside a nearby antique shop on the driveway. I commanded George to pull in so I could check them out. After chatting with the owner, I had step by step directions for converting the cribs to twin sized head boards. It was serendipity that she had two cribs, which would convert perfectly into four headboards. All four pieces cost $100 together, so not shabby! She already weathered them by leaving them outside for weeks, allowing the rain and sun to crackle the finish and give the wood a shabby chic appearance.

Our cribs looked like this when we brought them home. To get the look, follow the steps below.

1. Lightly sand the rough edges and make sure there is no loose stain remaining. There is no need to sand thoroughly because you’ll be spray painting over everything.

2. Remove any dust from the sanded surface with a soft brush or cloth.

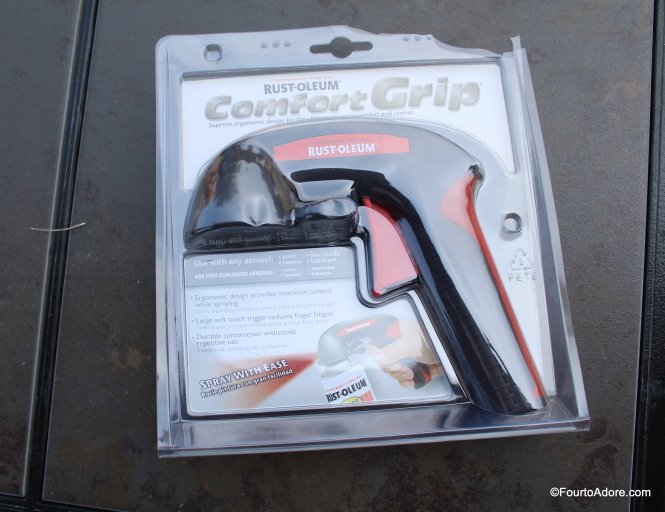
3. Using inexpensive white spray paint ($.97), prime all surfaces. You can use your thumb to spray if your finger gets tired, or use a spray paint trigger. I thought the trigger helped with control, giving a more even coat.


4. Once the primer is dry, cover everything with about three coats of Rust-oleum Painter’s Touch 2X Ultra Cover Paint Primer in your desired color. For the boys, we used Apple Red. We used Key Lime for the girls.


5. Allow paint to dry for about 24 hours.
6. Determine where you’d like your headboard to be secured to the wall. Then, drill pilot holes through the headboard and mark the corresponding place on the wall. Using drywall anchors, attach the headboard to the wall. We secured ours in four points.


Having the beds secured to the walls was critical for the boys. They are experts at dismantling things, hence the need for big boy furniture.

7. Arrange your bed’s foundation and mattress in front of the headboard.
We warmed up the girl’s space by painting an accent wall gray then creating a collage of accessories mostly found at Hobby Lobby. I snapped the black and white picture of them myself and mounted it to a canvas. The toe shoes were in my room as a child. All of their linens were found at Home Goods.

At this point, the boys are not ready for their quilts or many accessories. Their room isn’t looking as spiffy with sheets only on the beds and a barren nightstand, which is a sobering reminder to me that we do not actually live in a Pottery Barn catalog. At some point, I’ll get around to snapping pictures of their new digs.
hugs!
Amber
Psst…Are you subscribed to this blog? If you enjoy what you’re reading, you can have our latest posts delivered right to your inbox! Simply select “subscribe” on the right side of the page.
You’ll also find us on Facebook, Twitter, and Pinterest!


Adorable!!! Krylon has attachment one that’s a trigger, it’s awesome when using a spray can:))
Have a great day, Marianne
>
LikeLike
Yes! I used the trigger for the colored paint, but forgot to attach the picture. It was much easier to spray with the trigger.
LikeLike
What a darling room! So glad you found what you were looking for. I love Jenny Lind furniture too!
LikeLike
Thank you!! We are really pleased with the results. B
LikeLike
How clever to mount the headboards to the wall. Love it all! 💚💗
Teresa
LikeLike
Thank you!!! We are very happy with the result. 😀
LikeLike
Amazing!! When did you switch from cribs to toddler beds?
LikeLike
Thanks! Around 2.5 we switched the girls because Sydney was climbing out. We moved the boys at about 33 months. Toddler beds weren’t as bad as I thought, but were a game changer with naps. I have to separate kids at nap now.
LikeLiked by 1 person
Yeah! They haven’t tried climbing out yet but I’m trying to prolong toddler beds as long as possible. The idea freaks me out!
LikeLike
I’d enjoy the time you have with cribs for sure! But….also be proactive and made sure their room is totally toddler proof because you never know when they’ll escape 😖
LikeLiked by 1 person
Those headboards look so cute! Next spray paint project save your finger and buy a trigger! 🙂 https://www.google.com/webhp?sourceid=chrome-instant&ion=1&espv=2&ie=UTF-8#q=spray+paint+trigger&tbm=shop
LikeLike
Thanks! I did buy a trigger for the colored paint, but forgot to post that pic. Must update 🙂
LikeLike
Those headboards look so cute! Next spray paint project, save your finger and buy a trigger! https://www.google.com/webhp?sourceid=chrome-instant&ion=1&espv=2&ie=UTF-8#q=spray+paint+trigger&tbm=shop
LikeLike
Brilliant! Both rooms look great.
LikeLike
[…] of this, the boy’s room isn’t quite up to par with the girl’s grown up room, but it’s okay. It’s real. They have the same DIY Jenny Lind headboards attached to […]
LikeLike
[…] girls have been doing well with keeping things nice in their big girl room. This year, they have a silver tinsel tree with pastel ornaments on their dresser, and they are […]
LikeLike
Did you just use a twin metal bed frame up against them? I love this idea and I think your post on this saved me a lot of time and thought on how to do my girls room!!!
LikeLike
Actually, we just have the foundation and mattresses on the floor. You could use a metal frame too, but you’d probably have to hang the headboard higher on the wall. Have fun decorating! 🙂
LikeLike
Love it! I have twin girls and we were looking for headboard ideas -To keep them hanging out on their windowsills at nap 🙄 and not resting! Someone in my area is selling a Jenny Lind crib so I just messaged her. Fingers crossed!
LikeLike