Food Revolution: Phase 2 Snacks Redefined

snacks redefined

When eliminating snacks was unsuccessful for improving dinnertime, I was back to the drawing board.  First, I considered our goals for dinner, and with feeding in general.

  1. We wanted the kids eating a well balanced diet that was adequate for health and growth.  This was critical since our family has experienced chronic constipation, food allergies, and our children are much smaller than same age peers.
  2. We wanted the entire family to have pleasant mealtime experiences.

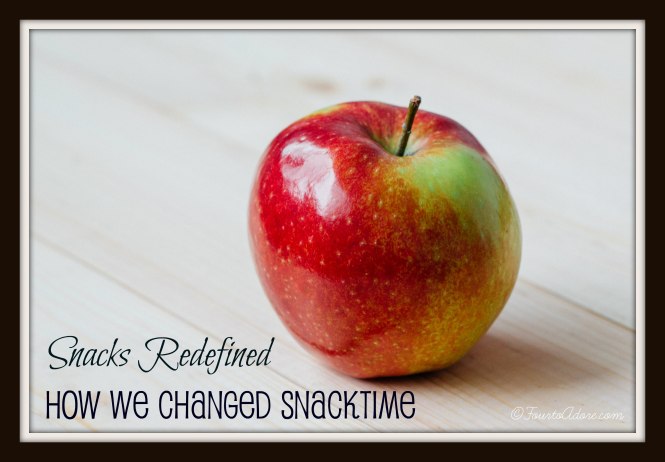
Since banning snacks basically created hangry children, I decided it was time for everyone (adults and children) to redefine snacks.  Over the past few years, we developed poor snacking habits.  The majority of the time, snacks consisted of food with minimal nutritional value.  Snacking wasn’t the problem itself, the bigger issue was these foods often became substitutes for meals and the kids weren’t getting adequate nutrition.  Keeping this in mind, I tweaked the snack menu.

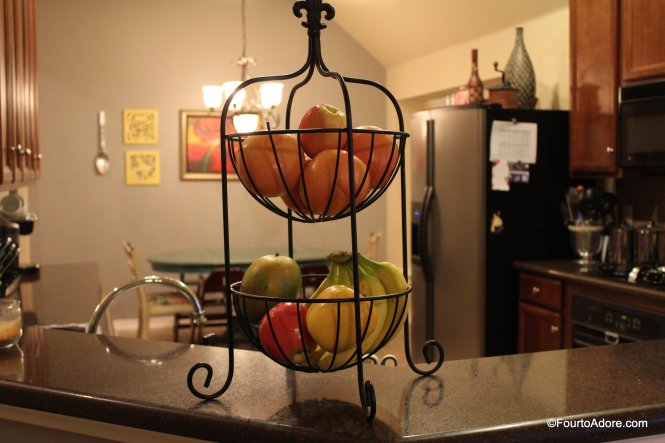
When our typical afternoon snack time arrived, I started offering several choices that included primarily fruits and vegetables, and other sources of protein such as nuts or dairy.  In the beginning, the kids were NOT pleased with these options, and often on their own volition skipped snacks altogether.  On many occasions they demanded off menu items.  Instead of catering to their whims, I continued offering a variety of options that included items I knew they’d enjoyed before.  We have two tiered basket on the counter top that is always full of fruit (often chosen by the kids during shopping trips), and these were consistently offered as snacks.  In addition, if someone didn’t eat part of a meal, and it was an item I knew they liked, I put it into lidded containers color coded by child.   Leftovers could then be added to the snack menu.

IMG_2400

IMG_2360

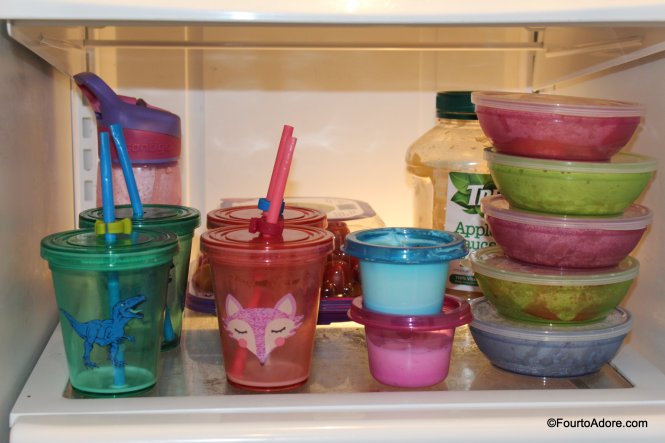
Here, we had left over Greek yogurt, apples, and pasta that was untouched at lunch.


After the weeks trudged on, the kids finally started trying their new snack options and enjoying them.  I could not believe it when Sydney chose apples for her snack, and then gobbled them with a huge smile on her face.  This was a BIG deal, people. Sydney is a self proclaimed “carnival” (e.g. carnivore) who loves to nosh meat and carbohydrates.  Fruit and  veggies have never been atop her preferred foods list, yet she decided apples were indeed tasty.  While we were shopping, she requested grapes.  This was huge for her.

IMG_2363

IMG_2380

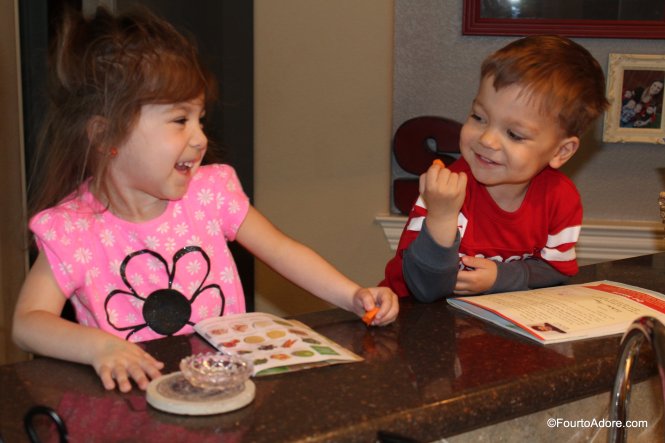
Raw carrots for snack?  Why yes!  And look at those smiles!


During this process of redefining snacks, our snack menu is somewhat limited.  At the same time, our previously enjoyed foods are not “forbidden” either.  I want the kids to learn how to enjoy a variety of food and feel satisfied with some of the most nutritious foods, but to also appreciate treats.  I enjoy desserts and salty snacks, why shouldn’t they?

Even with better snacking habits underway, improving the kid’s nutritional intake, my second goal was not yet achieved.  The kids were often fussy at dinner, claiming to be “very hungry” then refusing to eat anything presented to them.  It was not uncommon for one or more children to proclaim something such as “This is DISGUSTING!” (Thank you, Pixar for Inside Out, and adding “disgust” to the children’s emotional vocabulary.)  It seemed that the kids took turns having a dinnertime tantrum so we’d experience at least one per night.  Even worse, tantrums occurred even when we served favorite meals and despite the fact we told them they didn’t have to eat anything they didn’t want.  Dinner was an exasperating experience most nights.

At this point, we were on the cusp of accomplishing both of the feeding goals, but weren’t quite there.  Stay with me, I know many others are having similar struggles and are eager to discover what finally made all the difference in the world.


Hugs!


Amber


How to Build a Quad Feeding Table

As the babies approached their six month birthday, we knew spoon feeds were impending.  It’s not that we aren’t absolutely excited to introduce new flavors and textures to the babies, but we know it’s going to bring new challenges.  Over the past few months, we settled into a really nice feeding schedule with bottles at 8, 11, 2, 5, and 8.  Spoon feeds will inevitably interfere with our tried and true routine (in a good way eventually).  A jar of baby food won’t last one feed in this house so we will also be making our own baby foods.  That means even more work preparing feeds.  As it is, George spends roughly 30 minutes nightly preparing formula for the next 24 hours.  On a positive note, making baby food will make us eat healthier because we will be well stocked with fresh produce.

And the biggest challenge related to spoon feeds….where and how to feed four babies!  High chairs were never under consideration.  Four of them would be pricey and there is NO space for them in our kitchen anyways.   My original plan was to buy feeding seats to attach to our kitchen chairs.  Feeding seats would be relatively inexpensive, portable, and space saving.  However, our kitchen table is round and there’s no way one person could reach all the babies if feeding them alone.  I am alone with the babies 3-5 days of the week so practicality is imperative.  A few months ago, there was chatter among quad moms about feeding tables.  A lot of them raved about them so we started browsing the options.  There are companies that make commercial grade quad feeding tables.  However, these tables are primarily marketed to daycare and school settings.  They are very practical and durable.  They are also unattractive and expensive.  In order to house a quad table, we had to sacrifice our kitchen table.  Keeping that in mind, we wanted something sturdy, practical, and easy to clean, but that was not an eye sore either.  Thus, the idea of building a quad table was born.  We ordered red replacement seats for the commercial feeding tables from Just Multiples for $30 each.  Shortly after ordering our seats, I heard it through the grapevine that fellow quad mama, Traci’s father recently built a feeding table for her quads. Traci was kind enough to share their plans, which George used loosely.  Also, George was able to chat with Traci’s father for a few tips.

Just Multiples sells a commercial grade table for $575

Here is a list of the materials George used with a cost breakdown:

  • plywood $60
  • two 4 x 8 beams $22
  • wood filler $3
  • stain $12
  • wood glue $3
  • four 2 packs of corner braces $16
  • sandpaper $6
  • Liquid Nails $3
  • four replacement toddler table seats $120
  • paint FREE- we already had it!
  • miscellaneous woodworking tools FREE- we already had them
  • GRAND TOTAL $230

As you can see, we saved several hundred dollars making custom table that fits our breakfast nook perfectly!  Below George attached pictures with step by step explanations of how he fabricated our table.

I began by gathering my materials in order to layout my design.  Two sheets of 3/4" cabinet grade plywood and two 8X4" beams.

I began by gathering my materials in order to layout my design. Two sheets of 3/4″ cabinet grade plywood and two 8X4″ beams.

Next I began to layout my design using a rough set of plans from the Dvorak's.

Next I began to layout my design using a rough set of plans from the Dvorak’s.

Then I used a jigsaw and carved out my design.  I clamped both pieces together and cut both at the same time.

Then I used a jigsaw and carved out my design. I clamped both pieces together and cut both at the same time.

I used the seats to decide where to place my holes.

I used the seats to decide where to place my holes.

After cutting both pieces I cut out special openings to allow for the seat to snap into place.  (notice this is the bottom piece)

After cutting both pieces I cut out special openings to allow for the seat to snap into place; this is the bottom piece.  Note: In hindsight I’d make this hole 9 1/2 ” by 9 1/2″ square because the top piece will be 8 1/2″ by 8 1/2″ square and will cover this opening.

I used wood glue to press both pieces of wood together and I allowed this to sit for two days.

I used wood glue to press both pieces of wood together and I allowed this to sit for two days.

I used clamps to make sure everything went together smoothly.  Wood has a tendency to warp.

I used clamps to make sure everything went together smoothly. Wood has a tendency to warp.

I used a miter saw to cut down the legs to size.  All are 29" long.

I used a miter saw to cut down the legs to size. All are 29″ long.

Here are the four legs cut to size.   Notice how they are sanded down.

Here are the four legs cut to size. Notice how they are sanded down.

I bought a dowel rod and cut 8 individual pieces.  This will be used in the next step.

I bought a dowel rod and cut 8 individual pieces. This will be used in the next step.

I used a drill to make holes in the leg and into the underneath of the table.  Notice how I wrapped tape around the drill bit to give me a guide so that I did not go through the table.

I used a drill to make holes in the leg and into the underneath of the table. Notice how I wrapped tape around the drill bit to give me a guide so that I did not go through the table.

Next I used wood glue to glue in the dowel rods and then Liquid Nails to secure the legs to the table.  I used weights to make sure it went down properly.  I let this sit overnight to cure.

Next I used wood glue to glue in the dowel rods and then Liquid Nails to secure the legs to the table. I used weights to make sure it went down properly. I let this sit overnight to cure.

The next morning I sanded the table down for hours.  I then applied the first coat of stain.

The next morning I sanded the table down for hours. I then applied the first coat of stain.

I also used these brackets to secure the legs to the table again.  I wanted to make sure nothing moved.

I also used these brackets to secure the legs to the table again. I wanted to make sure nothing moved.

I then brought the table into the house to see how it fit in order to make last minute changes.

I then brought the table into the house to see how it fit in order to make last minute changes.

Amber wanted me to match our living room rug so I painted a little design.

Amber was afraid the table would look like a “sea of brown” and wanted me to match our living room rug so I painted a little design on the top.  It was a good idea.  After all, there will never be place mats, center pieces, or table runners on this table!  Paint was a good way to liven it up a bit.

Here is another angle after I applied a coat of polyurethane.

Here is another angle after I applied a coat of polyurethane.

And here it is all done in it's splendor.  Never in a million years did I ever think I would make one of these.

And here it is all done in it’s splendor. Never in a million years did I ever think I would make one of these.

This one shows all of the dimensions I used.

This one shows all of the dimensions I used.

To make sure the table could handle the weight of  four babies or toddlers, George perched on top of it.

To make sure the table could handle the weight of four babies or toddlers, George perched on top of it.

He also sprawled across the thing like some sort of gangster!  Should be good for a gang of quads.

He also sprawled across the thing like some sort of gangster, maybe the Quad Father. Should be good for a gang of quads.

Now that the table is ready to go, we just have to figure out how to pad the babies in so they can use it ASAP.  We realize the seats aren’t intended for six month old preemies, they are really for toddlers.  However, we figured if George was going to go through the effort of making a table, we might as well use it as long as possible.  Stay tuned for spoon feed updates and pictures with messy babies!

hugs!

Amber (and George)


Update….we used old baby bath towels to pad the babies into their seats until they sat up well enough independently.  They outgrew the quad table after their second birthday and we now use a family dinner table with restaurant high chairs.

Green Light, Go!

On Thursday Nisey helped me take the babies to see Dr. Knapp for their six month check up. Bless her for that. There is NO way I could take them all solo. Everyone got a stellar report and even made it on the growth charts.  Of course, they are still small compared to same age counterparts, but they are big enough to be compared in the first place.

Also, we were given the green light to start spoon feeds.  Dr. Knapp is surprisingly liberal about solid foods and says they can have pretty much anything besides honey. He doesn’t even recommend waiting on peanut butter! We aren’t planning to try peanut butter for a while and are going to offer it just before going to a well visit, just in case! He said we should just try one thing at a time and wait two days to look for signs of an allergic reaction. When they’ve tried all the components, he also suggested pureeing our dinners such as casseroles or pizza. We are excited about this new terrain, but also a bit apprehensive. With quads, spoon feeds is most definitely going to bring new challenges our way. To help us efficiency feed the quads, George began construction on a quad feeding table. As of now, he has the table built and is working on staining and painting it. Once it’s done, he is planning to write a post about how he tackled such a daunting project!

The babies are lined up largest to smallest: Harper, Rylin, Mason, & Sydney

Here everyone is waiting to see Dr. Knapp. The babies are lined up largest to smallest: Harper, Rylin, Mason, & Sydney

Sweet Baby Feet!  PS- That is not a shot you see in the picture, it is a pen.  =)

Sweet Baby Feet!
PS- That is not a shot you see in the picture, it is a pen. =)

6-IMG_3563

Rylin

13 lbs, 6 oz

25″ long

1-IMG_3526

Harper

15 lbs, 6 oz

25″ long

4-IMG_3556

Sydney

12 lbs, 3 oz

24 1/4 ” long

Over the past month or so, we experienced feeding difficulties with Sydney. She started refusing bottles, screeching, arching her back, and stiffening her legs during some feeds. She never spit up, but it became an all out battle. We considered the possibility of everything from silent reflux to food sensitivities. We tried soy formula and took reflux precautions, but didn’t find much relief. Dr. Knapp ruled out other problems such as ear infections and teething. He finally told us to stop force feeding Sydney and to let her refuse bottles if she wanted. We did that and it worked! We were trying to force the poor baby to eat more than she needed. She’s been much happier these days and she DID grow since our last checkup. She’s still the smallest, but is only about a pound lighter than Mason.  Sydney’s  hemangioma (strawberry birthmark) on her head is starting to involute (lighten and shrink), which is great news and apparently unusual.  Dr. Knapp said they usually grow much larger before they shrink.

1-IMG_3568

Mason

13 lbs, 3 oz

25 1/4″ long

Mason has been receiving Occupational Therapy through ECI since about two months of age because he had a slightly flattened head. Our therapist taught us how to do a stretching regime that we do between every feed and we encourage him to turn to his non preferred side (left). He’s made HUGE progress with therapy and is tackling many developmental milestones ahead of his siblings (notice in the picture he his holding his own bottle). However, we still see some mild facial asymmetry. Dr. Knapp of course had no concerns about it because Mason is doing so well, but as his Mama I am concerned. I plan to make an appointment for him at Cranial Technologies to make sure he doesn’t need any type of band to correct his head shape. I never want to feel guilty about not having it checked or have regrets.

The babies are all wearing size 6 month pajamas and are lined up largest to smallest.  Interesting to see how their pajamas fit!

The babies are all wearing size 6 month pajamas and are lined up largest to smallest. Interesting to see how their pajamas fit differently.

More babies!

More babies!

hugs!

Amber