Ornaments Up, Ornaments Down

This year marked our first time hosting Christmas with my extended family. With four two-year olds in the house, we knew decorating for Christmas would pose a slight challenge, but we were up for it. Last year, we put our tree up on a sturdy table, and for the most part ornaments were out of reach.  It worked beautifully.  This year, everyone grew enough that they could reach ornaments even if the tree was raised, and I feared they would tip it over. I refused to put the tree in a room where it would be unseen or to put gates around it. We don’t have the right kind of gates and I was unwilling to make the investment for a short season. Also, I figured someone would tip the gate or scale it anyways. Instead, we decorated the tree with shatter proof ornaments and deco mesh. It really looked beautiful despite being a “kid tree”. I also thought it would be a good opportunity to teach self-restraint and respect. After the tree was up, we taught the quads how to carefully touch ornaments with one finger. They were pretty good about it and usually followed the rule. While the tree was up, the quads took turns snatching ornaments when no one was looking. In those instances, we instructed them to put the ornaments back on the tree. Getting them to replace pulled ornaments proved a lesson in patience and acceptance for me. Though we used shatterproof ornaments, a few perished and some needed hot glue.  Aside from the tree, decorations in quad approved areas only included the mantle and nativity.  That was all I could handle.

Teaching the quads to respect the tree was a monumental task so presents were stored in the study.  We tucked gifts around the tree on Christmas Eve while visions of sugar plums danced in the quad’s heads. When Christmas arrived, our tree albeit rearranged many times over, was still intact and standing proudly.  Whew!

IMG_0812

Although our tree wasn’t glistening with our favorite blown glass ornaments, I found a place in the dining room for a few heirlooms I wanted to enjoy.

Decorate a chandelier with garland and ornaments

To accommodate a family of 16 adults and 7 children, we moved the high chairs out of the kitchen, and dined with the quads in the play room. This left better dining accommodations for our guests.

"kiddie table"

IMG_3632

IMG_3635

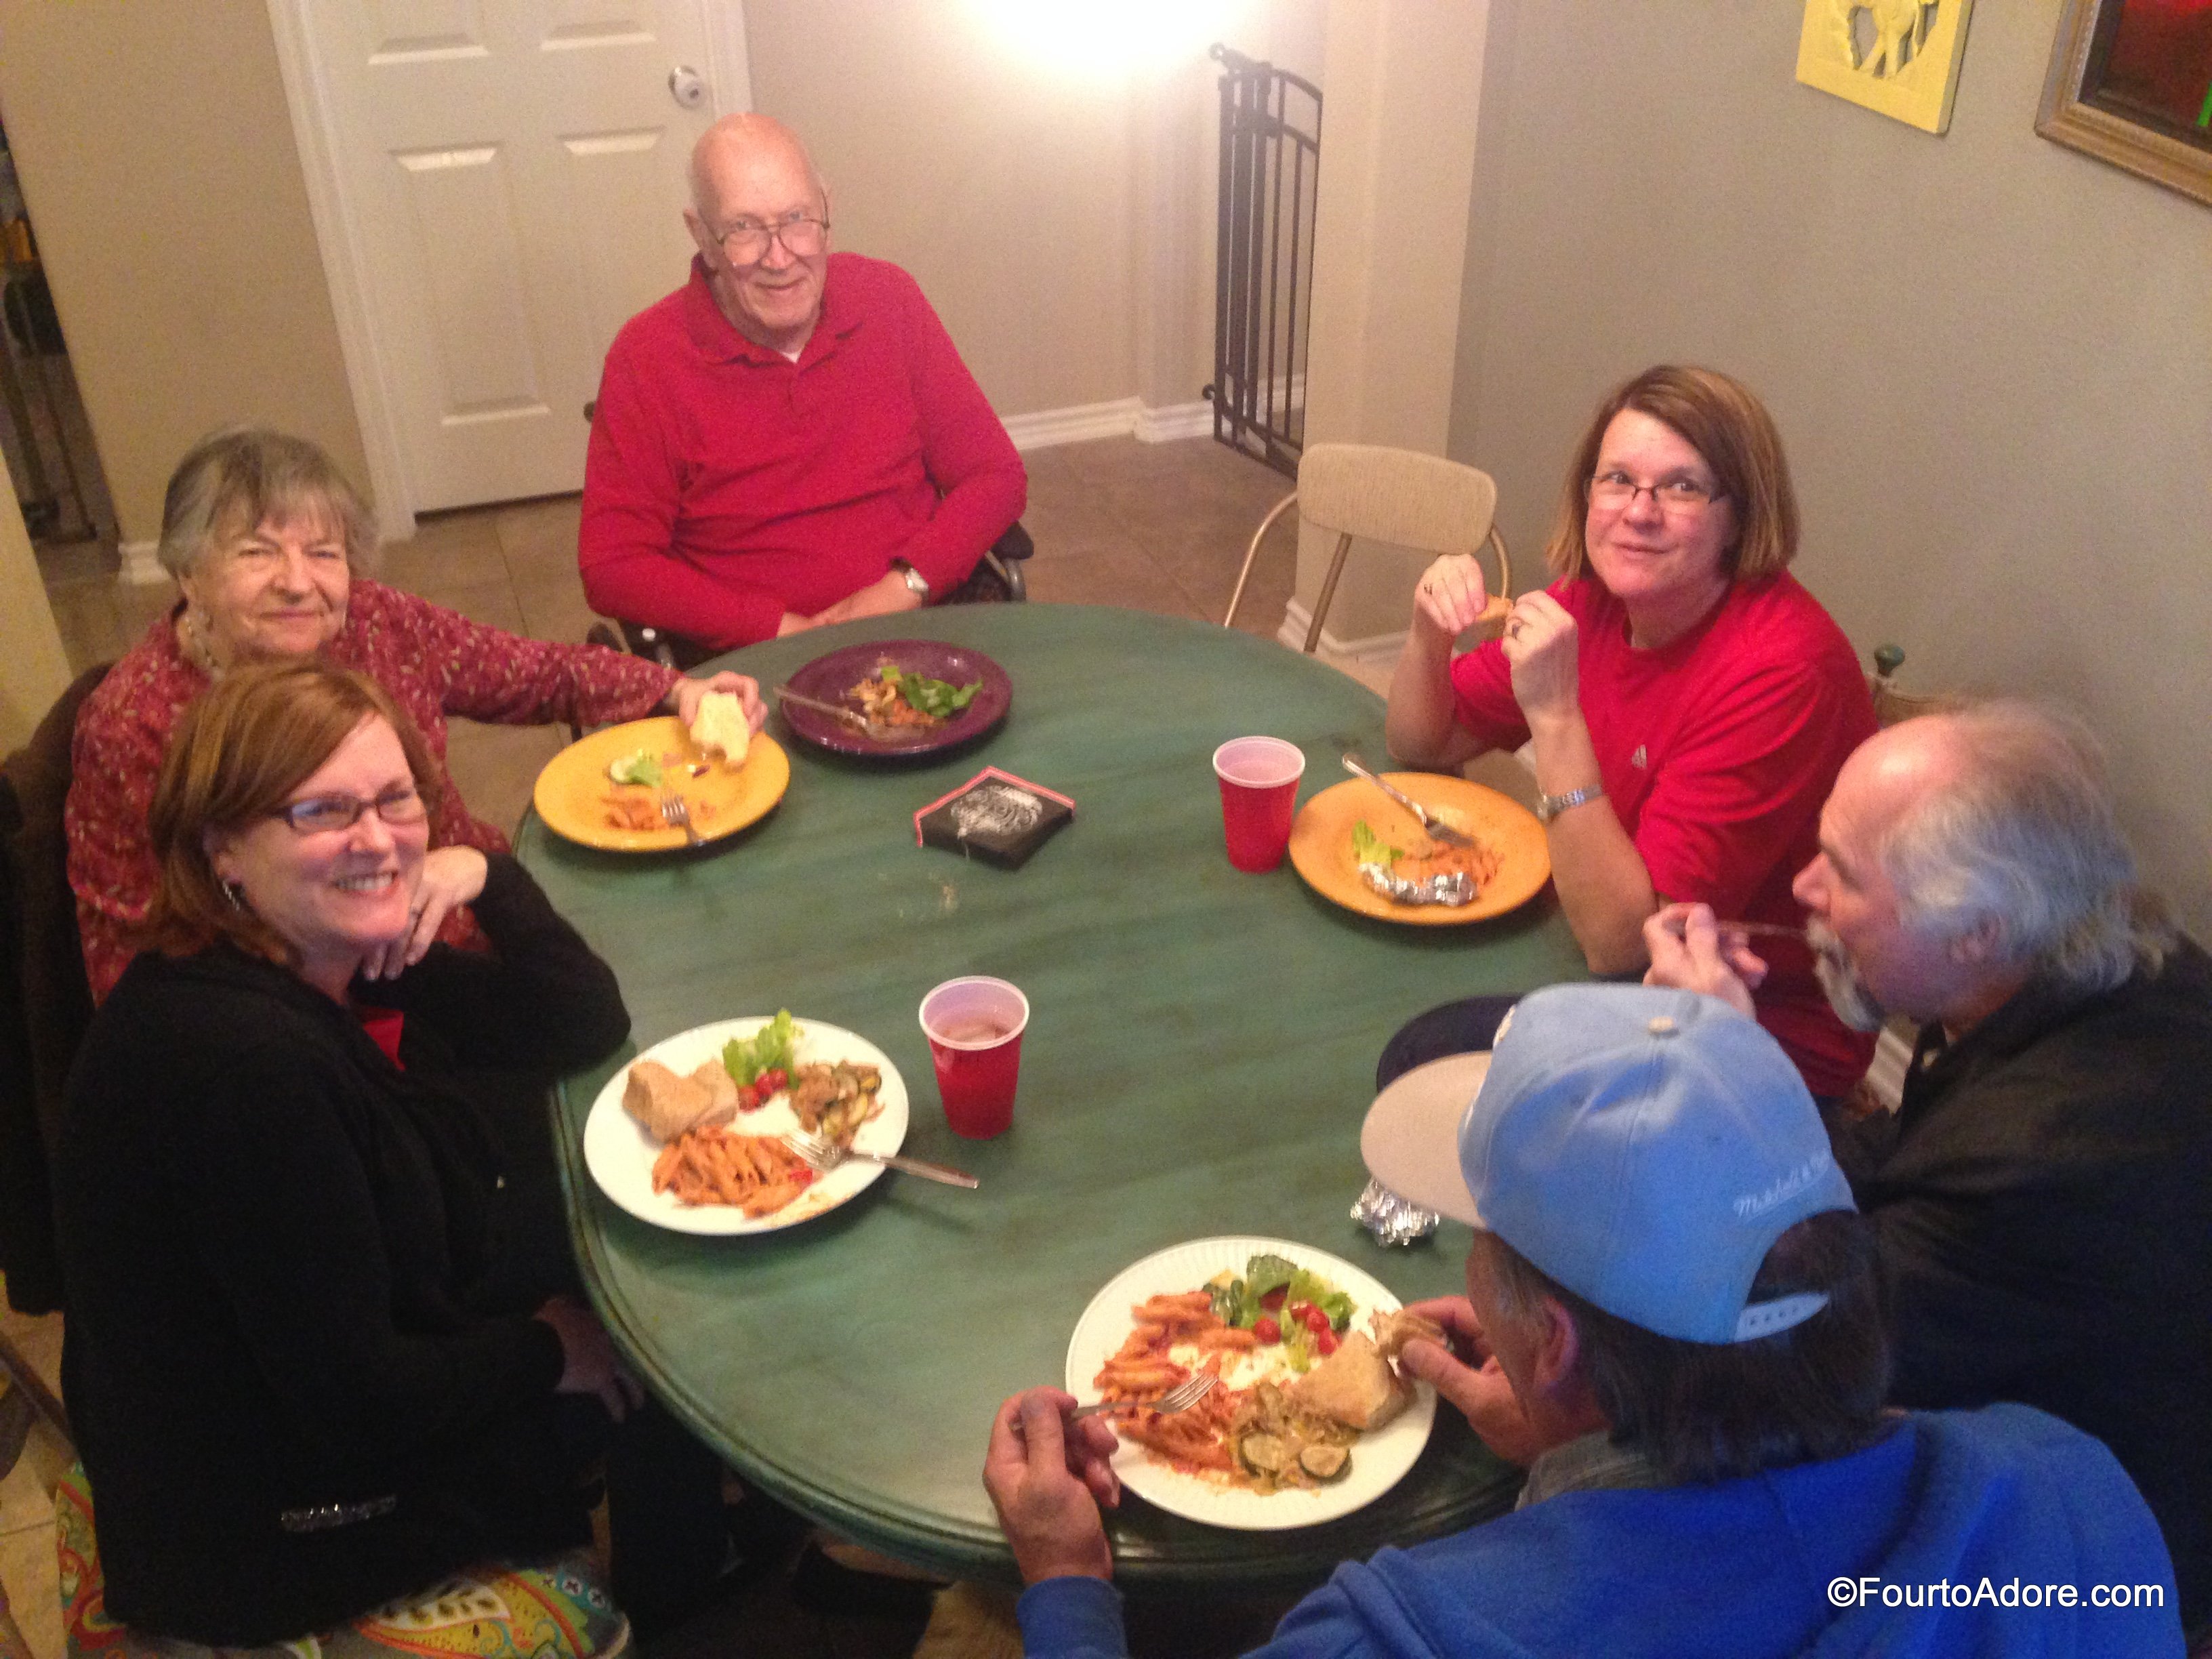
Although our living room is small, we managed to cram the entire crew in for gift exchanges.  The panorama feature on my phone almost captured everyone.  I simply couldn’t move fast enough while being steady to get all 23 of us.

IMG_3647

Keeping tabs on everyone during gift opening commanded my full attention so there’s only one photo from the charades:

Minnie Mouse necklaces handmade by Etsy shop, Texas Take

The girls were ecstatic when they opened these Minnie Mouse necklaces handmade by my quad mama friend, Amber. She has an Etsy Shop at Texas Take where similar necklaces are sold.

IMG_0847

We did, manage to snap one photo with my parents, sister, and her boyfriend (Matt).

watermarked Christmas 2014

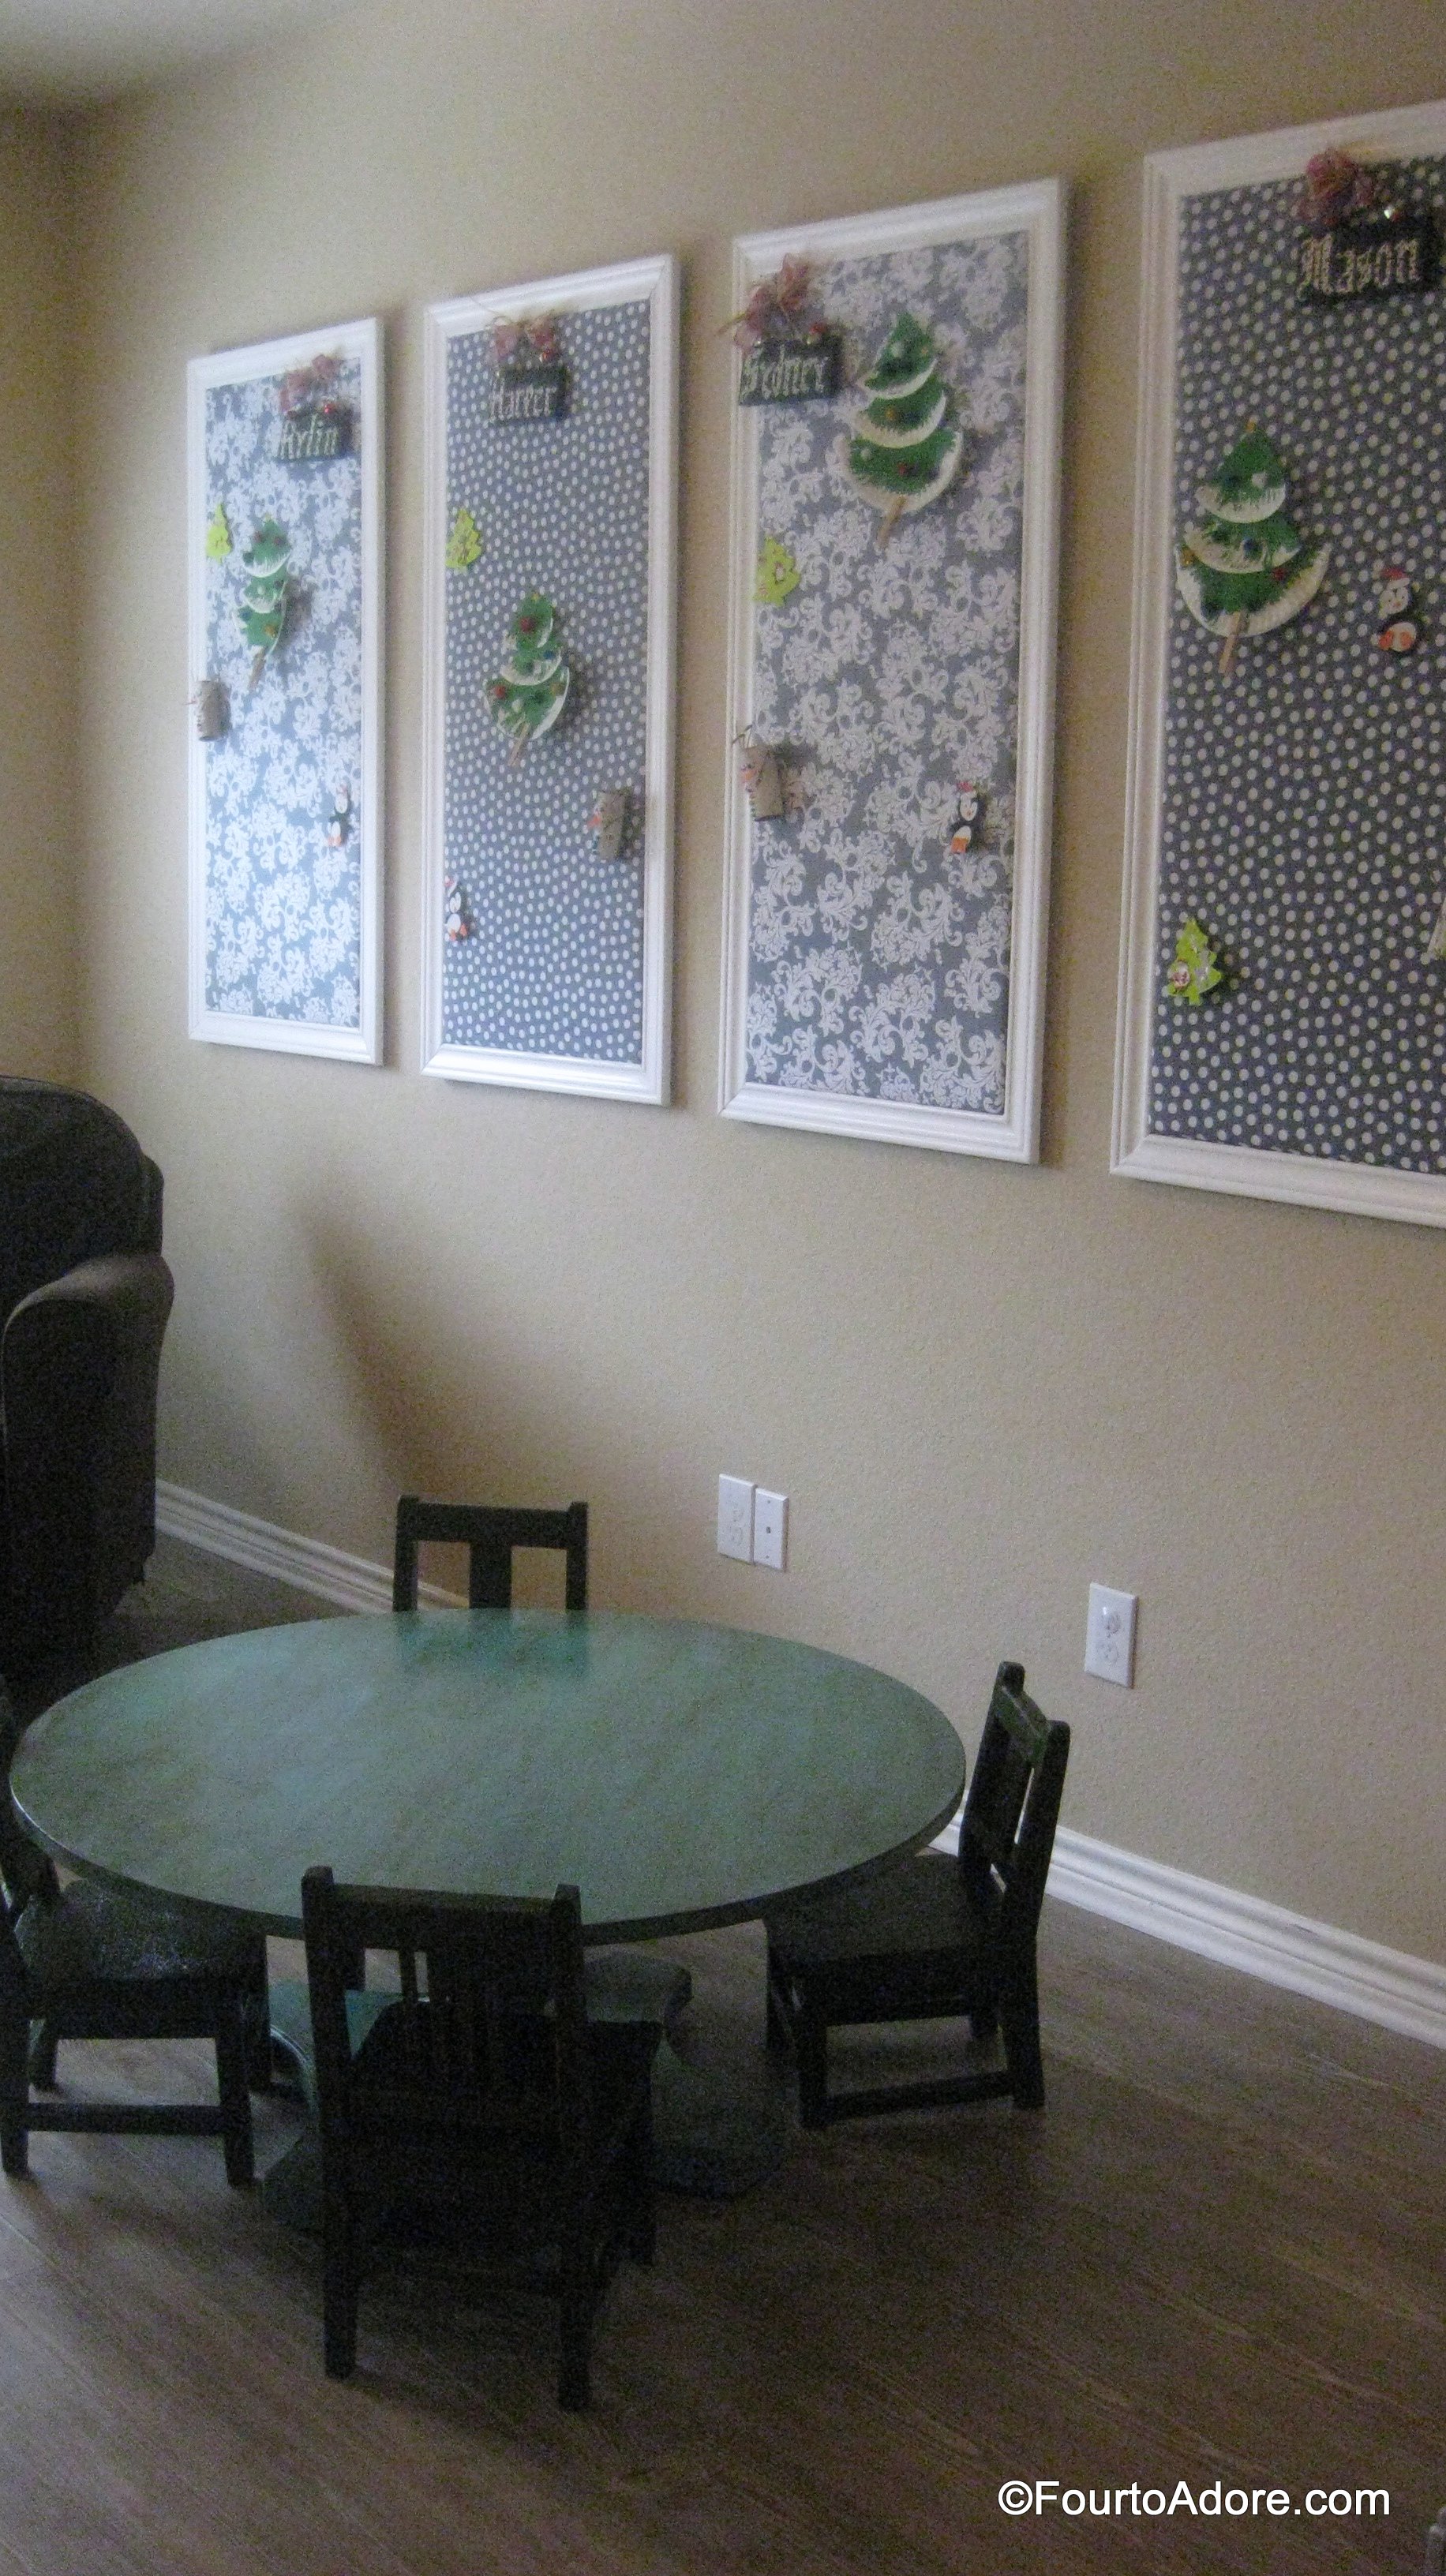
We typically keep our Christmas tree and decorations up until New Year’s Day.  It’s so much work putting them out, we like to enjoy them for the full month.  This year, I had enough with teaching the quads respect of the Christmas tree and had everything packed up two days after Christmas.  In fact, the quads were so talented at ornament removal, they were charged with the task of taking ornaments down for the year.  They really enjoyed this “chore” above all others they’ve been given.

IMG_0864

IMG_0866

I hope your holiday season was a wonderful one and that 2015 brings you peace, hope, and joy!

hugs!

Amber

The Reason for the Season

When my parents first got married, Mom worked at a Hallmark store.  While she worked there, she bought a small nativity set, which she used every Christmas while we were growing up.  When my sister and I were little, we had a grandiose Barbie Dream house, but Barbie found her home empty at Christmas.  At the time Mattel did not manufacture families for Barbie.  I think it was just Barbie, Ken, and Skipper.  At Christmastime we would take Baby Jesus from the nativity and he would serve as Barbie’s baby.   I guess he was sort of a foster child staying with Barbie and Ken for the month of December.  He did a beautiful job as Barbie’s baby and we generally got him back into his manger before Christmas.  However, at some point with all of our shenanigans, he went missing.  Of course, you can’t have a nativity without Baby Jesus so my mom removed the wings from the little cherub who resembled Baby Jesus and put him in the manger instead.  The cherub sort of looked like Baby Jesus, but he didn’t fit quite right in the manger and looked awkward.  Mom used the nativity with the cherub sitting in for Baby Jesus for years; I think always complaining about how we lost Baby Jesus.

One year Mom found a gorgeous jewel-toned nativity set at Bombay and Company and decided she didn’t need her incomplete nativity anymore.   By then I was in college and had my first apartment.  Mom gave me her old nativity since I didn’t have one, and I happily accepted it.   I soon discovered that Mom’s vintage nativity was actually a Fontanini set from Italy and they continued to make pieces for it.  I found a replacement Baby Jesus in a department store and added him to the nativity.  This new figurine was a Baby Jesus, but with his newness he didn’t fit in with the old nativity set quite right either.

When Dad was putting the Christmas decorations back into the attic that year, he saw something tiny glimmering between two rafters.  He shined a flashlight on the tiny object and discovered it was the original Baby Jesus.  As it turned out, we had not lost Baby Jesus after all.  He was in our house all along and right over head for all those years. I like to tell this story at this time of year because it is a reminder that He never leaves us alone even when we feel forgotten or forsaken.  It is also a message that I kept close to my heart during our struggles with infertility, and still do as we take on the everyday challenges of raising quadruplets.

Fontanini nativity set

This December has been joy filled with the quads learning about Christmas traditions and celebrating the season.  They’ve learned Christmas carols, watched holiday movies, and visited Santa.  We’ve crafted all sorts of festive decorations from gingerbread men to reindeer.  If you’ve been following us on Facebook or Twitter, you may have seen Bop’s (our scout elf) various locations in our house.

All of those secular traditions are fun, but we haven’t let them overshadow the true reason for the season.  This year, we spent time reading toddler books about the first Christmas and showed the quads our Fontanini nativity set.  They’ve rearranged the nativity a few times, but have been good about leaving it on the burlap, which helps me keep tabs on Baby Jesus.

toddler nativity books

Fontani nativity

It was Harper’s idea to move the kitchen footstool to the den so he could get a better view of the nativity.  I thought it was clever, and I’ve been proud of his self-restraint in looking at the nativity.  Sometimes two of the quads will share the stool and look at the nativity together.

toddlers looking at nativity

Fontanini nativity

Since I’m not exactly encouraging the quads to play with our family nativity, I was happy when I found a Melissa & Doug toddler’s nativity set.  This one is wooden and durable so they can manipulate and arrange as they like.

Melissa & Doug toddler nativity

Despite making several Christmas crafts, I kept coming up short when it came to an age-appropriate nativity craft until my friend, Amber shared hers last week.  (Don’t forget to stop by her blog, Texas Tales for a more detailed description of the craft and other toddler nativity books).  It’s very simple and ideal for toddlers.  I printed Baby Jesus coloring pages and let the quads color them.  Then, I dotted glue onto the manger and asked the quads to place snips of rafia over the dots.  For a special touch, we also glued a star on the top of the page.

toddler nativity craft

May you find love, peace, and hope this year.  Merry Christmas!

Hugs,

Amber


Quaddler Approved! {Casdon Toy Dyson Vacuum Review}

When choosing toys for the quads, my favorites inspire imaginative play, problem solving, and creativity.  Consequently, I was pleased when they received a Dust, Sweep and Mop set from a friend for their second birthday.  At first, they seemed to think this toy was best suited for swashbuckling so I safely tucked it away, and temporarily forgot about it.  A couple of weeks ago, I rediscovered this toy and demonstrated how to use it.  In fact, the crew happily “helped” me tidy up for a party we were hosting.  Later in the week, my heart exploded with joy when Mason independently pulled all of the chairs from our kitchen table to sweep the crumbs below.  This particular not only inspired imaginative play, it encouraged chore completion, a major win in my book!

Melissa & Doug Broom

Melissa & Doug Broom

I was delighted when Casdon’s Toy Dyson Ball Vacuum arrived for the quads to test drive since it is exactly the type of toy I prefer.  It encourages imaginative play while also helping the quads learn a valuable life skill.  I planned to surprise the quads with it after bath time, but they spied it prematurely and squealed “It’s a vacuum!!!”  I couldn’t squelch their desire to clean so we immediately opened the box and loaded the batteries.  It only took about a minute to assemble and load the batteries, which was good because the quads were chomping at the bit.  The biggest problem?  There was one vacuum and four eager toddlers awaiting a turn.  Toddlers are notoriously impatient, especially with new toys, but everyone got a turn before bath.

Casdon Toy Dyson Ball Vacuum

Seriously, who can resist this face? He was ecstatic about a vacuum

The quads easily learned to operate switches and didn’t mind the realistic sounds. Thankfully, the toy is much quieter than my Dyson because when they hear me vacuuming, they cover their ears and whine.  In addition to a colorful spinning cyclone, it also provides real suction from the base, which can pick up small bits of debris and dust. (Don’t get too excited though…remember, it’s just a toy so it won’t replace your vacuum.)  The quads are a little young for to operate the removable dustbin independently, but they will learn in time.  They did, however, try to remove the clear container on the front since that’s how I unload the dust from our actual Dyson.  Toddlers really watch every single thing we do, which is good reason to model what we desire for them.  The quads didn’t seem to notice, but I appreciated the gender neutral color since our boys and girls will be playing with this toy.

Casdon Toy Dyson Ball Vacuum

Though the age range suggested on the box is three to eight, I think kids about 2.5 to 5 or 6 would be better suited for this toy.  My kids aren’t quite three and adore it, and I suspect most eight year olds would find it a bit immature (or too small) for them.  In fact, I’d be inclined to teach an eight year old how to operate our real Dyson as part of a chore chart.  If you’re looking for a last-minute gift for a toddler or preschooler this year, consider the Casdon Toy Dyson, it’s quaddler approved!

Casdon Toy Dyson Ball Vacuum

hugs!

Amber

Disclaimer: I would like extend a special thanks Casdon for providing a Toy Dyson Ball Vacuum for us to try for the purpose of review.  No other compensation was received, and all thoughts/ opinions are 100% my own. 

I have provided Amazon affiliate links should you choose to make purchases via Four to Adore.  Please visit my disclaimer page for further information regarding affiliate links. 

PS- If you can’t get enough of Four to Adore, don’t forget to follow us on Facebook, Twitter, and Pinterest!

Dad’s DIY {Up-cycled Bulletin Boards}

My wife loves doing art projects with the kids, and even more displaying them. At our old house, we created a simple children’s art display using open frames with clothes pins and ribbon. It worked relatively well in the old space. When we moved to the new house, the art display came along. Because the kids started creating a lot more art, Amber added a few more frames to the art gallery wall. After a while, the frames became overly crowded and cluttered looking. Also, they were crooked on the wall most of the time. Of course eight little hands also rearranged the frames frequently.  It bothered me. I had an idea to streamline the gallery and give each child a designated place for their own work.

Here’s how the art gallery wall looked with open frames.

Children's Art Display using empty picture frames

To create our new display, I began with the following materials:

  • 4 x 8′ plywood sheet, cut into four equal size boards (the hardware store will cut the boards to size)
  • packet of wall hanging brackets
  • roll of batting
  • 3 yards of fabric
  • 2 packages of wood trim
  • painter’s caulk
  • liquid nails
  • 1 large foam floor puzzle (we up cycled a few that we used when the quads were crawling, they were well loved and gnawed so not good to pass down)
  • staple gun with staples and brads

This is the step by step process:

DIY Bulletin board

Lay out all boards on a flat surface

DIY Bulletin board

Draw a line 8″ down from the top on each board (This is the BACK).  You will use this line later to place hanging brackets.

DIY Bulletin board

Flip each board over and draw lines 2″ in from all sides so you have a rectangle drawn(This is the FRONT).  This will show you where to place foam and trim.

DIY Bulletin board

Lay interlocked puzzle pieces on each board. Then, use scissors to cut them to fit into the rectangle drawn on each board.  Finally, use liquid nails to adhere puzzle pieces to each board.  Allow to cure overnight.

DIY Bulletin board

Cut batting to fit over puzzle pieces and secure with a staple gun.  This step ensures that surface is smooth.

DIY Bulletin board

Cut fabric to fit over batting then secure with a staple gun.

DIY Bulletin board

Miter cut trim at 45 degree angles and secure to board with brad nails.

DIY Bulletin board

Once all trim pieces are attached, each board should look like this.

DIY Bulletin board

Using a nail set and hammer, push nail heads into the trim.

DIY Bulletin board

Flip each board over and attach hanging brackets to the backside. Use the previously drawn line as a guide for placement.

Use painter’s caulk on the front side to cover nail heads and fill gaps at the joints.  Finally, use one coat of paint to hide imperfections in the trim.  Enjoy displaying artwork!

It cost about $25 per board to make, and I’m really pleased with the result.

DIY bulletin board display using up-cycled foam puzzles

DIY bulletin board display using up-cycled foam puzzles

George

PS- If you can’t get enough of Four to Adore, don’t forget to follow us on Facebook, Twitter, and Pinterest!

Annual Sit with Santa

When the quads were infants, we were on lock down due to their premature immune systems.  Although I wanted them to have keepsake pictures with Santa, it wasn’t worth the risk of taking them out in public.  Even lock down couldn’t keep Santa away from the babies.  He surprised us with a visit and we captured some adorable keepsake pictures.

Santa watching over sleeping babies

Last year, we were still hesitant to take them to wait in long lines and still had lingering fears of germs.  Santa was kind enough to drop by our house for a second visit.

Santa

I think we’ll always worry a little about germs (the mere thought of FOUR sick kids is horrible), but we are letting go of them to experience the world.  This evening they had an opportunity to visit with Santa at our mothers of multiples Christmas party.  I’ve seen the classic kids wailing on Santa’s lap pictures, and wondered what the quads would do this year.  They didn’t grin for the camera, but not one tear was shed.  They treated Santa just like everyone else we meet.

Santa

Santa wasn’t satisfied with just visiting the children, and insisted Mom and Dad have a chat too.

family picture with Santa


Hugs,


Amber

Gateway Church Southlake {A Spot to Visit with Tots}

Lists of places to take toddlers in Dallas Fort Worth

I’ve found that everyone’s mood and behavior is always best when we play outdoors at least 30 minutes daily.  However, sometimes winter weather puts a damper on outdoor play.  I’ve been searching for indoor options to help keep everyone active.  Thanks to our local mothers of multiples groups, we’ve discovered several fabulous indoor play areas.  Many of our local churches maintain indoor play areas that are free and open to the public.  This week, we joined our mothers of multiples group for a play date at the Children’s Indoor Play Area at Gateway Church Southlake.  Someone counted 19 children and seven moms with our group.  It was a nice turnout!  The quads had a great time playing in this cheerful, bubble themed play area.  I was grateful that my friend, Kristin, tagged along to help me watch all four.

Location:

700 Blessed Way

Southlake, Texas 76092

Hours:

8 am – 8 pm weekdays

Cost:

FREE!!!

Favorite Features:

Did I mention it’s FREE???

Since the play area is indoors, it’s climate controlled and clean.

The play area includes several ride on toys (e.g. train, ark) that do not require coins to operate.  There are small climb on toys for young toddlers and a large climber and slide for older children.

Tips:

The entrance to the children’s play area is on the north side of the church.  Look for the signs and you can park close to the entry.

Shoes cannot be worn in the play area, so be sure your kids are wearing socks.

Gateway play area

Sydney and Mason were the only ones brave enough to climb to the top of the play area. Sydney had so much fun, I had to go up and get her down myself.


IMG_3499.JPG

Gateway play area

The boys got plenty of practice taking turns driving the coveted fire engine.

Gateway play area

Rylin did not care for the larger climbing area and instead took refuge on this pack of gum.

If you aren’t in the Dallas Fort Worth area, chances are local churches in your area have similar play areas. Ask around! There are several other indoor play areas we plan to try this season.

hugs!

Amber