DIY Tips for Planning Parties for Multiples

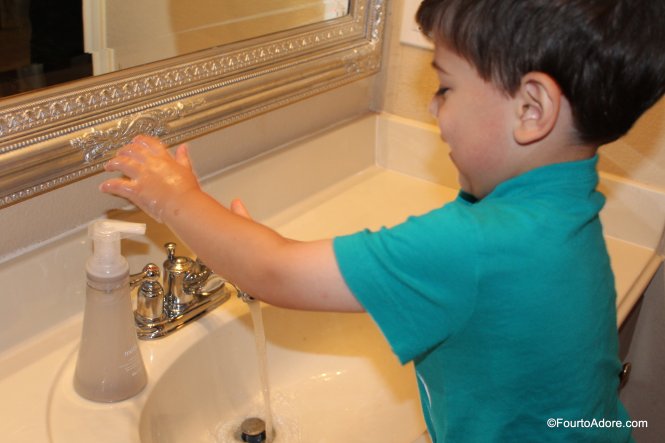
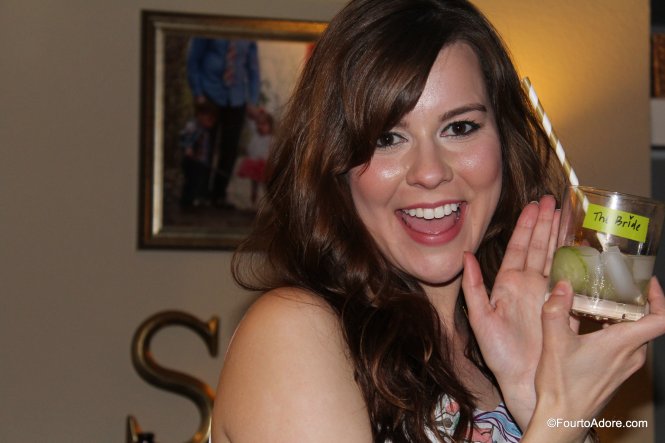
It is hard to believe, but I am in the beginning stages of planning a FIFTH birthday for my babies.  It seems that I was just planning their first birthday, and here were are on #5. Guest author, Wendy Dessler, shared a few ideas for planning the big bash this year.


Each of our children is special and their birthday is a particularly important day. When you are the parent of multiple kids born on the same day, giving each of them their special experience can be a challenge. It’s unrealistic to host multiple parties and expect guests to attend each one.  But you can have a shared party for your multiples and still make each child feel special. It just takes a little planning and creativity.

 More bang for your buck

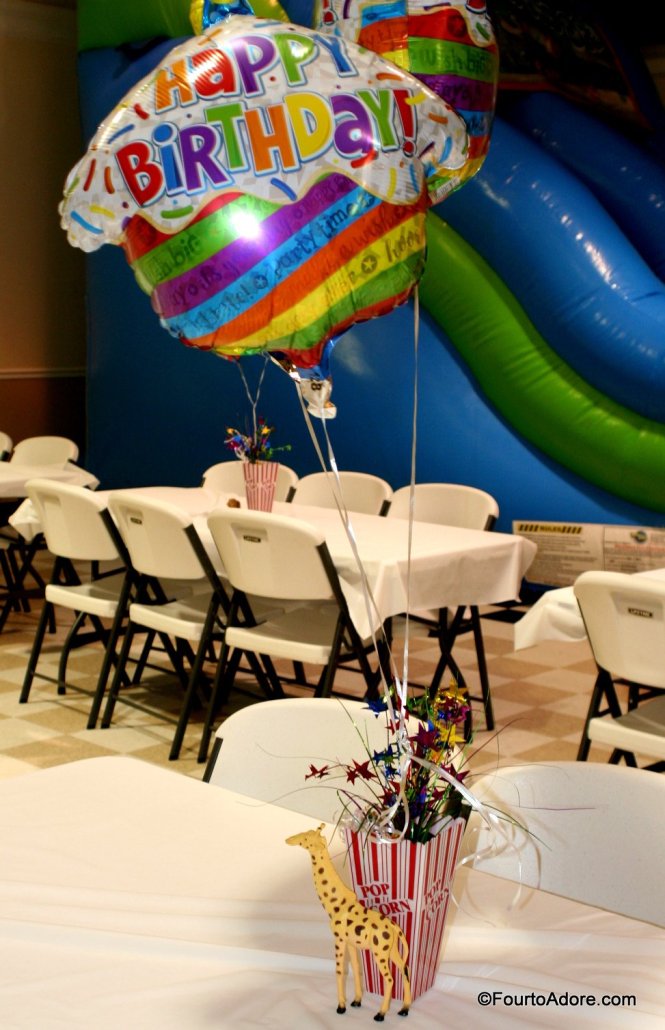
If your children were born on different days of the year, you would be hosting different parties, complete with unique sets of decorations, cakes, gifts, and of course the expenses are multiplied. As the parent of multiples, you can combine the funds and have one big celebration. For the same money you would have spent, you can have pony rides, rent a bouncer for the entire day, have costumed superheroes attend or have a talent show.

Instead of multiple cakes, have a candy buffet

Candy buffets are very popular right now, and as the parent of multiples, you can easily make that work to your advantage. Set up an 8’ table, or two 6’ tables. Zone the tables so that each child has his or her own section. Your table covering for each child should be a different color, using craft paint to write their name on the front of the cover in their zone is a nice touch. Each zone will have a theme based on the likes and style of each child. For example, one zone may be a Barbie theme, another section may be a baseball theme, the third may be all about bugs, and the fourth may be teddy bears. Allow each child to choose their theme. Buy your candy in bulk and have it sent directly to you. Each zone should feature two main colors. Create matching backdrops and you have a really great quad-candy buffet. If you need more information on how to set up a candy buffet, please click here.

 Set up the venue in four zones as well, allowing each child his special table.

delfi-de-la-rua-133880

Shared Birthday = shared gifts?

It happens. People buy one gift for multiple children to share. Multiples are not unlike any other child. They want their own gift and sharing with siblings is a tough request. So how do you get around the shared gifter?

 Request a no gift party. Explain to the children that the party is a great celebration, and it may be difficult for some of our friends to afford multiple gifts. Here are some favored variations:

 Note on the invitation that no gifts are expected, but if they feel inclined to bring a gift, please bring one gift for the children to share. Then divide the gifts among the children, allowing each to open a few.

  • Limit the gifting to one gift per child per family.
  • If the children are inviting their own friends, you could note, “You are invited to Bobby’s 6th birthday party. You are not expected to bring a gift for child A, B, or C.

While some people feel uncomfortable, my favorite idea is to have a 5 & 5 party. You explain to the guests that you request $10.00 for the gift. $5.00 will be donated to the charity of the child’s choice and the other $5.00 is collected for the gift. The children can buy one item or the money can be divided equally between them.

 There is no right way or wrong way to host a party for multiples. So use your imagination and have some fun!


About Wendy 
Wendy is a super-connector with Outreachmama who helps businesses find their audience online through outreach, partnerships, and networking. She frequently writes about the latest advancements in digital marketing and focuses her efforts on developing customized blogger outreach plans depending on the industry and competition.


You may also like:

O’ Christmas Trees

Before our wedding, my cousins hosted an ornament shower in my honor.  I received a gorgeous collection of ornaments reflecting the love of our friends and family.  George and I bought a lovely prelit tree for our apartment and it was bursting with gifted ornaments. The tree was the perfect size for our cozy apartment.  We moved that tree to our first house, and then to our next house. Our perfect little tree somehow seemed dwarfed in a house with a larger den and higher ceilings.  Nonetheless, our tree adorned with ribbon and ornaments and looked pretty.

02-IMG_7713

Last year the lights finally stopped working so we added strands of lights and pined for a taller prelit tree.  Before decorating this year, we snagged a nine foot slim tree on black Friday. The new tree has a very small footprint in the den so we have plenty of space and it draws the eye all the way up to the ceiling.  This tree is filled primarily with shatterproof ornaments since it’s in our main living area and the kids helped decorate it.  Despite being kid friendly, I think it’s gorgeous!

img_3662

img_3652img_3649

Since our original tree was in decent condition, moved it to the front room so there’d be a tree in the window.  We had plenty of heirloom and handmade ornaments to fill this tree and it serves as a Christmas card display.  I really appreciate receiving Christmas cards and each year try to find a new way to display them.  I think this is my favorite so far.  The kids often slip into the study to admire the ornaments and to check out the cards.  They especially like seeing the ornaments with their tiny baby handprints on them and others they painted.

img_3698

img_3706

In addition to our large trees, the kids have miniature trees in their rooms.  The girls chose a sparkling pink tree, while the boys inherited my old silver one with vintage ornaments from my childhood.  All four kids took great pride in filling their own trees and have not bothered them since we finished decorating.  A year ago, the boys’ tree would have been pulverized, but this year they enjoy looking at it and showing it to house guests.  It’s amazing the difference a year makes.

img_3688img_3681

How many Christmas trees do you have?


hugs!


Amber


For more from Four to Adore, connect with us via Facebook, Twitter, and Pinterest.  We often share pictures, life hacks, activities, recipes, and more via social media.


A Fancy Nancy Banquet


Before Thanksgiving, we borrowed Fancy Nancy: Our Thanksgiving Banquet from the library.  Fancy Nancy is among our favorite book characters.  She inspires the kids to use sophisticated vocabulary words and to behave with their best etiquette. In this particular book, Nancy has the opportunity to dine with the adults, away from the “kid” table.  Naturally, our kids wanted to do the same.  Just before packing away our fall decor, we decided to have a family dinner in our formal dining room with ceramic plates instead of our usual plastic fare.  The kids relished every second of it, and we were pleasantly surprised with their outstanding table manners.

When I set the table for Thanksgiving, I realized the table stayed pretty all season and didn’t collect junk.  I wanted to do the same with Christmas décor, so I set out to create an elegant Christmas tablescape.  George and I have twelve place settings of fine china, flatware, and crystal.  Over the course of our marriage, we’ve used it on special occasions such as anniversaries and holiday meals.  In twelve years we’ve probably used them no more than once a year.  Why?  Mostly because I don’t like hand washing dishes and our china isn’t dishwasher safe.  That’s ridiculous.  I decided that not only was our dining room table going to be set using our fine china, but we were also going to use it!

I gave the chandelier my usual dressing, garland adorned with my Old World Christmas Wedding Ornaments.  They are among my favorite ornaments, but are also quite delicate and are best away from little hands.  I then created a table runner with lime deco mesh, which I brightened with hurricane glass filled with candles and silver ornaments.  I thought our silver plated nativity was the perfect finishing touch and compliment to our china.

img_3628img_3631

We’ve already used the formal dining room twice this month and hand washing the dishes wasn’t such a hassle either time.  First, we celebrated my mom’s birthday with my parents, sister, and brother in law.  There was room for all ten of us at the table, and even the quads were allowed to use the china.   Then, my college room mates joined us for brunch.  On each occasion, our guests presumed the beautiful table was for show, and felt honored when they discovered it was for them.  If a milestone birthday and nearly two decades of friendship aren’t worthy of china dining, I don’t know what is.

img_3636img_3637

I’m not sure whether we’ll have more guests over before Christmas or not, but our table is gorgeous and awaiting another meal.  Even if we don’t have guests over, our family will enjoy it at least once more before I come up with a winter tablescape.

Do you have a formal dining area or fine china?  Do you use it?

hugs!

Amber


For more from Four to Adore, connect with us via Facebook, Twitter, and Pinterest.  We often share pictures, life hacks, activities, recipes, and more via social media.


In Celebration of Fall

I really love fall with it’s crisp weather, lingering pumpkin spice scent, and rich traditions.  This year Texas weather has been insanely warm hot so it’s been a little harder for me to get in the fall spirit.  Seriously, my kids were wearing shorts last week and the air conditioner has been running.  Nonetheless, I filled our home with warm fall décor in hopes fall would one day appear.  We aren’t hosting Thanksgiving this year, but I decided to set our new dining table anyways.  It was begging for a little splash of fall.  Since having the table fully decorated, I realized it stays looking pretty and never collects random items like usual.  From here on out, I think I’ll have to keep seasonal tablescapes out.

On the table, I pulled together an assortment of glass hurricanes and filled them with items I had including cranberries, wine corks, and coffee beans (the aroma is fabulous).  Deco mesh and heirloom monogrammed chargers completed my table scape.  To fully enjoy our fall table, we may have a family dinner there this week.  I’m certain the kids would enjoy a “fancy” meal. img_3457

img_3465


I kept the entry way simple with a collection of antique books, a fresh pumpkin, a framed fall printable (a gift from my friend, Amber), and a pumpkin spice candle.  Did I mention I adore pumpkin spice?!?!  Even with summer like heat, the scent feels like fall.

img_3459img_3460


This was the first year the kids each chose their own Halloween costume and weren’t part of a theme.  Long before Halloween arrived, they determined exactly what they would wear and proudly stood out as individuals- Rainbow Dash, a pirate, Rapunzel, and Spider-Man.  George and I pulled together coordinated costumes, however.   Complete with bowl cut wig and fitted red pants, George dressed as Howard Wolowitz while I was his wife, Bernadette from the Big Bang Theory.

img_3416


Though the kids celebrated their fourth birthday this summer, we still hadn’t taken four year photos.  We decided it was better late than never so we staged a fall DIY photo shoot.  One of the kiddos (I won’t name names…) may not have cooperated with my Pinterest-y clothing scheme, but we managed to get some great shots and had fun taking them.

img_3174img_3210img_3260

The individual photos capture each child’s personality perfectly…


Happy fall, ya’ll!


hugs,


Amber


For more from Four to Adore, connect with us via Facebook, Twitter, and Pinterest.  We often share pictures, life hacks, activities, recipes, and more via social media.


Making this Year’s Halloween Party a Standout   


Halloween is such a festive holiday and, if you’ve decided this is your year to take the party to your house, a few tips will help make it a ghoulishly good time. Sure, you can phone it in with some chips, a case of beer, and a few decorations, but you don’t want to throw just any party for your fellow ghosts and goblins. And that doesn’t mean you have to grow your own money tree either, as a successful soiree doesn’t have to break the bank. Read on for tips on making this year’s Halloween party a standout.

Go Big on Your Costume

If you’re hosting the party, you cannot—and I repeat, cannot—opt out on the costume. You also don’t want to do something lame (hello, ghosts made with sheets). You and your fellow host/hostess should go for hilarious Halloween costumes or, at the very least, something quite creative. Of course, there are costume stores on nearly every corner during the season but, if you’re more of a DIY type, simply check out Pinterest for plenty of inspiration. Impress people with your pop culture wit by going as Eleven and her waffle from the smash hit Netflix show, Stranger Things, or go with an impressive couple’s costume. Either way, you’ll get major props for going beyond last year’s “Salt & Pepper” costume.

©FourtoAdore.com©FourtoAdore.com

Haunt Your Halls in Style

There is no other holiday that calls for decorations at a party more than Halloween. It really makes the ambience that much more fun when guests enter a house filled with spooky spiders, malevolent monsters, and other gory goodness. Once again, when it comes to Halloween decorations, Pinterest will be your best friend. From the Wicked Witch’s legs coming out of your potted plants to spider light-up mason jars, it has everything you’ll need to make your event something spectacularly spooky. If you want to go all out, convert your entire pad into a haunted house. For added ambience, have a scary movie playing in the background. Of course, this is only if your guests are adults, as you don’t want to scare your wee witches and warlocks for life.

Serve Terrifying Yet Tasty Treats

When it comes to Halloween food, the grosser the better. And, wait; have I mentioned that Pinterest is your friend? Seriously—all you need to do is simply enter “Halloween food” in their search bar and your brain might explode from the plethora of ideas. For appetizers, try Frankenstein chips ‘n’ guacamole (Frankenguac!), and crescent mummy dogs (kids love these!). If you’re serving a main dish or dishes for your guests, consider slow cooker pumpkin soup, or the dead man meatloaf. For dessert, the possibilities could follow you into the afterlife. From severed ladyfinger cookies to dirt pudding pumpkin patch and pumpkin rice krispie treats, devilishly delicious desserts are the perfect way to cap off your freakishly fun fiesta.

When it comes to a Halloween party, you can’t forget the BOO-zy concoctions. Of course, beer and wine will please the pickiest of palates but remember, you want this party to stand out. Go with the theme and serve things like a caramel apple or vampire kiss martini. Talk about leaving an impression on your guests!

09-IMG_7317


Play Hauntingly Good Music

No party worth its salt goes off without music. You could hire a DJ so you don’t have to worry about a thing, or simply hook up your iPod to some Bluetooth speakers. Either way, guests will love doing the Monster Mash love into the evening. As we all know, it’s a dead man’s party. Check out the Bluetooth audio options from JBL to ensure your playlist bumps all night long.

Want your party to be special and spooky? Follow the tips mentioned for a ghost of a good time.


hugs,


Amber

[Post sponsored by Purple Camel Media]


For more from Four to Adore, connect with us via Facebook, Twitter, and Pinterest.  We often share pictures, life hacks, activities, recipes, and more via social media.


Slow Cooker Meal Roundup

img_1348

After our babies were born, meals were one of the most needed, and appreciated gifts we received.  Having multiple infants at home meant providing around the clock care, which left very little time for our own self care.  Simple things like a hot shower or warm cup of coffee became luxuries and having a nice meal together was a rarity.  When someone delivered a meal, we were oh-so gracious.  After our gifted meals were depleted, I was faced with the challenge of putting a decent meal on the table.  Out of necessity, I learned how to cook more than queso in a slow cooker. With a lot of trial and error, I rounded up a handful of our own family’s favorite slow cooker meals, which I typically prep as freezer meals.

To pay it forward, freezer meals are now our go-to gift for families welcoming new babies.  Rather than sending a cooked meal, I add all the raw ingredients into a gallon Ziploc bag and freeze it. Then, when the family is ready to use the meal, they can add it to their slow cooker.  To make a complete meal, I also send a whole grain and steam in bag vegetables.  Everything is packaged in a plastic bag with a label, directions, and use by date (three months after prep).  Before prepping freezer meals as gifts, I always check with the family dietary restrictions and preferences. If you’re looking for some tasty, easy to prep meals for yourself or to gift to others, give our favas a whirl!  The last batch of meals I prepped took me 90 minutes and I ended up with 10 meals (half for our family and half to share).

img_2061

Chicken Taco Bowls

  • 2-3 chicken breasts
  • 1 can Rotel (mild if your family is sensitive to spice)
  • 1 t. minced jar garlic
  • 15 oz. can black beans, rinsed & drained
  • 2 cups frozen corn
  • 1 Tbsp chili powder
  • ½ Tbsp cumin
  • ½ tsp dried oregano
  • 1/2 t black pepper.

Cook on low 4-6 hours, or high 2-3 hours.  Shred chicken with a fork.  Serve over long grain rice and garnish with shredded cheddar, sour cream (or plain Greek yogurt), and salsa.  Or, make tacos instead!

**This recipe is good for families on dairy free (without garnish) and gluten free diets.

Adapted from Budget Bytes

Curry Chicken

img_1744


  • 2-3 boneless, skinless chicken breasts, cut into bite-size pieces
  • 6 oz can of tomato paste
  • 13.5oz can of coconut milk
  • 1 small onion diced
  • 2 cups of frozen mixed vegetables
  • 14.5oz can of tomato sauce
  • 1 tsp minced jarred garlic
  • 3 Tbsp honey
  •  2 tbs. curry powder
  •  1 tsp. salt
  •  1/2 tsp. crushed red pepper (adjust heat as needed)

Cook on low 4-6 hours or high 2-3 hours.  Serve over basmati rice or with naan.

img_3119

** I like this recipe for families on dairy or gluten free diets.  You can omit the chicken and add chickpeas for a vegetarian version.

Adapted from from New Leaf Wellness

Orange Chicken

  • 2-4 skinless chicken breasts, cut into bite-size pieces
  • 1 cup  orange marmalade
  • 1 cup barbeque sauce
  • 3 tbsp. soy sauce

Cook on low 4-6 hours or high 2-3 hours. Serve over steamed brown rice with Asian stir fried vegetables.

img_7547

Adapted from the Frugal Girls

Creamy Pesto Chicken

img_1741

  • 2-3 chicken breasts
  • 1 cup pesto
  • 3 Tbs. Ranch dressing mix
  • 1 cup water + 1 tsp. Better than Bullion OR 1 cup chicken broth
  • 8 oz. cream cheese cubed
  • 1 small package of frozen broccoli florets (reserved)

Cook on low 4-5 hours or high 2-3 hours.  Shred chicken then add frozen broccoli and cook an additional hour.  Serve over long grain rice pasta.

**Avoid this meal for families with tree nut allergies.  For a lower fat version, substitute 1 cup of plain Greek yogurt for cream cheese.

Adapted from The Picky Palate

White Chicken Chili

  • 2-3 chicken breasts
  • 2 Tbs. olive oil
  • 2 cups chicken stock
  • 1 small onion diced
  • 2 cups frozen corn
  • 2 cans white beans (drained)
  • 1 can mild Rotel
  • 2 tsp cumin
  • 2 tsp chili powder
  • 2-3 tsp salt
  • 1 tsp pepper

Cook on low 4-6 hours or high 2-3 hours.  Shred chicken.  Garnish with sour cream, shredded cheese, and green onion.  Serve with cornbread, tortillas, or tortilla chips.

Adapted from Texas Tales 

Italian Chicken

  • 2-3 chicken breasts
  • 8 oz. cream cheese cubed
  • 2 cans cream of chicken soup
  • 1 package of Zesty Italian dressing mix

Cook on low 4-6 hours or high 2-3 hours.  Serve over pasta with a salad or steamed green beans.

Adapted from  Stick a Fork in It.

We are currently in a season of welcoming new babies, but freezer meals also make excellent gifts for families grieving a loss, following a hospitalization or surgery, etc..  A homemade meal is a wonderful gesture to warm a friend’s heart.


img_3126

For other slow cooker and simple meal ideas, check out my slow cooker meals board and Mom & Kid Approved Meals board (this board consists of meals vetted by fellow moms of multiples) on Pinterest.

hugs,


Amber

Related Posts:


For more from Four to Adore, connect with us via Facebook, Twitter, and Pinterest.  We often share pictures, life hacks, activities, recipes, and more via social media.


Hair Emergency {How to Remove Flarp from Hair}

A hair emergency must be a rite of passage for both childhood and parenthood. For most, it’s the obligatory snip to the tresses.  For some, it’s a dye job gone awry.  When I was about ten it was the home perm kit my mom tried on me.  I ended up with frizzy frayed hair that split in the front creating awful wispy hairs.  It took months for it to grow out again.  It was not a good look.  When my sister was about four years old, she leaned forward to blow out a candle and successfully ignited her bangs.  Yipes!  Luckily for her, it was only a quick singe before the flame was snuffed.  With quadruplets, I knew something similar was bound to happen, and it certainly did.

When I cook dinner, I usually give the kids sensory activities, puzzles, or crafts to work on at the kitchen table.  Among their favorites are Play Doh and kinetic sand, so I knew flarp (a birthday gift) would likely entertain them for a solid hour.  They were indeed enamored with the drippy doughy stuff.  Periodically, I peeked over at them and found stretching, pressing, and molding, which was fine.  When I spied someone putting flarp all over their arms, I redirected them immediately. However, just as I popped our lasagna in the oven, I froze.  Sydney’s pigtails were streaked with neon orange flarp. GAHHHHHHHH!!!!!  Hair emergency, an hour before company was expected for dinner.

final-4

Instinctively, I began trying to pull small bits of the goo out, but instead of removing flarp, I was mostly pulling out precious hairs.  Clearly this wasn’t the best method for flarp removal.  I panicked, imagining we’d have to go to the salon for a new hair do.  First, I decided to contact my friend and hair stylist, Kristin.  She asked for a list of all available oils and butters.  I came up with coconut, olive, canola, Crisco, butter, peanut butter, and baby oil.  Her recommendation was to coat small sections of hair in baby oil.  Then, use a fine tooth comb to pull flarp from one inch sections of hair.  I stripped Sydney down to her undies and situated her in the bathtub while I ordered the other three kids to stay in the playroom, no exceptions.  After separating the untouched hair from the goopy stuff, I got to work.  Much to my relief, it actually worked.  Within about 25 minutes, I removed about a quarter cup of sludge from Sydney’s hair and none remained on her head.  Thanks to the baby oil, Sydney looked like a grease monkey for several days, but no hair was trimmed in the process. Her hair was restored and I’m hoping she’ll keep gunky stuff out of her hair.


final-5final-3

Have you experienced a hair emergency?


hugs!


Amber


For more from Four to Adore, connect with us via Facebook, Twitter, and Pinterest.  We often share pictures, life hacks, activities, recipes, and more via social media.


I’ll Never Buy Hand Soap Again

In the past year or so, we’ve begun teaching the kids to manage basic hygiene habits themselves.  Of those tasks, hand washing is of the utmost importance.  However, my crew found the squirting of hand soap to be a highly entertaining task and they often got carried away with squirting.  Much to my dismay, the counter tops were often covered in a slimy soap film and we ran though hand soap quickly.  Hand washing with quads became not only messy but also expensive.  My friend and quad mama, Krista, suggested switching from regular soap to foaming soap.  It was a great suggestion indeed.  A single pump of foaming hand soap fills little hands and discourages multiple pumps.  Foaming soap also doesn’t drip or create the slime like regular soap.  The only problem was that with four sets of grubby hands, we still used it rather quickly and it wasn’t cheap.  I knew there had to be a better option; behold I found it on BrenDid.


After your store bought foaming hand soap container is empty, you can refill it on the cheap in two steps with two simple ingredients.

  1. Fill your soap container with eight ounces of water (I used tap water, but if you won’t use it quickly, distilled water is best)
  2. Add one ounce of liquid Castile soap (I used lavender scented, which was $7 at Walmart in the cosmetic section) then shake the bottle to blend both ingredients

foaming soap


Our DIY soap foams as well as the store bought version, smells great, and cleans hands as effectively.  DIY for the win!  For additional information about why this DIY version of foaming hand soap is not only easy and inexpensive, but also a better for you version, pop by BrenDid for details.  She has lots of great information about the chemical aspect of commercially produced soap.

2 ingredient DIY foaming hand soap2 ingredient DIY foaming hand soap

hugs,


Amber

Related Articles:

Basic Hygiene Skills to Teach Little Kids

The Day I Quit Potty Training


For more from Four to Adore, connect with us via Facebook, Twitter, and Pinterest.  We often share pictures, life hacks, activities, recipes, and more via social media.


Step Right Up {Carnival Party}

As the quad’s fourth birthday approached, I decided it was prudent to host at a party venue rather than at home.  Last year we rented a playscape and it was fabulous not having to clean the house before or after having a slew of preschoolers at the party.  I was ecstatic to find a similar venue that included fresh popcorn and cotton candy with their party package.   Since we’d be serving carnival fare, I decided to run with that theme.  Once again, I commissioned my friend, Amber , to design custom invitations that I had printed at Costco.

IMG_0681

The week of the party, I had the kids create carnival themed crafts to hang as banners.  As center pieces, I used Dollar Tree Mylar balloons arranged in popcorn containers.  Since our party overlapped with the dinner hour, we served hot dogs from a crock pot along with fresh fruit.  It was a super easy way to feed a crowd and keep with the theme.   Since George is a cupcake connoisseur, we never order bakery cakes.  This year, we used a rainbow cupcake recipe from Just a Taste and it was ahhhh-mazing!  Whether or not we actually make rainbow cupcakes again (the rainbow part was slightly tedious), it will be our go-to recipe for from scratch cupcakes and frosting.  The cake was dense and sweet, but not overly so and the frosting complimented it perfectly.  For this particular party, the rainbow color in the cake was a fun touch.

IMG_0562

IMG_0565

To cook hotdogs in a slow cooker, spray your slow cooker with cooking spray then fill it with hot dogs (mine held about 50).  Cook on low for 4 hours.

IMG_0572

For party favors, I filled cello bags with animal crackers and fruit snacks then embellished them with a printable gift tag from We Heart Parties.

IMG_0680

Before our guests arrived, we snapped a family photo, and I was glad we did since there was never another opportunity.  The kids filled their time bouncing in the bounce houses, playing in the kid town, exploring the train, and playing games as the adults mingled.

IMG_0579

It probably  feels redundant for guests, but to make each of the kids feel special, we sing happy birthday to them individually, in birth order.  It doesn’t take a lot of time, but I know it means the world to them.

I’m quickly noticing the challenges of this new season with four year olds, but am appreciating the end of the threenagers reign.

hugs!


Amber

Related Articles


For more from Four to Adore, connect with us via Facebook, Twitter, and Pinterest.  We often share pictures, life hacks, activities, recipes, and more via social media.


Tooth Fairy Treasure Box

Tooth Fairy Box: Spray paint a mini wooden treasure box and have your child put it on her nightstand for The Tooth Fairy. She'll be thrilled to find treasure inside when she wakes up. ©FourtoAdore.com

When she was about 18 months old, Sydney chipped her front tooth. At the time it was fine, and I expected it to remain until she was old enough to lose it.  It never caused pain, but poor Sydney often caught her lip on it and it irritated her.  When I took the kids for their semi annual dental exam in January, Sydney’s chipped tooth died and was becoming gray.  Dr. Roberts said it was still okay, but we should keep a close eye on it.  Last week, we returned for follow up and the tooth had abscessed, which meant it was time to have it extracted.  George took the day off work to manage the other three kids while I focused on Sydney at the dentist.

Even though pulling this tooth was simple, Sydney required sedation for her comfort and to keep anxiety at bay.  While waiting for the sedatives to take effect, I enjoyed snuggling my little cuddle bug.  Sydney was very brave and never complained about the process.  Even though she was losing this tooth in less than ideal circumstances, I wanted to make it special.  We talked about the tooth fairy and Sydney was excited to be the first one who would get a visit.

final-15

On the way home from the dentist, we stopped by Michael’s to pick up supplies for a tooth fairy door I spied on Pinterest.  We didn’t find the door we originally intended to buy, but instead I found adorable mini wooden treasure boxes on the wood craft aisle.  Sydney chose a beautiful shade of pink in a handy half can size, and I grabbed a shimmer spray for the top.  I knew the Tooth Fairy would appreciate a shimmery pink box!  I picked up three more boxes so the other kids would have one for the future.


Before bed, George read “The Night Before the Tooth Fairy” by Natasha Wing, and Sydney proudly put her Tooth Fairy box on her nightstand with her tooth inside.  I thought it would be much easier for the Tooth Fairy to open the treasure box from the nightstand rather than under a pillow.  I can imagine that flying undetected is hard work as is.


In the morning, Sydney was thrilled to find a sparkling dollar bill, gems, and a handwritten note from The Tooth Fairy in her treasure box.  While the other three kids didn’t receive treasure, The Tooth Fairy left them tiny notes reminding them to brush and floss their teeth.

Tooth Fairy Box: Spray paint a mini wooden treasure box and have your child put it on her nightstand for The Tooth Fairy. She'll be thrilled to find treasure inside when she wakes up. ©FourtoAdore.com

hugs!


Amber

More Tooth Fairy Fun:


For more from Four to Adore, connect with us via Facebook, Twitter, and Pinterest.  We often share pictures, activities, and recipes via social media.