
With a birthday party on our heels and vacation time from work, George and I set our sights on several DIY home improvement projects over the summer. Because we both have Type A personalities, George and I are task finishers, meaning when we begin something we do not stop until it’s done. This can be a good thing as far as task completion, but it can be the detriment to self-care and leisure time. Knowing this, George and I developed a “time budget” for all projects. Each night we allotted only one hour to work on projects. Since most everything takes place once the babies are tucked in for the night, we have a small time frame to do everything from cooking dinner to showering, and sometimes even relaxing. An hour a night was ample enough to put a dent in our DIY list, but left a little time for the other things on the to-do list as well.

Shortly after we moved into our house we busily began painting all of the walls. It was a blank canvas of stark white and we desperately wanted a warm, cozy feeling. At the time, deep jewel tones were en vogue so our dining room became crimson while our bathroom was deep plum. Admittedly, I despised the bathroom after we finished painting it. Because it was a labor intensive job, I settled with a color I didn’t fully embrace. Sometimes DIY jobs just don’t live up to your vision and our master bathroom was one of those instances. It made a large bathroom feel cramped and dingy.
As we considered the possibility of putting our house on the market, we both knew that our Plum Palace could send even the most zealous buyers sprinting away. Neither one of us wanted to put in the elbow grease to prime and paint the walls a neutral color, but acknowledged it needed to be done. We wanted to pay someone to do the job even less so we jumped into our first DIY project of the summer: neutralize the master bathroom. We stuck to our one hour a night budget, doing just one part of the job per night. By night four it was D-O-N-E! Honestly, the part that took the most time and effort was cleaning in the end. We didn’t want to cut corners on any piece of this project so we scrubbed every nook and cranny until the room was fresh and sparkling.
Prior to the paint job, I was planning to distress the cabinets in white to brighten the space, but I’m ditching that idea now. With the fresh khaki paint, I don’t mind our cabinets anymore. In the mornings, the natural light spills into the room and it’s a refreshing way to start the day, especially when applying make up.


As soon as the babies began to roll over, George and I settled with the fact that there was no room for our beloved coffee table. It took up a slice of floor space we couldn’t afford to lose and we feared future head conks when they learned to pull up. We sorely missed our coffee table. It made enjoying our morning cup of Joe a bit of a challenge and we never knew where to lay our remote controls.
Then, my mom offered to give us my great grandmother’s coffee table. I know, it seems odd to get a coffee table when you just ditched a perfectly good one. However, this one was not only a family piece, but it has ideal characteristics for babies. It is round, which means it’s void of corners (that is what makes tables hard on noggins). Plus, it has a pedestal rather than legs so babies don’t trip on pesky legs sticking out there.
By the time this table found its new home in our den, the babies were successfully pulling up on furniture, but there was little material for them to use. The day it arrived, the babies darted to it and began banging toys on its surface. This table was made to last and was in excellent condition, but it boasted a 1960’s finish complete with gold flecks. Neither George or I liked it’s appearance. We let it hang out in the den for a few weeks until we finally decided we wanted to distress it using a cool aqua. I found a tutorial on Pinterest and it was pretty simple.
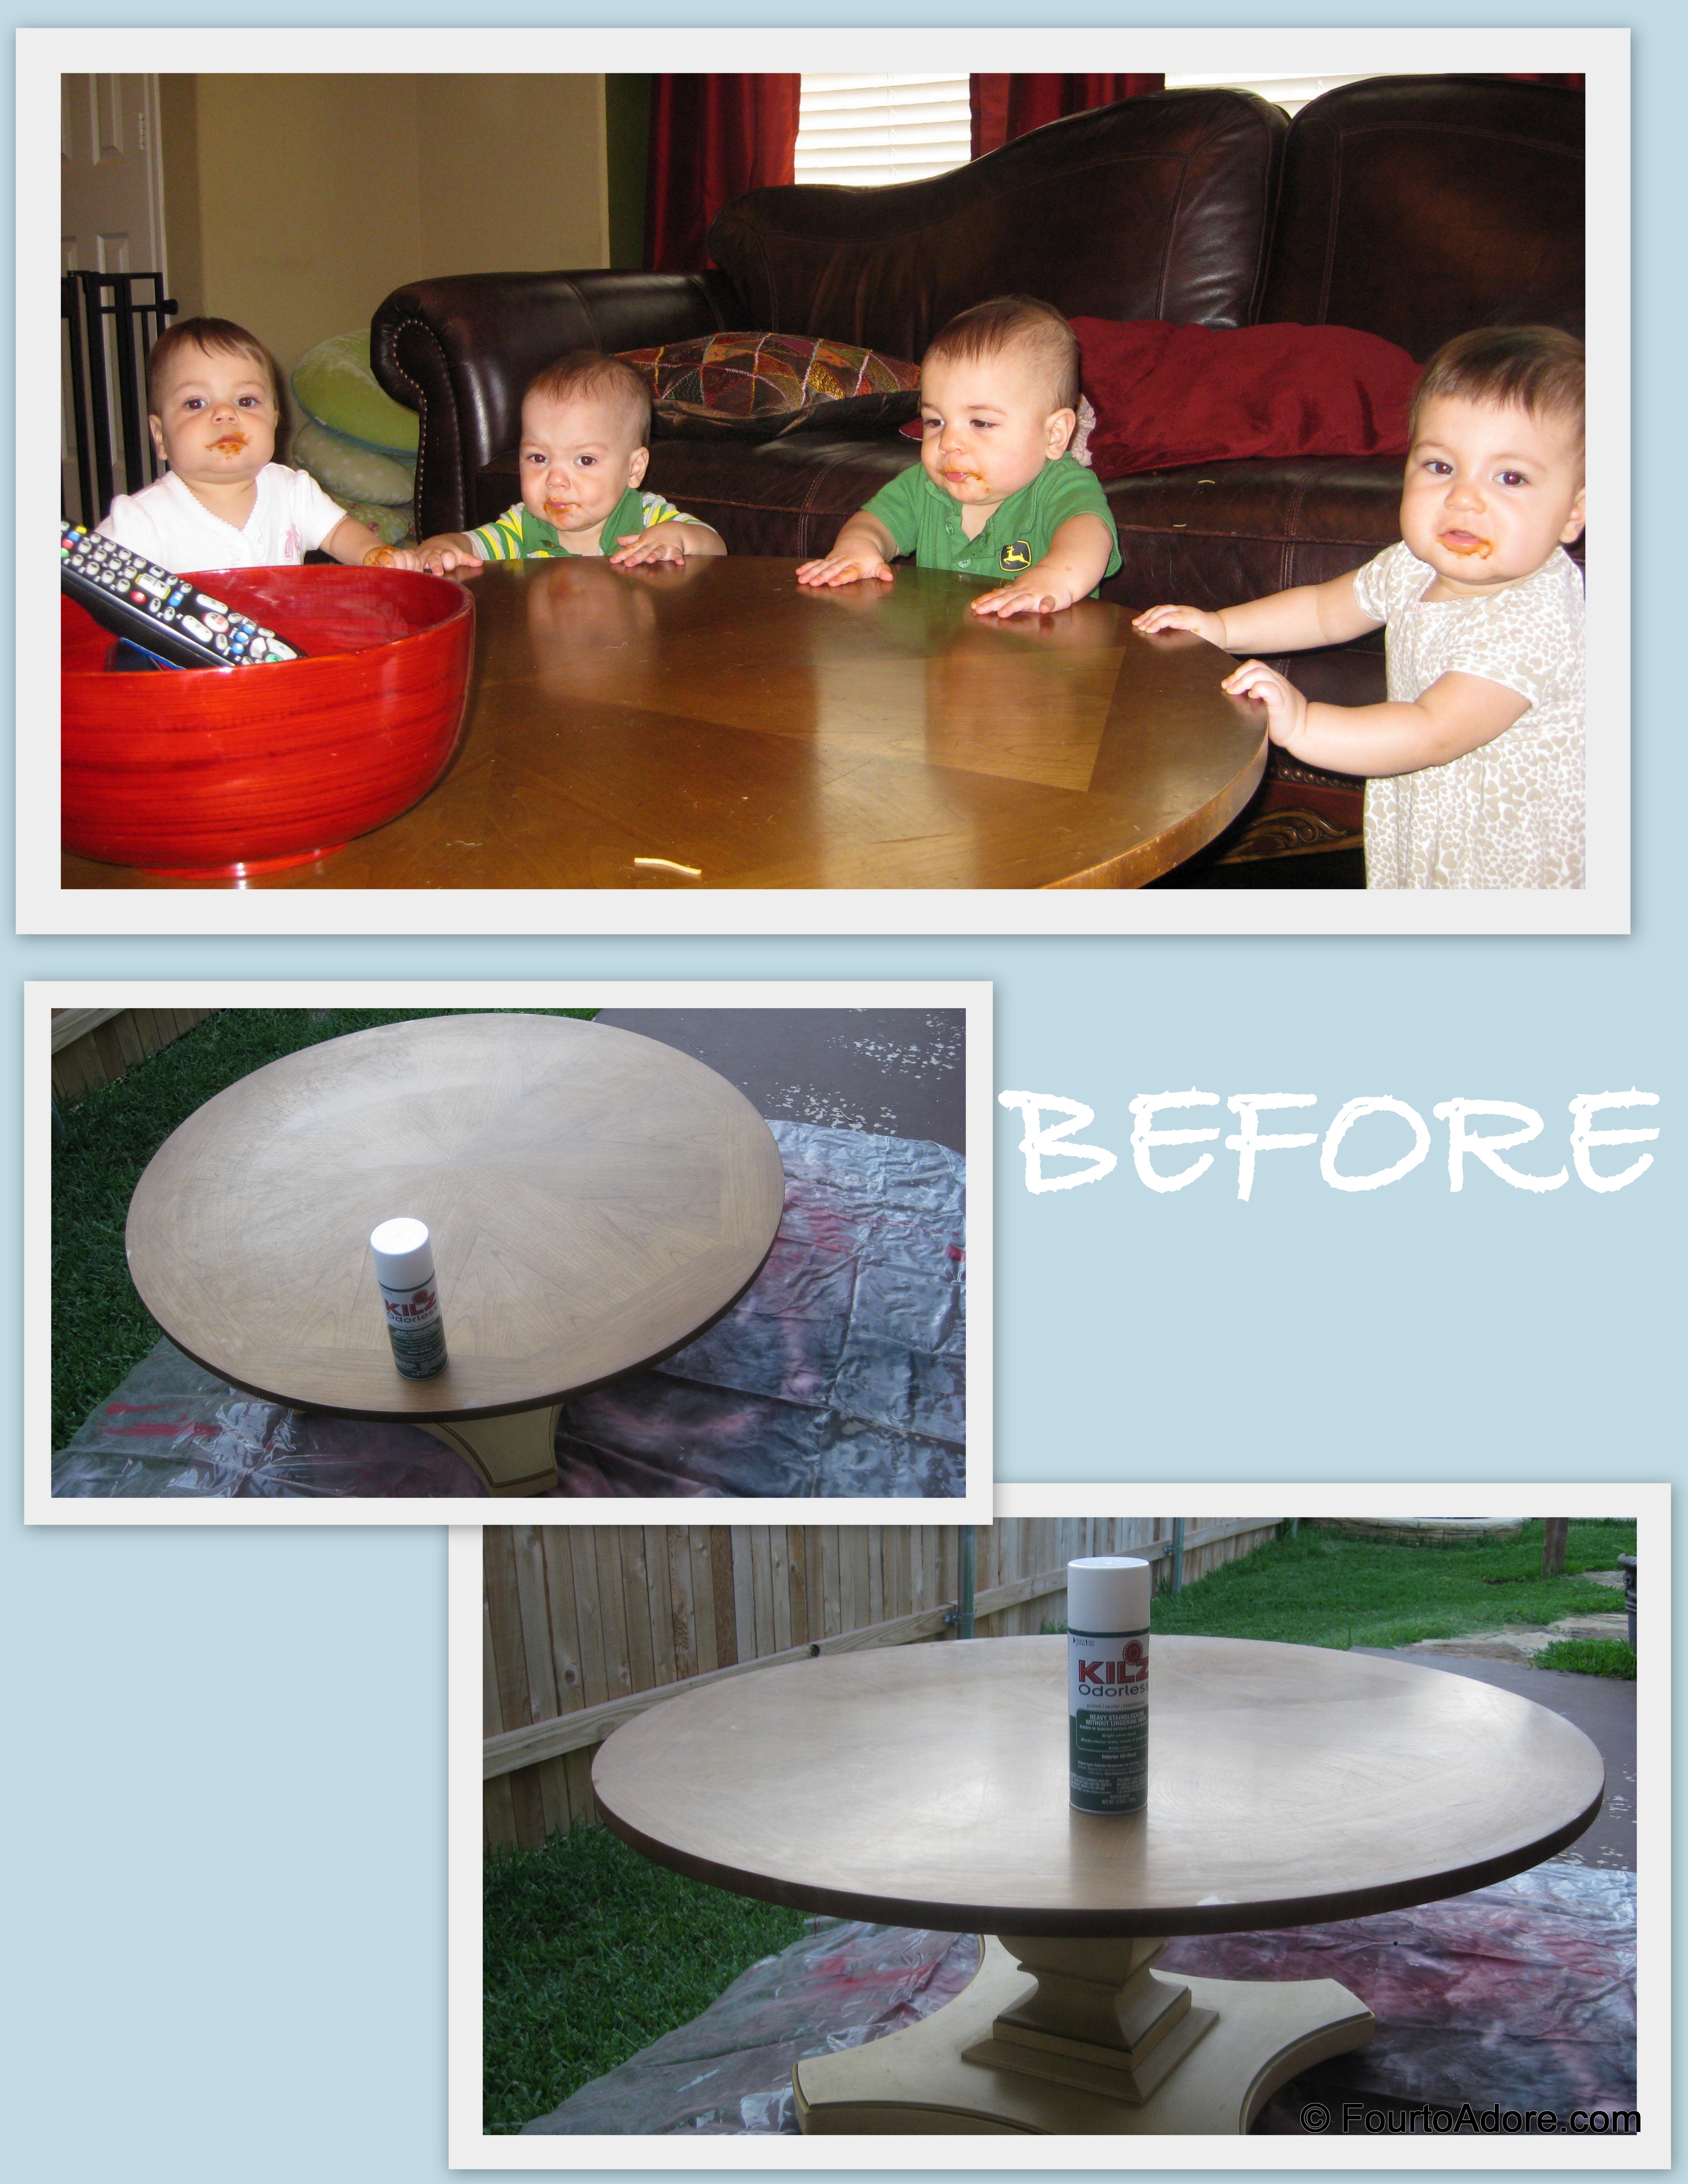
You may be thinking we ruined an antique. That is true, it is no longer the way it was designed. What value is there in an antique if you don’t like it? I envision us keeping this table for years to come and painting it to match whatever decor suits us.

As soon as the table was complete and returned to it’s rightful place in the den, Sydney began adding to the distressed finish with maracas. For the time being, the babies cannot reach the very center of the table so we can leave remote controls, drinks, or phones there.
Soon after the babies began pulling up, they also figured out how to climb. One of their favorite places to go: the gas fireplace. I spend plenty of time redirecting them from climbing, but with four highly mobile babies I find them in places I prefer they not go. In order to protect them, we have to toddler proof our house even though we supervise the babies well and set limits.
This meant our fireplace needed a cover before the quads climbed right in. George upcycled some plywood from the garage. After he cut it to fit the opening, he painted three coats of magnetic paint on the wood followed by a coat of black. I saw a cute idea on Pinterest where the homeowner also magnetized her fireplace cover and put magnetic alphabet letters as a teaching tool. I scoured Amazon and thought I found the perfect set of magnetic letters. They were brightly colored and the magnet covered the entire letter to keep little hands from pulling them apart. The package arrived the morning of the babies’ birthday, which was perfect for party decor. However, I quickly learned we won’t be using these letters for a few years. The babies made a beeline right to them, shimmied up the fireplace, pulled off letters and then began munching.

We left the babies “Happy Birthday” sign on the fireplace the day of their party, but took it down immediately after.
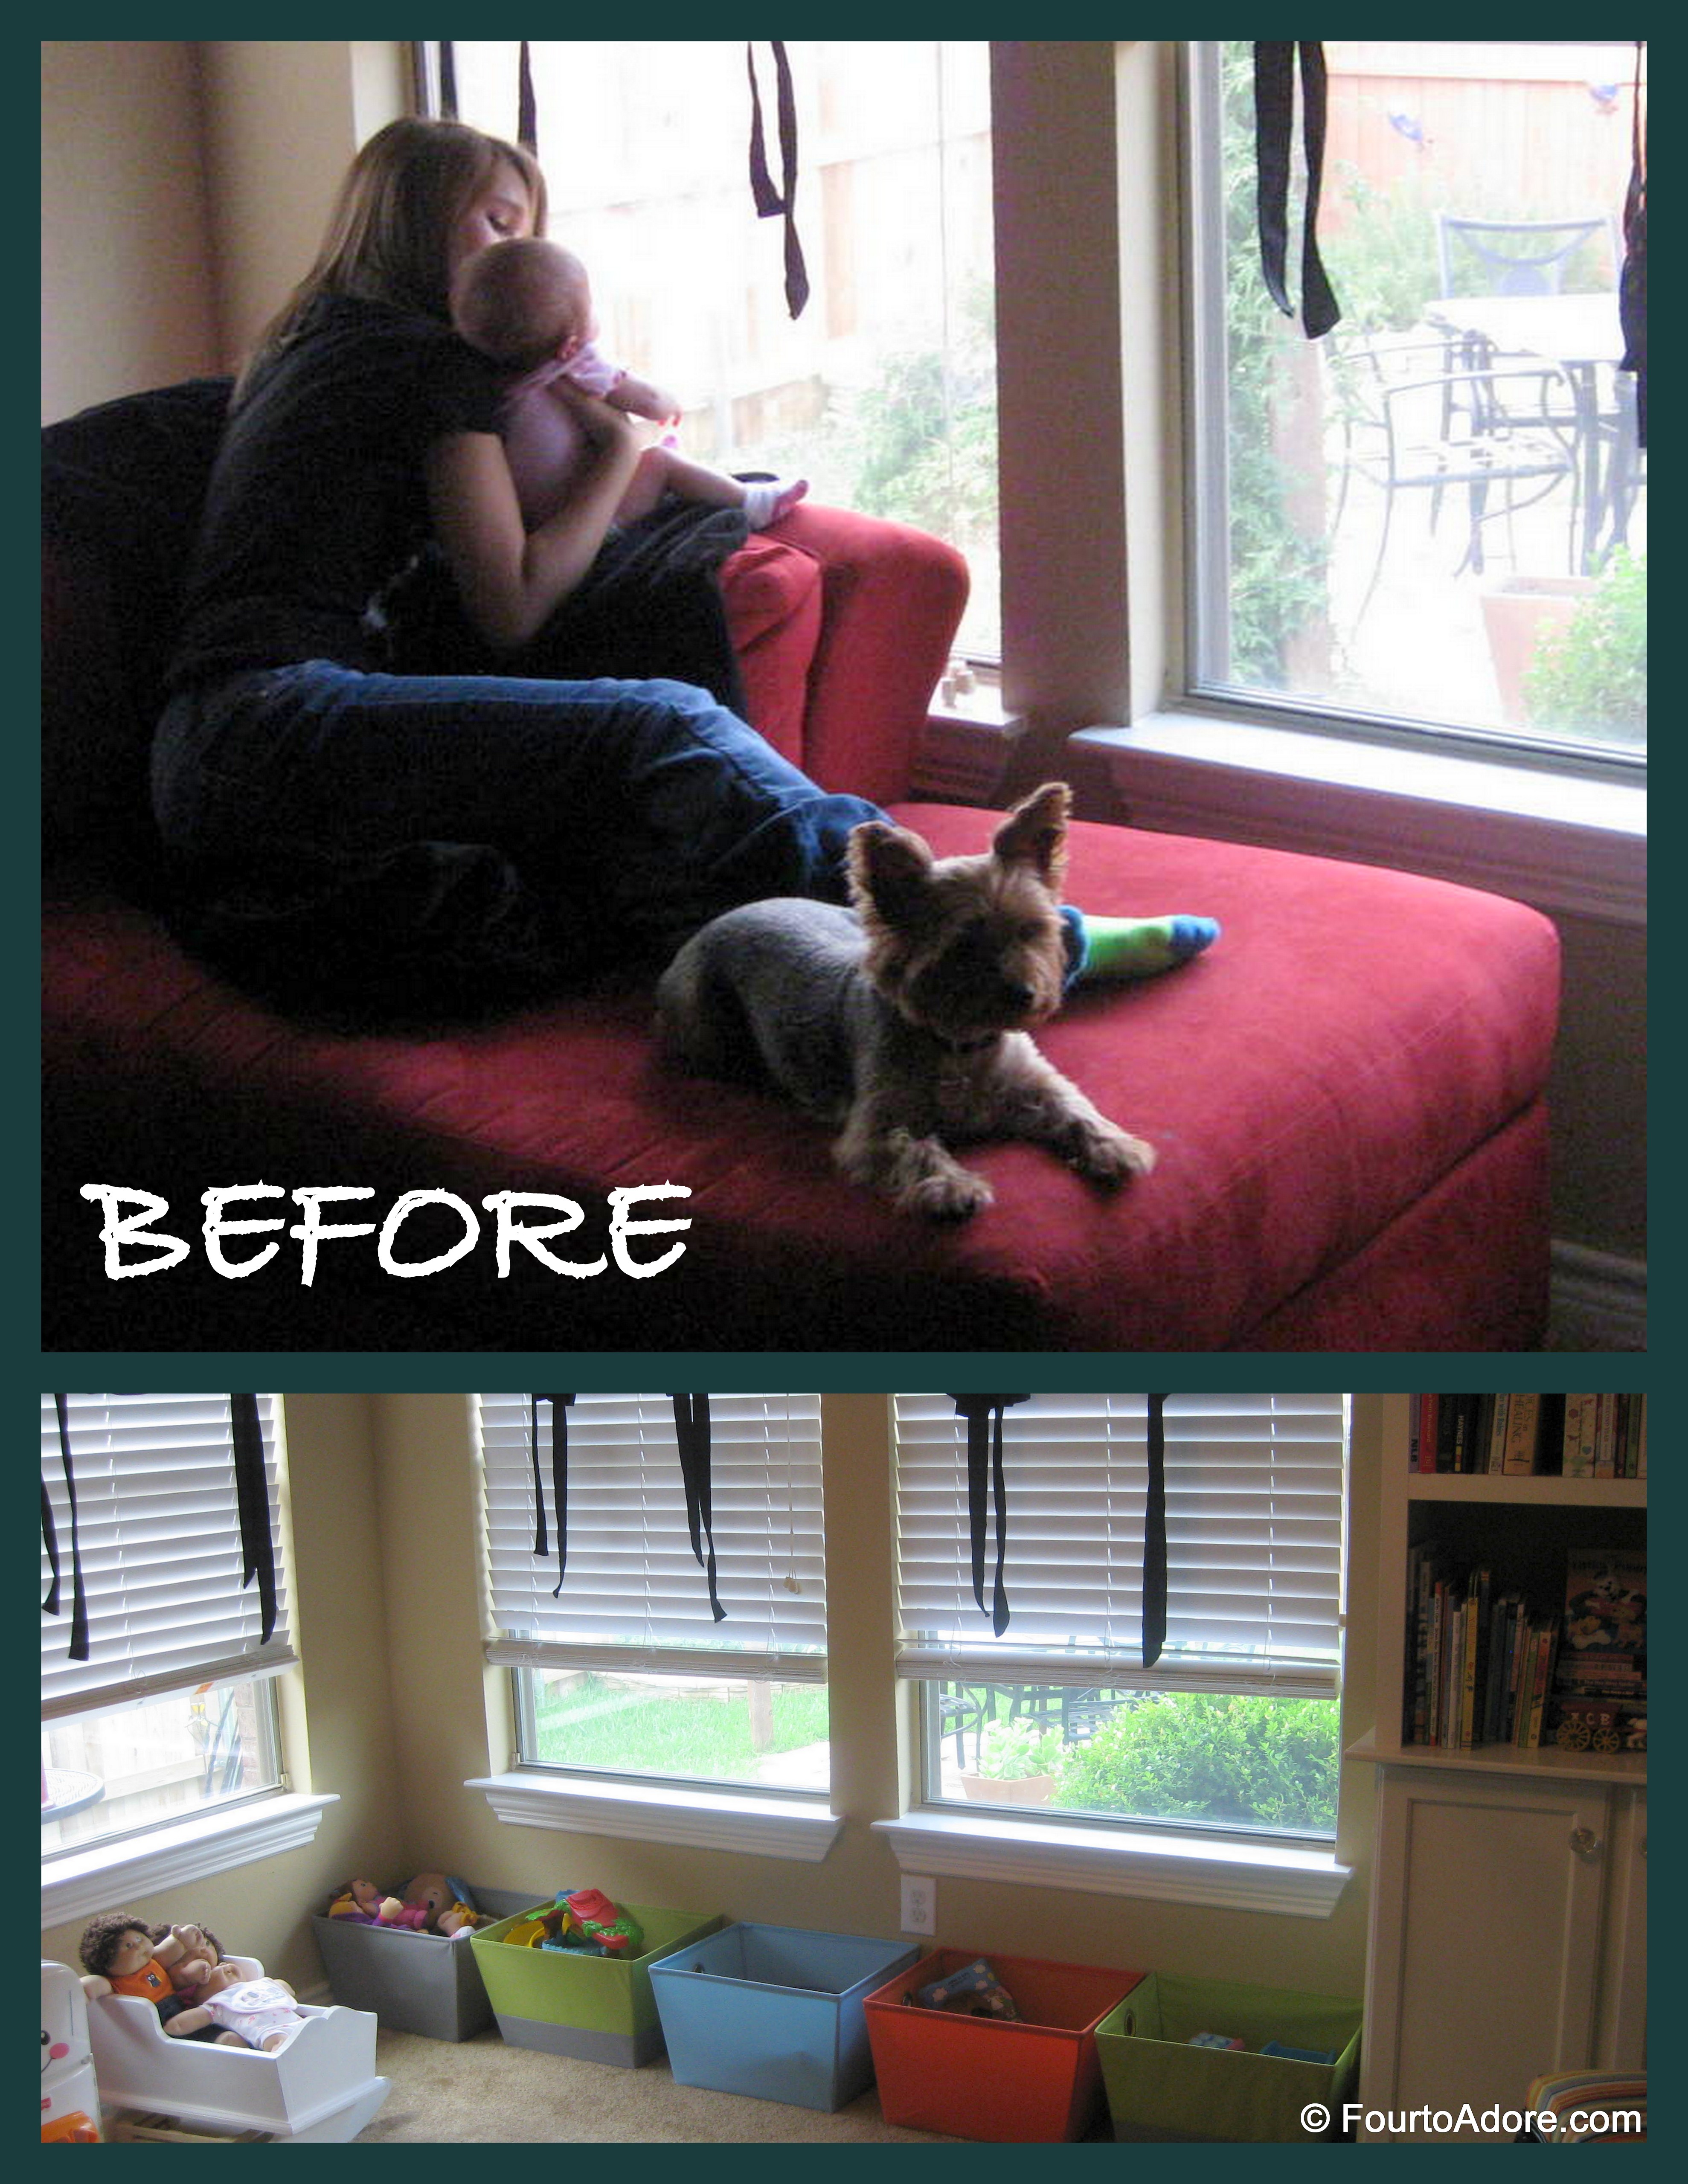
One of my favorite pieces of furniture was our red chaise lounge situated between the windows in the study. I devoured many a book from that spot and gazed out the windows with the babies there. A few months back, I knew it was time to re-home my cozy chaise. As the babies became increasingly mobile, I noticed they seemed cramped spending the entire day in the den and we needed more play spaces. Thus, our study became a playroom/ study combo room. It’s not a large space and the chaise lounge took up the majority of the space. In it’s place, I found toy storage baskets at Home Goods and George built a custom fitted window seat to house them. The babies now use the window seat for table top toys and they pull up on it to glimpse into the yard. While I miss my cozy spot, we are utilizing our new play area much more than we did when it was only a study. Besides, I don’t have much time to read these days.
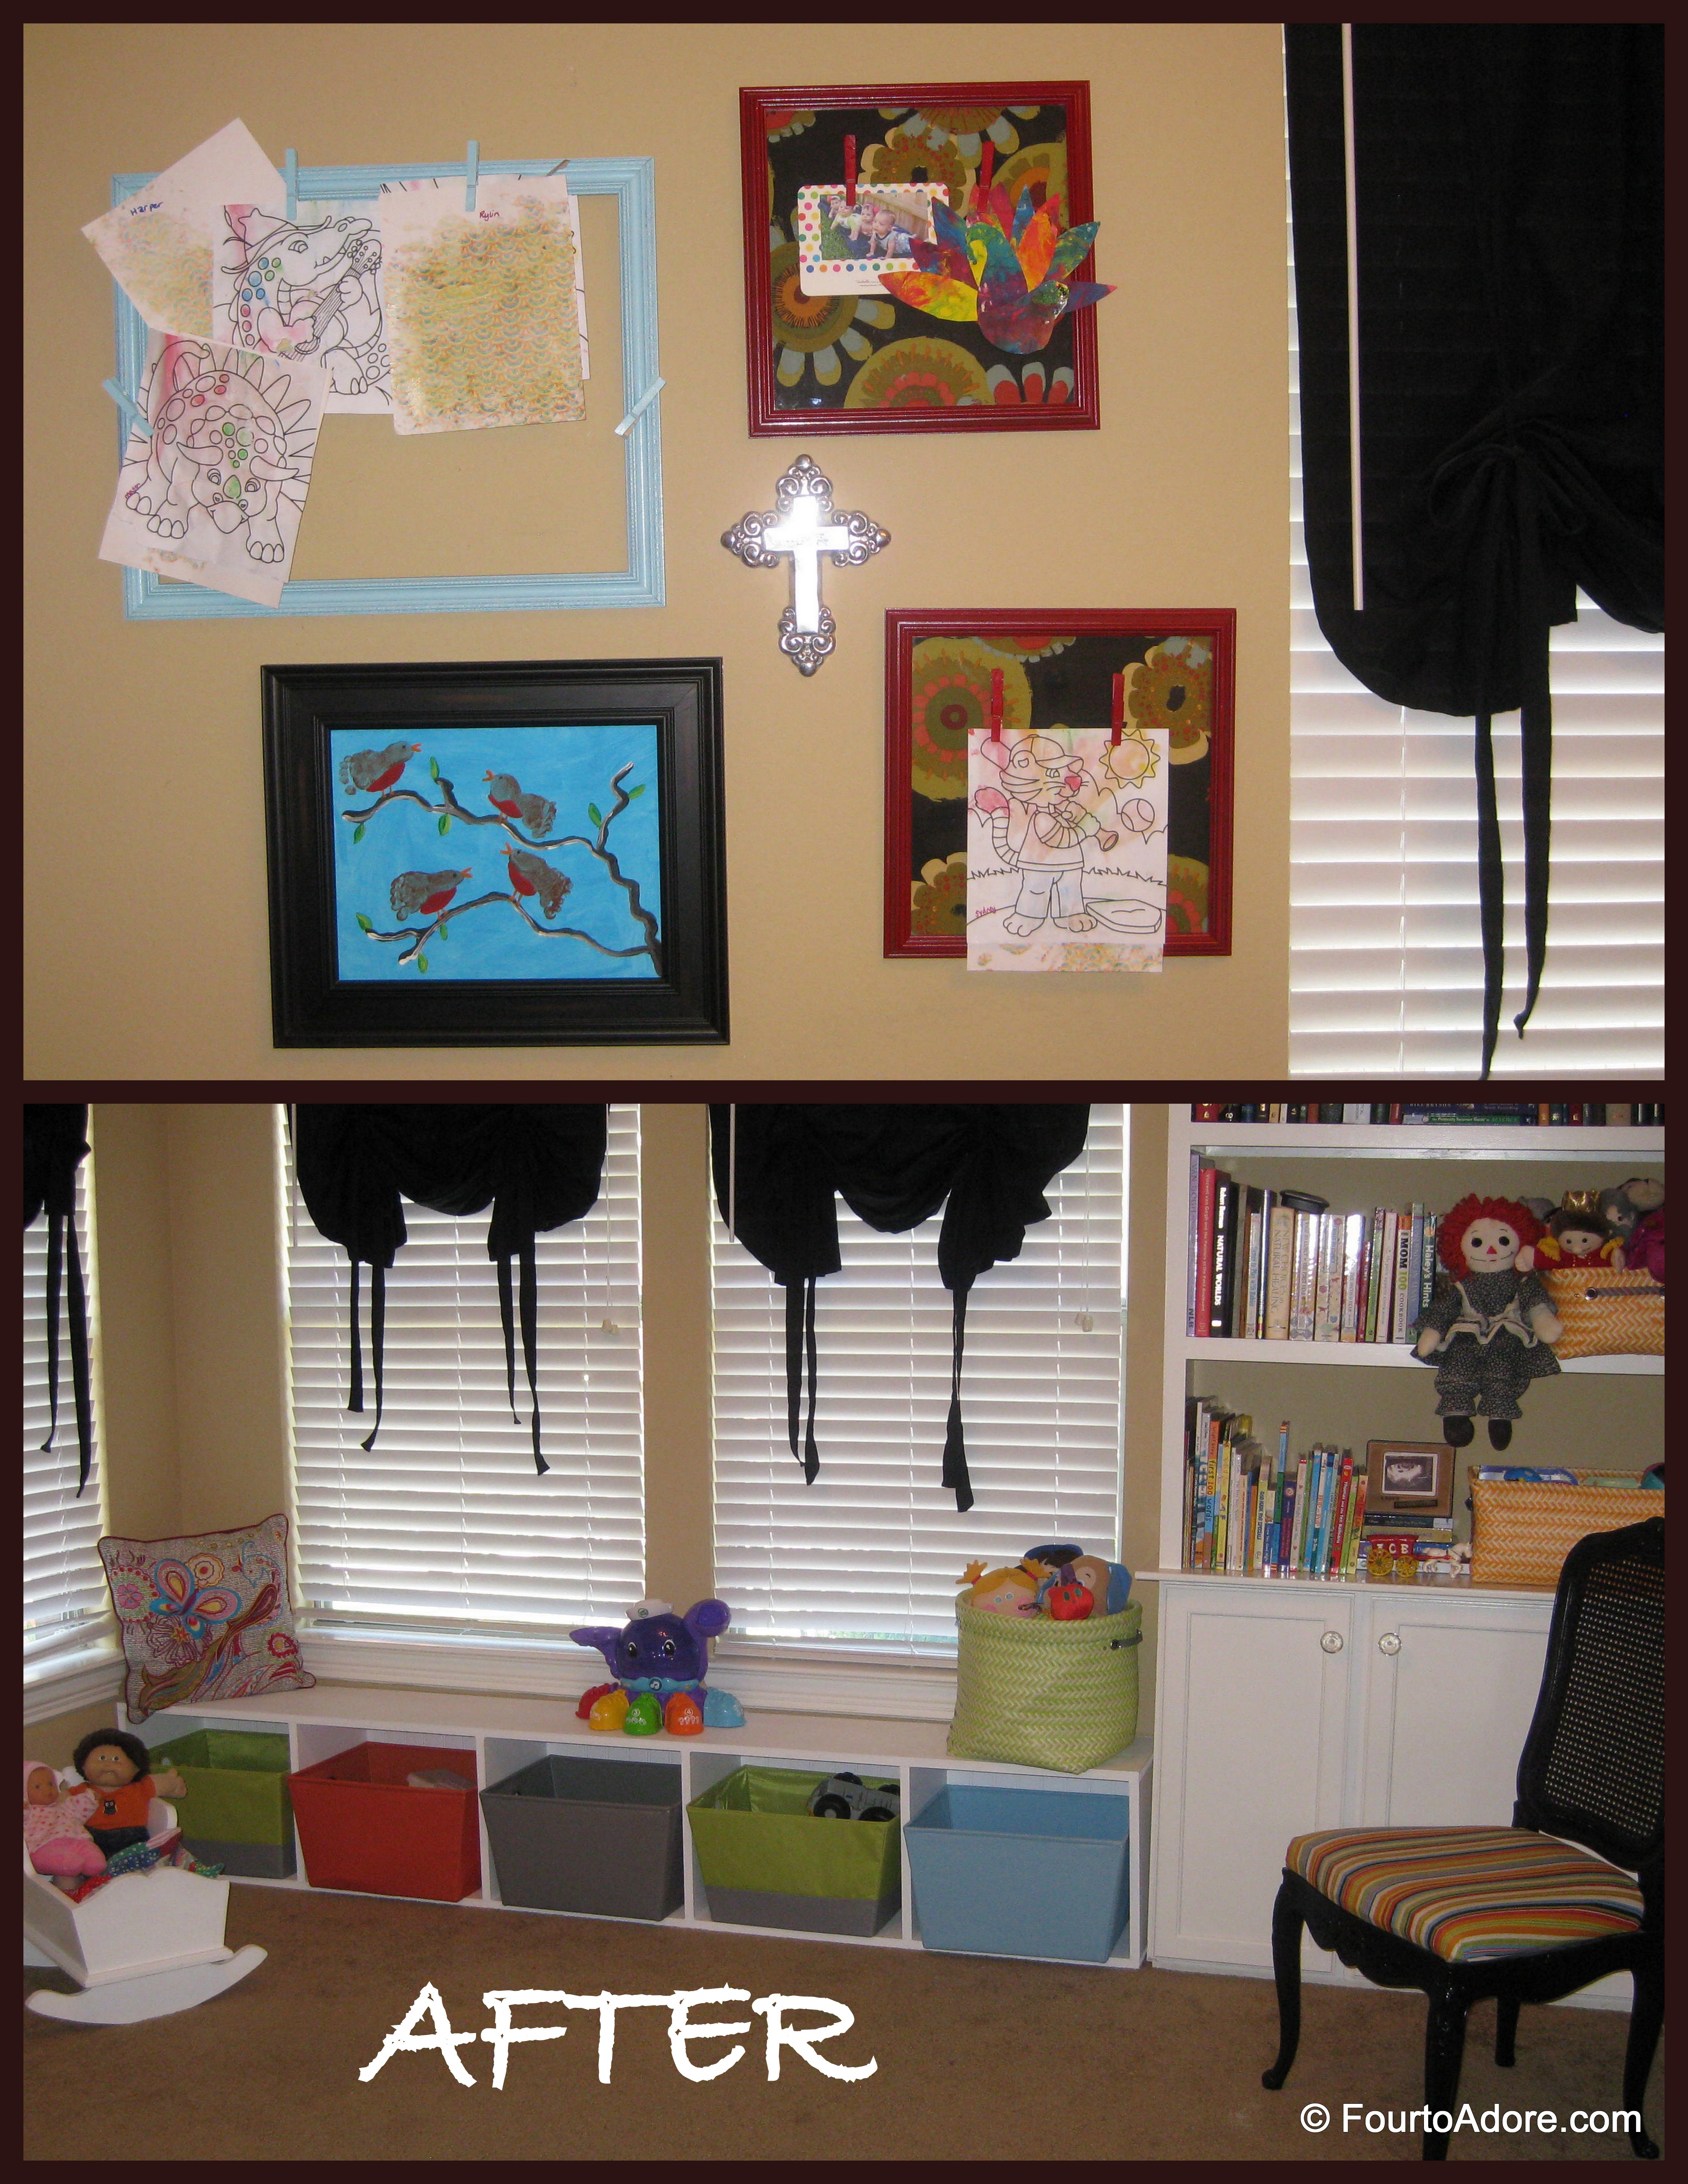
With the new purpose for our study, I thought an art gallery wall was also in order. I rustled up old picture frames from the attic and George spray painted them in bright colors to compliment the baskets. He then spray painted a few clothes pins in matching colors and I hot glued them to the frames, for holding pieces of art. Two of the frames had panes of glass permanently attached. On these, I backed the inside of the frame in fabric then glued the clothes pins right on the glass. As the babies create new works, we’ll change up the display.
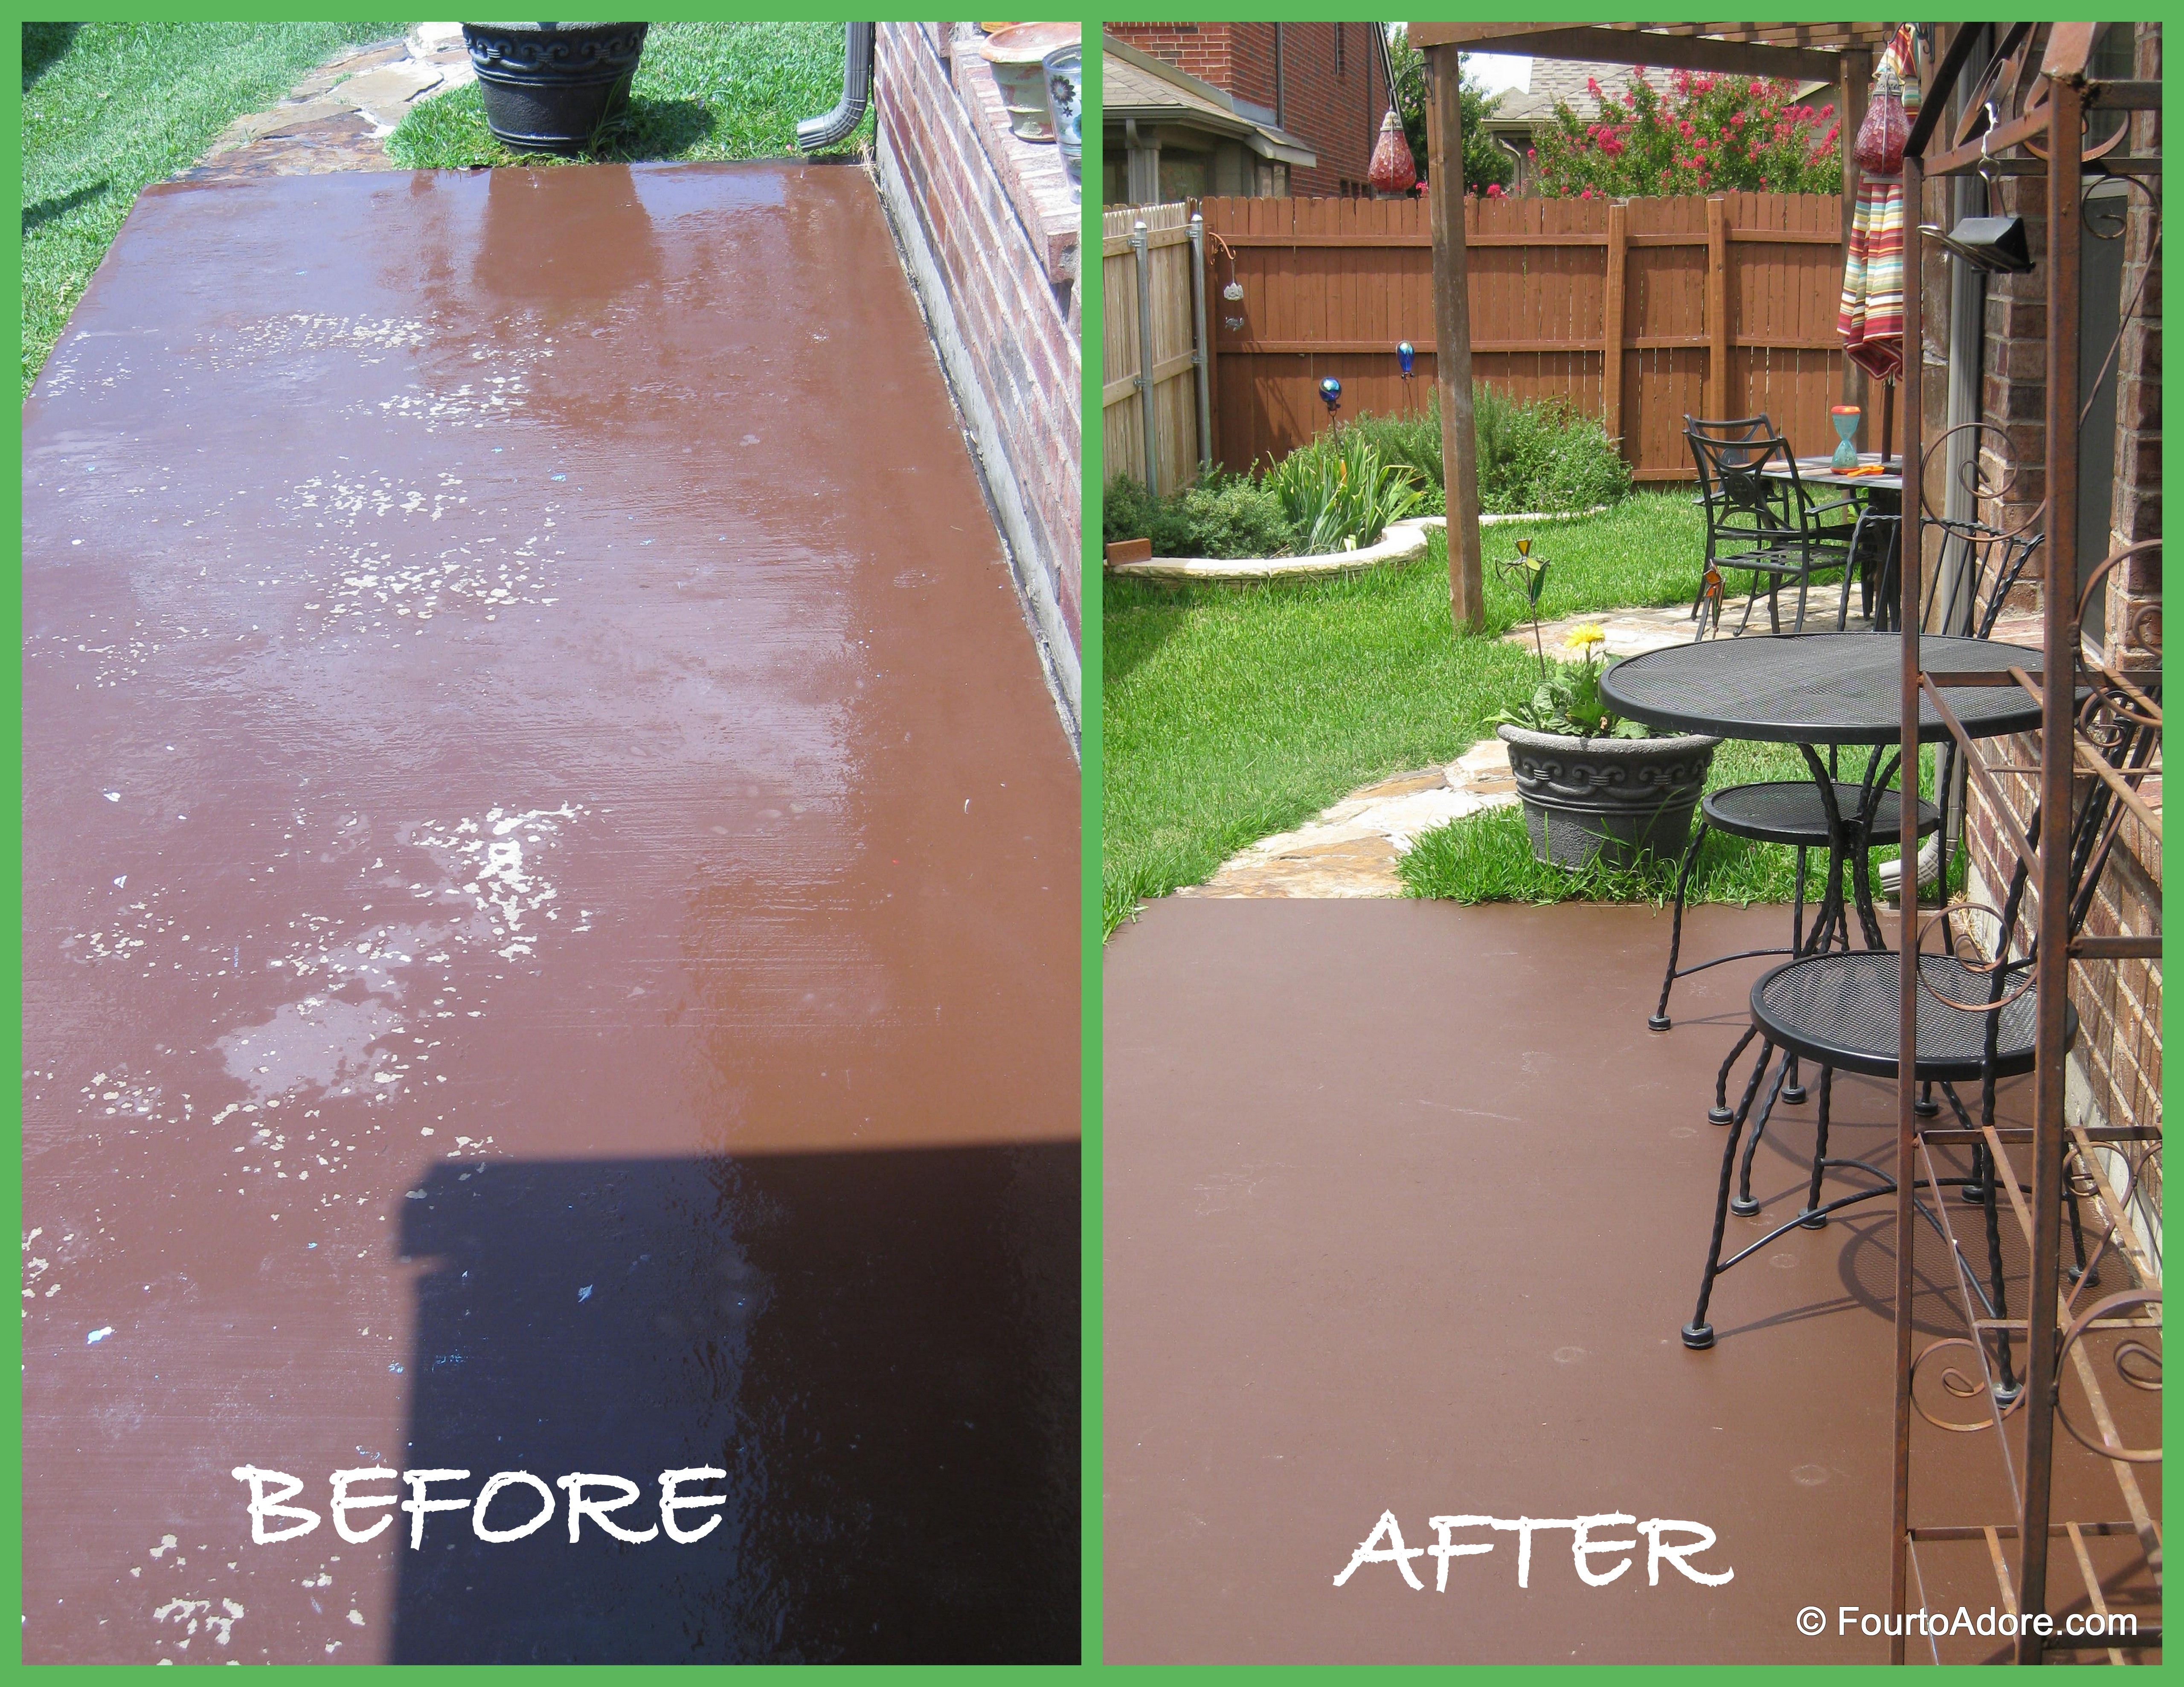
After moving into our house, we were irritated to find that our back porch never, ever appeared clean. We would scrub it, spray it with water, and once even power washed it, but it was always dingy looking. Then we discovered porch paint. It was miraculous in hiding the grime and dirt. However, a year later we found the paint peeling. As a result, porch painting is one of George’s annual projects. It seems like a huge chore, but really it takes him 20 minutes tops, and makes the porch look new again.
What DIY projects are you itching to conquer?
hugs!
Amber


Amazing. I don’t know where you guys find the time. Team work…. yea!!!!
LikeLike
Team work + time budget!
LikeLike
I so wish I had you and George’s combined creativity!!! I see all these cute ideas and am not confident I can execute them. Love everything you guys did! We need a “amber teaches Tiffany how to refinish things” day 😉
LikeLike
You can totally do this stuff! We can have an “Amber teaches Tiffany” day too 😉 Just tell me what Pinspires you and we’ll tackle it!
PS- I started with a different tutorial for the table and it went south so I had to do something new!
LikeLike
That table is gorgeous! If Gina’s not already jealous, she will be! 🙂
LikeLike
Thank you! The table is totally something Gina might do. =)
LikeLike
The built in looks awesome. I couldn’t agree more with you question of What good is an antique if you don’t like it? My argument is if someone else is to get it later, they can always strip the paint. Real wood is always there. Beautiful job on your coffee table. I love it.
LikeLike
Exactly, if you want to restore it, wood is intact. Glad you like it!
LikeLike
Everything looks great! Your bathroom looks very elegant and just love the table!
LikeLike
Thank you 🙂
LikeLike
great job it all looks GREAT, but I loved the purple walls in your bathroom!!
LikeLike
Too funny! I knew someone would prefer the purple walls.
LikeLike
Wow what an amazing difference a little paint makes.
LikeLike
[…] playroom was the perfect spot for the quad’s table and chairs. They’ve been making me “hot coffee” nearly every morning. They even […]
LikeLike
[…] is our new art gallery wall in the playroom. I used the frames from our old study, and found another to expand it. The quads LOVE seeing their materpieces and telling about them. It […]
LikeLike
[…] technique that could withstand quads. In fact, we used the same color and technique we used on our coffee table. We then painted the chairs white and distressed them with the same technique to give them an […]
LikeLike
Hi,
I found your page via Google image search. I am trying to find a diy fireplace baby proofing idea. Your fireplace looks just like mine, and I love what you did. Can you tell me how you got it to stay up? Did you drill into your fireplace or something else? I think your post is from a year ago, did it work out long term? Thanks for any further tips on this I really need them! Michelle
LikeLike
It works great a year later! We actually moved and brought the cover to our new house where it works perfectly!
My husband had a piece of plywood cut to the exact dimension of the inner part of the fireplace and it is basically just wedged in tight. We painted it with magnetic paint so it’s functional too. The quads have magnetic letters and numbers they stick on it. Good luck!
LikeLike
Thank you for the quick reply!!! So, I just need to cut it to the perfect size and wedge it in… sounds do-able! Leave it to a mom of quads to figure this out. I cant imagine chasing four babies away from a fire place, my one has me exhausted, LOL! Thanks again- have a blessed week!!!
LikeLike
You’re welcome! Yes, just get it the perfect size so it fits tightly. I don’t think I mentioned- we used a thin sheet of plywood.
Baby proofing for quads is critical! They get into everything, lol!
LikeLike
[…] was my grandmother’s, and she used it for her Christmas tree too. A few years ago, we refinished the table and it serves as a kid’s table in the […]
LikeLike