Toddler Beds, Take Two

big boy beds

At the start of the year, Sydney forced us to transition the girls from cribs to toddler beds.  Being a daredevil, Sydney escaped from her crib, which meant keeping the girls in cribs was no longer safe.  Since the boys are rather mischievous and had not attempted such an escape we kept their cribs intact. I was absolutely content with this arrangement.

Since moving the girls to toddler beds, they’ve done well, but naps are sporadic at best.   They tend to gab to each other as if it’s a constant slumber party.  Recently, Mason began trying to go to bed in the girls rooms and occasionally asked for a big boy bed.  He really tugged at George’s heartstrings on this one.  After some thought, George and I decided spring break week would be best for this change.  It meant I’d be home all week as we eased into toddler beds.

The day prior to the big change, George inspected the boy’s room for final toddler proofing measures.  All furniture was secured to the wall, latches were installed to the closet door and cabinets, electrical cords were secured, outlets covered, blind cords clipped, and the chair removed.  George then removed the front panel on both cribs.   We introduced the OK To Wake! Owl, and explained that the boys were to stay in bed until the owl illuminated green in the morning.

George read bedtime stories to the crew before tucking the boys into their new beds.

George read bedtime stories to the crew before tucking the boys into their new beds.

Following story time, both boys scrambled into their respective beds as if they’d done it a million times.  It was so easy.  Too easy.

toddler beds

toddler beds

Once prayers were said, I flipped off the lights and both boys snuggled under the covers.  About 30 seconds after we left the boy’s room, they both came charging into the playroom.  I’d forgotten to secure the door knob cover.  Once I wrapped it in a few layers of packing tape, they were set for the night.  George and I retreated to the den for some television watching and braced ourselves for protest.  I checked the baby monitor multiple times, and instead of finding distraught boys, I found two sweetly sleeping boys.   Much to my surprise, we didn’t hear a peep out of them until 7:30 am when Mason proclaimed, “It’s okay to wake!  The owl is green!!!”    I was even more surprised when I found their room totally undisturbed.  Though the room was toddler proofed and immediate hazards were removed, I anticipated a few trouble spots.  Fully expecting these things, I begged George to install latches on EVERY drawer.  His reply, “Let’s see what happens.  Give them the benefit of the doubt.”  While I want them to learn independence, sometimes my sanity is worth taking extra precautions.  I had a little side of crow for breakfast the first morning after toddler beds.

The first day they went down for nap without too much trouble, except they never actually fell asleep.  Instead they had great fun swapping beds and playing all sorts of imaginative games.  At the end of nap quiet playtime, everything in their rooms was in order.

When I went to get the boys up the second morning, I was greeted with a light citrus fragrance trailing from their room.  Undeniably familiar…GermX hand sanitizer.  Inside, I found Harper squirting the last few drops of a once full bottle of GermX all over the dresser.  It was one germ-free dresser that’s for sure.  Aside from the sanitizer, things looked good.

When I opened the bedroom door, I found Harper squirting the last few drops of a once full bottle of GermX all over the dresser.

On the third morning, I discovered socks in the diaper champ and diapers/ swim suits strewn about the room.  I was fed up with these shenanigans especially considering at least one was preventable with a strong latch.  I shot off an angry text complete with pictures for George to see.  His reply, “Mismanagement???”  Oh no, mister!  I was NOT pleased with this response.  I wanted some serious latches.

toddler bed mischief

The boys were different size diapers, which meant I had to sort through each one.

toddler bed mischief

On day four, the morning went smoothly even though George hadn’t yet installed any new latches.  I crossed my fingers for nap, but it did not go well.   About an hour into nap, I heard something suspicious.  Harper managed to dismantle the diaper champ and shredded the garbage bag inside.  Thankfully I emptied it just prior to nap so there were no diapers inside.  I suspected they may put things in the Diaper Champ, but never thought they could take it apart.  I ended up locking the Diaper Champ in the closet, scolded the boys, and put them back to bed.

diaper champ dismantle

The rest of nap did not go any better, the boys finagled a cabinet door open where George had installed a latch.  Once inside the cabinet, they had a hay day scattering undies, socks, and pajamas everywhere.  Harper informed me he was making a train.  To his credit, he lined the baskets up and it did resemble a train.   The only good thing about this mess is that it forced me to do a little spring cleaning.

toddler bed mischief

Despite the now daily shenanigans, George didn’t see a need for additional latches just yet.  On the fifth morning of toddler beds, I woke up to find all of the dresser drawers pulled out with pants scattered about the room.  The drawers aren’t terribly big, but for toddlers are slightly heavy so George finally agreed to latch them.  AMEN!!!!

toddler bed mischief

During nap on day five, Poppa stayed home with the boys so I could run errands.  According to Poppa, the boys sounded rather rowdy.  When he checked on them, both mattresses were off the beds and the boys were jumping wildly.  After a stern talk from Poppa, both boys fell asleep.  (I think I need a recording of Poppa telling the boys to go to bed.)

Today was the first morning when things were not in shambles.  Instead of trouble, I found Mason holding the owl so it would cast light on the door as Harper created shadow puppets.  That charade warmed my heart. The morning was smooth, nap not so much.  This time time they removed the sheets from their beds and got into the diapers again.

toddler bed mischief

Desperate for the boys to take a nap, I settled them onto pallets and rubbed their backs to settle them.  It worked like a charm!

sleeping on pallets

After a full week of toddler bed mayhem, I harassed George enough for him to install latches on the remaining accessible drawers.  Of course, these guys are a clever pair so I’m sure they’ll discover more mischief.  At least I can rest knowing we really exhausted all toddler proofing options available, and George can rest knowing I won’t pester him anymore.

toddler proofing

Even though the boys have created far more messes than the girls could ever imagine, I have to give them kudos for going to bed easily and staying asleep through the night.  The girls keep their room tidier, but getting them to bed is a bit more problematic.

hugs!

Amber

PS- If you can’t get enough of Four to Adore, don’t forget to follow us on Facebook, Twitter, and Pinterest!

Frugal for Four

Adding four people to your family at the same time can be quite taxing on finances.  In our case, it meant income being reduced significantly with expenses steadily rising.  We went on a mission to rethink our spending and find places to pinch pennies.  It wasn’t terribly difficult since my own father is extremely thrifty.  In an effort to save money, we’ve begun making many of our most used household commodities.

Before the quads were even born, we began using Dad’s recipe to make laundry detergent.  We knew four babies would mean exponential growth in laundry and they would need a sensitive formula.  We found it surprisingly simple to make and also effective in cleaning our clothes.

DIY laundry detergent

To make our detergent, we mix 2 c. Borax, 2 c. Super Washing Soda, 1 bar grated Fels Naptha laundry soap, and 1 bar grated Ivory bar soap. We use a cheese grater to grate the soap, and store in a lidded container. We found it’s easier to grate soap that’s been out of the wrapper and air drying a few weeks ahead of time.  Use 2-3 teaspoons per load (tip: a medicine cup is  the perfect scoop!) Instead of using fabric softener on the kids’ clothes, we add about 1/4 cup white vinegar to the rinse cycle.  It helps remove odors and softens clothes too.

If you prefer a liquid detergent, check out Our Multiples Journey for a similar recipe that results in liquid form.   Also, if you’d like step by step directions, please visit The Littlest Lesnaus since Krista uses a similar recipe to us.

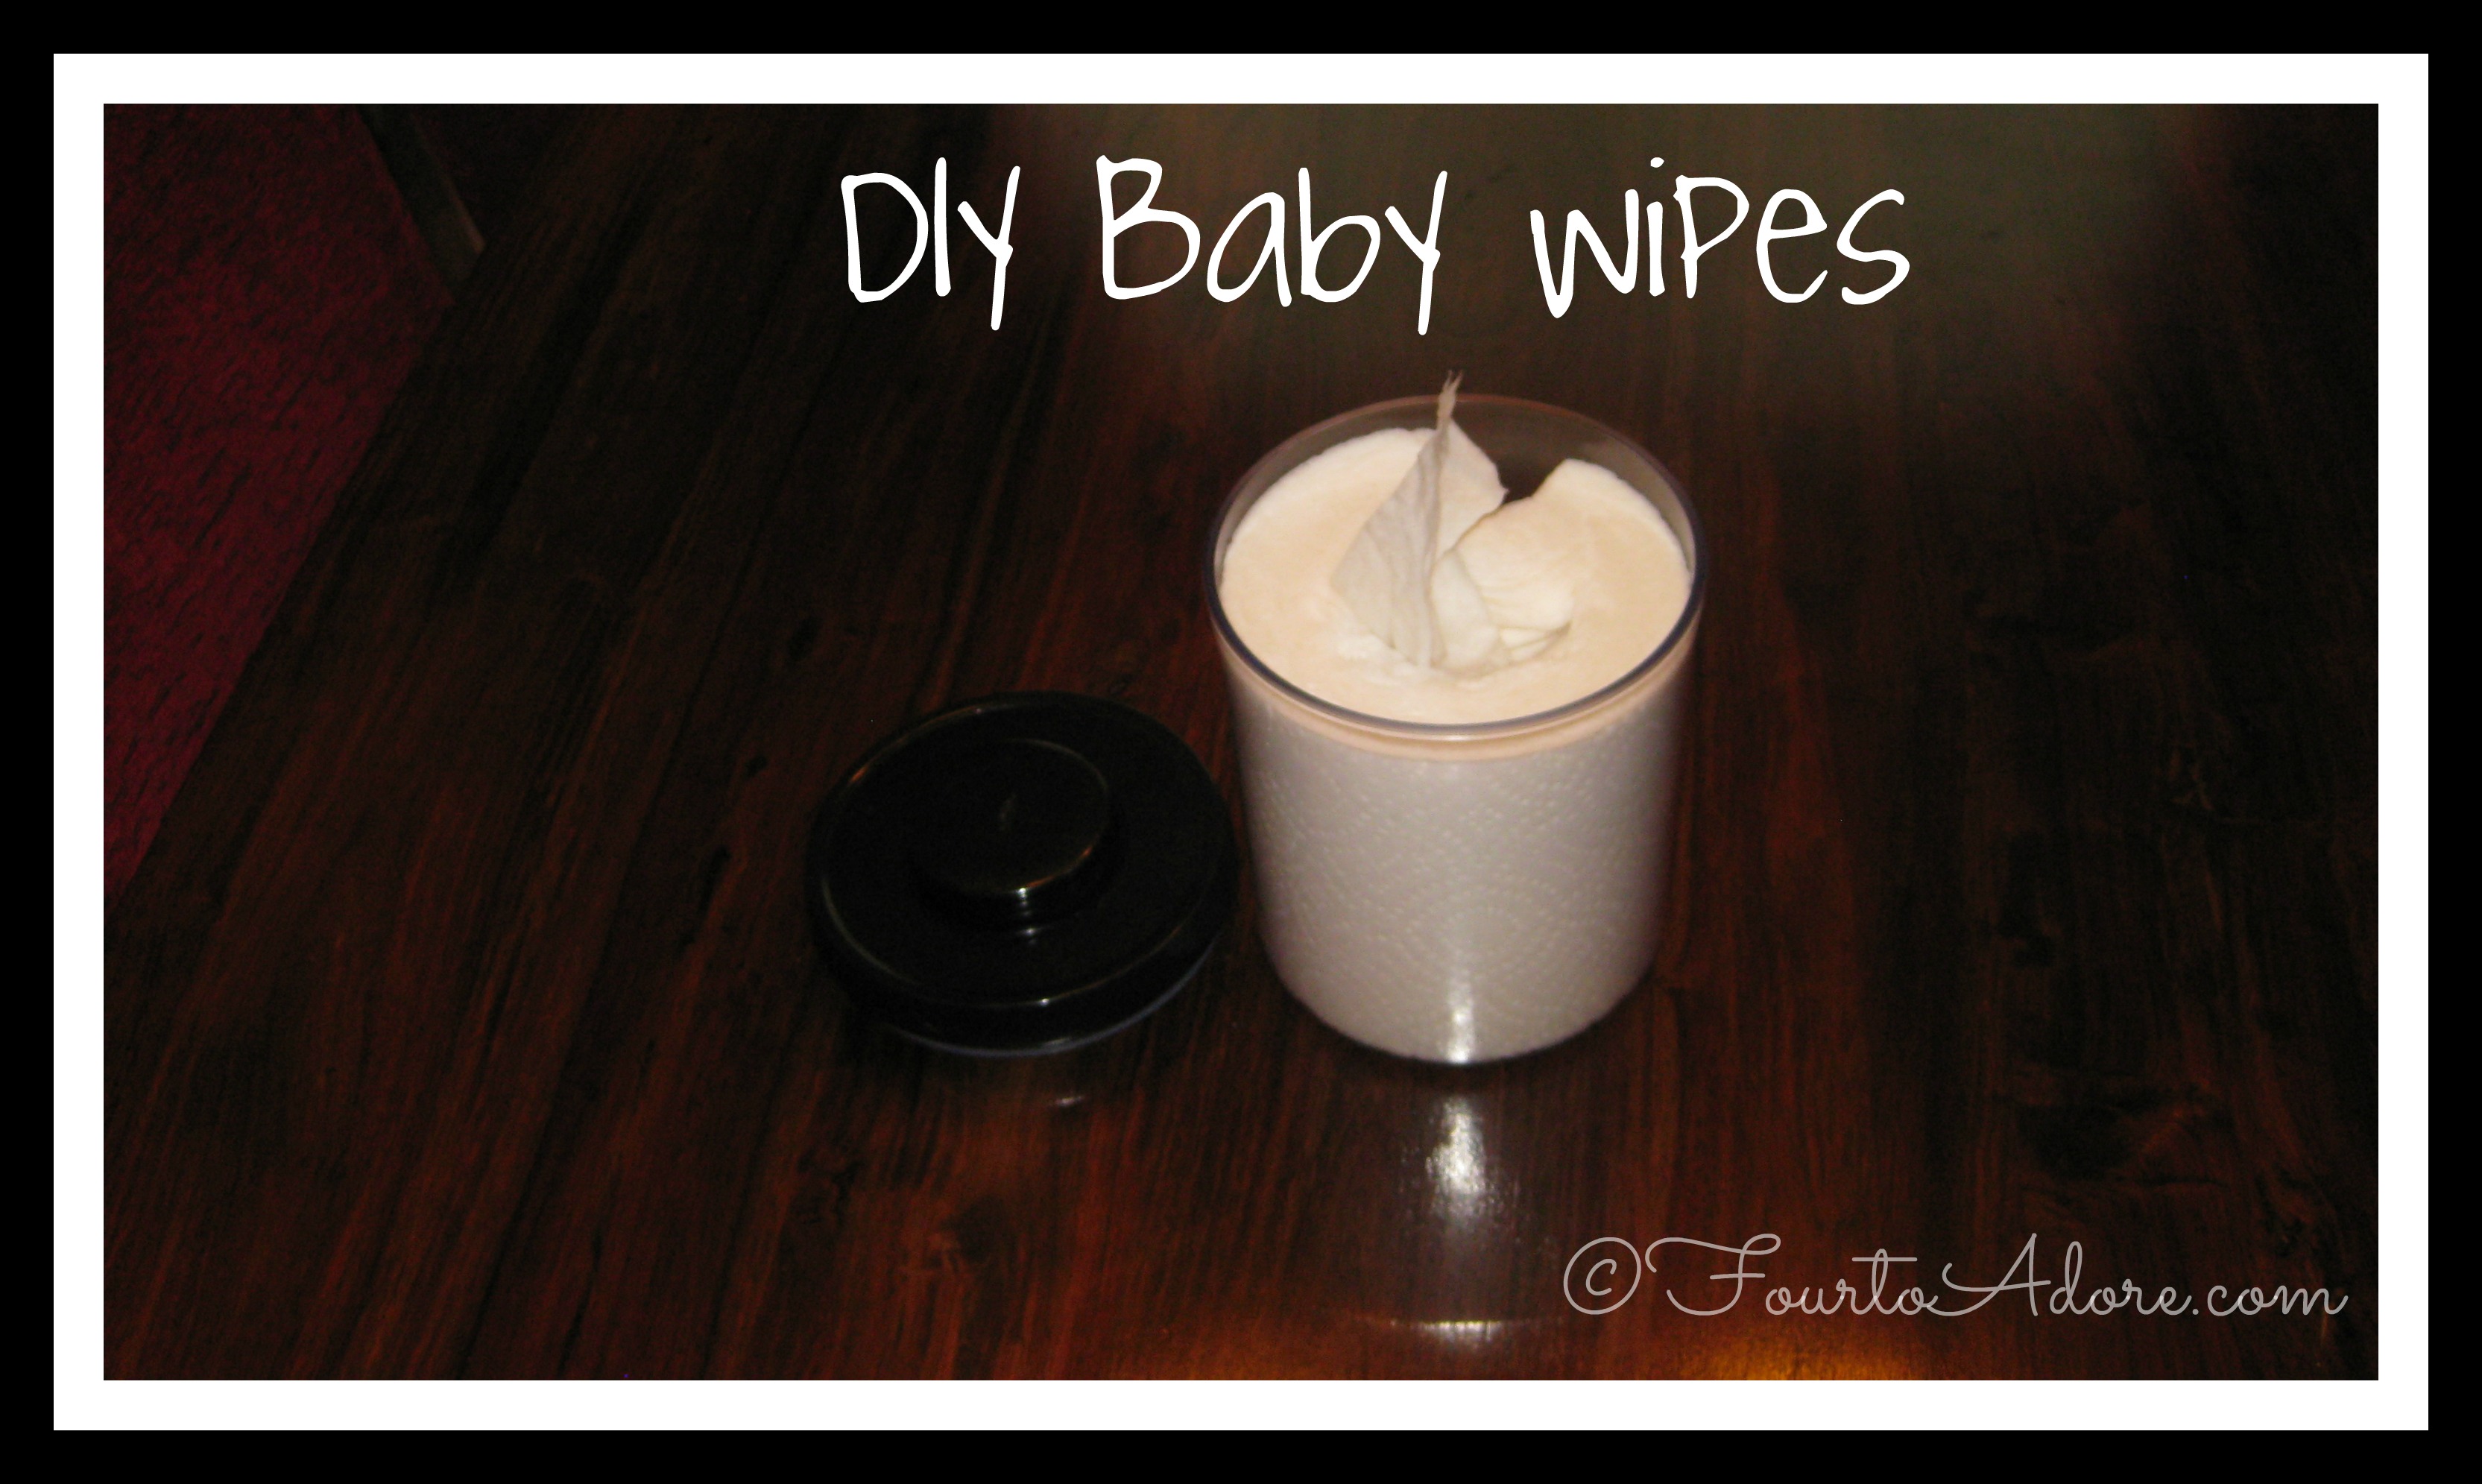
Before the babies arrived, we received many packages of diapers and wipes as gifts.  It was a huge blessing to us, but we eventually began to deplete our supply, and we also noticed problems with diaper rash.  Because of additives and chemicals, our pediatrician recommended we use toilet paper instead of wipes, but I wasn’t a fan of that idea.  Consequently, we began making our own baby wipes, which we now prefer to store-bought and we are saving quite a bit of money.

How to make baby wipes using paper towels, water, baby wash, essential oils, and baby oil.

Once the babies began eating solid foods, I made baby food from fresh, frozen, canned, and dairy products.  It was surprisingly simple to make, and the babies really enjoyed it.  Consuming a lot of produce meant A LOT of washing.  That’s when I started using a two ingredient produce wash.  It’s simple: one part white vinegar and one part water mixed in a spray bottle.

DIY produce wash using vinegar and water

In addition to using my produce wash for fruit and veggies, I use it to clean toys and sometimes even the counter tops since vinegar contains antibacterial properties and is safe around toddlers.  Check out Texas Tales for a few other ways to use vinegar in your home.  I started using Amber’s tip of using vinegar/ water for mopping except I add a few drops essential oil for fragrance.  Vinegar is also an excellent substitute for dishwasher rinse aid!

It may not be a commodity in everyone’s house, but popcorn is a staple here.  It’s a guilt free snack with its high fiber content and ability to fill grumbling tummies.  Seriously, it is among my favorite snacks, and most of our friends have been served popcorn at our house one time or another.  For me, popcorn is nostalgic.  I recall family movie nights with my own parents and we always enjoyed freshly popped popcorn.  When I went off to college I developed an addiction to microwave popcorn.  I hadn’t mastered the skill of stove top cooking like my Dad, but still wanted to enjoy warm, fresh popcorn.  Several months ago, I considered the many additives that likely lurk in microwave popcorn and knew there must be a better option.  I still haven’t mastered the art of stove top popcorn popping, but I remembered a trick my sister used when we were kids: lunch sack popcorn.  It’s brilliant, and now enjoyed at our house almost daily!

DIY microwave popcorn

Put 1/2 cup popcorn kernels in a paper lunch sack (large size works best) then roll the top. Microwave 2 minutes (time may vary based on your wattage, ect). Once popcorn is popped, melt about 2 tablespoons coconut oil then drizzle over popcorn and season lightly with sea salt or dry Ranch dressing mix.

crock pot yogurt

With the quads, yogurt is a major commodity for our home.  We go through an insane amount of it each day.  As in, they ate a large tub just today.  My friend, Becky, recently introduced me to Homemade Yogurt. It is simple to make and is definitely a money saver.  The only problem is we devour yogurt so quickly I cannot make it fast enough to keep up the pace.  Therefore, I only make yogurt when we are running low and won’t have a chance to replenish our stock.  It’s nice to have the ability to make yogurt even if we don’t make it regularly, however.

What are your favorite money saving tips?  Do you have any great do-it-yourself recipes?

hugs!

Amber

PS- If you’d like to see more from Four to Adore, follow us on Facebook, Twitter, and Pinterest!

Toddler Activities for Bad Weather Days

Today marked day three of school and business closures thanks to fickle Texas weather.  Another lovely blanket of snow (yes, real snow!) covered our lawns and streets.  Prior to that, we had an ice storm and several dreary, rainy days that kept us inside.  Ironically, after a few of these days I experience feelings of cabin fever (I’m sure those of you in cold climates are laughing, it’s ok).  I can’t stand it!!!  Since the arrival of the quads venturing out is a rarity, but when I feel as though weather traps us, I feel irritated.  We play outside every single day even if we stay home and we crave the sunshine here. The kids pick up on my feelings, and  their behavior deteriorates quickly.  Everyone gets cranky and demanding, which exacerbates cabin fever for me.  To keep my cabin fever at bay and behavior in line, I tried a few new activities to keep us occupied.  All are worth a repeat!

Indoor activites for toddlers when the weather keeps you inside.

1. Salt TraysMy Nearest & Dearest inspired this one (stop by her page for a few other ideas we are yet to try).  I sprinkled a thin layer of salt into Brookstone sand trays (a cookie sheet with sides or a lunch tray would work).  The quads used their fingers to create designs and also ran cars through the salt to create tracks.  It was a rather “Zen” activity that relaxed all of us.  I played yoga tracks from Pandora, which helped set the mood.

Pour a little salt onto trays and let kids trace designs or make tracks in it

2. Colander Game– Borrowing from Learning and Exploring Through Play, I used wooden skewers to create a maze through a colander then the quads took turns dropping pom poms through the maze.  They worked on turn taking and recognizing attributes (e.g. color, size, texture) for this one.  It involved maybe a minute to prep and clean up, and they were entertained about 15-20 minutes.

Colander/ Pom Pom Game

3. Tea Party- We hosted several tea parties when the quads had a cold this winter and it’s always a nice distraction.  It’s also the opportune time to practice table manners and drinking from open cups.

Tea Parties are great for practicing manners and when the weather keeps toddlers inside

4. Bring the Snow Inside– Typically I’m in favor of bundling the kids to play in cold weather, especially if they’ll have an opportunity to play in snow.  However, I didn’t feel up to the challenge again.  Instead, I brought the snow inside.  Scooping, shaping, and coloring the snow kept all four occupied for a solid 45 minutes!

If you don't want to bundle up to enjoy the snow, bring a tub inside for sensory play.

bring snow inside for a sensory experience

5. Window Clings– I periodically snatch gel window clings from the Dollar Tree or Target’s One Spot and now we have a decent collection for each season.  I pulled the den blinds up and let the quads loose with sheets of them.  I was surprised at how they independently sorted them by attributes and reassembled several of the designs including a snowman, Santa, and penguins. It involved zero prep on my part and took less than five minutes to clean up.  They played happily for about 30-40 minutes!

Window clings are fun for toddlers to arrange.

What are some of your favorite indoor activities for bad weather days?

hugs,

Amber

PS- If you can’t get enough of Four to Adore, don’t forget to follow us on Facebook, Twitter, and Pinterest!

Dad’s DIY {Up-cycled Bulletin Boards}

My wife loves doing art projects with the kids, and even more displaying them. At our old house, we created a simple children’s art display using open frames with clothes pins and ribbon. It worked relatively well in the old space. When we moved to the new house, the art display came along. Because the kids started creating a lot more art, Amber added a few more frames to the art gallery wall. After a while, the frames became overly crowded and cluttered looking. Also, they were crooked on the wall most of the time. Of course eight little hands also rearranged the frames frequently.  It bothered me. I had an idea to streamline the gallery and give each child a designated place for their own work.

Here’s how the art gallery wall looked with open frames.

Children's Art Display using empty picture frames

To create our new display, I began with the following materials:

  • 4 x 8′ plywood sheet, cut into four equal size boards (the hardware store will cut the boards to size)
  • packet of wall hanging brackets
  • roll of batting
  • 3 yards of fabric
  • 2 packages of wood trim
  • painter’s caulk
  • liquid nails
  • 1 large foam floor puzzle (we up cycled a few that we used when the quads were crawling, they were well loved and gnawed so not good to pass down)
  • staple gun with staples and brads

This is the step by step process:

DIY Bulletin board

Lay out all boards on a flat surface

DIY Bulletin board

Draw a line 8″ down from the top on each board (This is the BACK).  You will use this line later to place hanging brackets.

DIY Bulletin board

Flip each board over and draw lines 2″ in from all sides so you have a rectangle drawn(This is the FRONT).  This will show you where to place foam and trim.

DIY Bulletin board

Lay interlocked puzzle pieces on each board. Then, use scissors to cut them to fit into the rectangle drawn on each board.  Finally, use liquid nails to adhere puzzle pieces to each board.  Allow to cure overnight.

DIY Bulletin board

Cut batting to fit over puzzle pieces and secure with a staple gun.  This step ensures that surface is smooth.

DIY Bulletin board

Cut fabric to fit over batting then secure with a staple gun.

DIY Bulletin board

Miter cut trim at 45 degree angles and secure to board with brad nails.

DIY Bulletin board

Once all trim pieces are attached, each board should look like this.

DIY Bulletin board

Using a nail set and hammer, push nail heads into the trim.

DIY Bulletin board

Flip each board over and attach hanging brackets to the backside. Use the previously drawn line as a guide for placement.

Use painter’s caulk on the front side to cover nail heads and fill gaps at the joints.  Finally, use one coat of paint to hide imperfections in the trim.  Enjoy displaying artwork!

It cost about $25 per board to make, and I’m really pleased with the result.

DIY bulletin board display using up-cycled foam puzzles

DIY bulletin board display using up-cycled foam puzzles

George

PS- If you can’t get enough of Four to Adore, don’t forget to follow us on Facebook, Twitter, and Pinterest!

Lifespan of a Pumpkin {Pumpkin Pie Cheesecake & Spiced Pumpkin Soup}

This year, my mom charged me with making desserts for Thanksgiving.  My Dad, sister, and I enjoy the tradition of pumpkin pie on Thanksgiving, but it’s not my mom’s favorite.  In order to make something my mom would like, and preserve tradition, I thought pumpkin pie cheese cake would fit the bill.  I found a recipe for Pumpkin Cheesecake bars, but it wasn’t pie-like enough so I adapted it.

As I made my shopping list, George reminded me that instead of using canned pumpkin, I could roast sugar pumpkins for a more robust flavor.  And, better yet, I could use the sugar pumpkins from the Flower Mound Pumpkin Patch to make fresh pumpkin puree.  I was slightly hesitant since these pumpkins had been on our porch a while.  George gently reminded me that pumpkins sit outside at pumpkin patches all season and are still good to eat as long as the flesh is firm.

Roasting sugar pumpkins is a simple process, but I was thankful George took over and involved the quads.  First, he washed the pumpkins well and peeled the monogramming from them so the paint wouldn’t leech inside.  Next, he cut the pumpkins in half and scooped out insides.  Finally, he laid them face down on a foil lined baking sheet.  They roasted in the oven for an hour at 400 degrees.

he cut the pumpkins in half and scooped out insides.  Finally, he laid them face down on a foil lined baking sheet.  They roasted in the oven for an hour at 450 degrees.

The quads took turns helping to scoop out the insides.

roasting pumpkin

Roast pumpkin face down 400 degrees for an hour

The aroma of roasting pumpkin was delightful!  Once the pumpkins were roasted, we removed the skin and pureed the pumpkin in our food processor.

roasted pie pumpkin

I added about a cup of water to the food processor to smooth the pumpkin.

IMG_3425

Once the pumpkin was done, I used it to make my Pumpkin Pie Cheesecake.

Pumpkin Pie Cheesecake recipe made with roasted pie pumpkins

To make your own Pumpkin Pie Cheesecake, you’ll need the following:

Crust
    • 1 1/2 c. graham crackers crumbs (I used a food processor, and it was about 3/4 sleeve of graham crackers)
    • 1/4 c. granulated sugar
    • 1/4 c. melted butter
Filling
    • 4 packages (8 oz each) cream cheese, softened
    • 1 tsp. vanilla extract
    • 1 1/2 c. granulated sugar
    • 2 eggs
    • 2 c. roasted sugar pumpkin puree (1 can of pure pumpkin would also work)
    • 2 teaspoons pumpkin pie spice (you can also combine equal parts nutmeg and cinnamon)

Preheat the oven to 350 degrees.  In a spring form pan, combine graham cracker crumbs, sugar, and butter then press evenly across the pan.

Using a stand mixer, combine cream cheese, vanilla, eggs, pumpkin puree, and pumpkin pie spice.  Pour filling into the spring form pan.

Bake at 350 degrees for an hour.  Remove from the oven and allow to cool before refrigerating.  Keep in the refrigerator at least 3-4 hours before serving.  Garnish with whipped cream and pumpkin pie spice.

I was admittedly a tiny bit nervous about serving a dessert on Thanksgiving that I created and had never tasted before, but felt confident in the ingredients.  It was a winner and enjoyed by everyone, including the quads!  I think it will be on our Thanksgiving menu annually.

Pumpkin Pie Cheesecake

I had quite a bit of pumpkin puree leftover after baking my pie.  I decided to use the remaining puree to make Spiced Pumpkin Soup from a recipe we clipped from a magazine years ago (we’ve had it so long, I don’t know the original source).

spiced pumpkin soup made with roasted pumpkins

You’ll need:

  • 4 tbs. butter
  • 2 minced onions
  • 2 tsp. minced, jarred garlic
  • 1/4 tsp. red pepper
  • 1/2 tsp. crushed coriander
  • pinch of cayenne
  • 6 cups pumpkin puree (you can also use three 15 oz. cans of pure pumpkin)
  • 5 c. chicken broth
  • 2 c. milk
  • 1/2 c. heavy cream
  • 1/2 c. brown sugar

Melt butter in a stock pot then saute onions until clear.  Add garlic until aromatic then stir in spices.  Cook about another minute.

Add pumpkin and broth, stirring well.  Bring to a boil then reduce heat.  Simmer 10-15 minutes. Slowly add brown sugar, then milk and cream.  Serve with crusty bread.

I’ve been enjoying our spiced pumpkin soup for a few days and have enough to freeze for later.  From the farm to the table, our pumpkins had a quite a lifespan, and I’m happy they didn’t end up in the garbage.

What is your favorite pumpkin recipe?

Hugs!

Amber

P.S. Now that Thanksgiving was fully celebrated, the Christmas decor commenced at our house!

Pssst- If you can’t get enough of Four to Adore, don’t forget to follow us on Facebook, Twitter, and Pinterest!

Dear Thanksgiving, You Aren’t Forgotten

The week following Halloween, George and I took the crew to Half Price Books in search of Thanksgiving books.  Behind an elaborate Christmas book display, we found a meager shelf labeled, “holiday”.  This shelf contained a conglomeration of holidays ranging from Valentine’s Day to Easter with a smattering of Thanksgiving books.  Sadly, the majority of the Thanksgiving books were geared to older children.  We snagged two age appropriate books worth purchasing so we’ve read these two at least once daily all month.

Thanksgiving books for toddlers

The Best Thanksgiving Ever is a charming story about a family of turkeys that gather to celebrate their many blessings. Naturally, their feast consists of corn.
Let it Fall describes the change in seasons and family activities during autumn. The illustrations are beautiful and capture the beauty of family time.

After our trip to the bookstore, my Facebook news feed began overflowing with pictures of children clad in Christmas attire as they visited Santa, evidence of wrapped packages, and fully decorated Christmas trees.  Seriously, this began around November 3rd.  Anytime I entered a retail establishment, holiday music lingered and Christmas products were in the fore front.  It started feeling as if it were December already, and there was an urgency to prepare for Christmas. Then, our neighbors began adorning their homes in twinkling lights.  It became such a trend that our home owner’s association left notes at homes where decorations were out 30 days prior to the holiday.   Consequently, the HOA president has been dubbed “Scrooge of the Neighborhood” by some overzealous residents.  Holiday light citations may not have been necessary, but I tend to agree with the notion it’s too early to commence Christmas activity the first week of November.

Instead of following the masses, I dug my heels in this year and refused to begin decorating for Christmas when the turkey hasn’t been carved.  This year, the quads are learning about the seasons and holiday traditions, and I want to teach them about Thanksgiving as much as any other holiday.

To give a little attention to Thanksgiving, we spent time decorating die cut leaves and then writing what we are thankful for this season.  (In case you were wondering, the quads dictated, and I transcribed.)  Since the quads have been working on prayers expressing gratitude, this task was an easy one for them.

Thanksgiving activity: have kids decorate die cut leaves then write what they are thankful for on them.

For a little festive fun, we also made turkeys from paper plates and toilet paper rolls.

Turkey craft: cute paper plates in half and decorate with glued on feathers.  Staple a toilet paper roll onto the plate and add goggle eyes and a beak.

Once we finished our Thanksgiving crafts, I nestled the turkeys into our mantle decor and taped the die cut leaves among the autumn garland.  The leaves are nice reminders of the little things we appreciate in our lives.

Autumn mantle

Add "thankful leaves" into fall garland as an activity for the family

Despite my reluctance to start celebrating Christmas before Thanksgiving, I did purchase the quads Christmas pajamas.   In my defense, I was burned the first two Christmases with the quads.  I waited until after Thanksgiving and found barren shelves!  Harper was forced to wear pajamas about a size too small two years in a row.  I wasn’t making him do it again.  They’ll get to wear their new pajamas the night our Christmas tree goes up.

When do you begin decorating for Christmas?  Perhaps you’re an eager beaver.  Maybe you wait until Christmas Eve. Maybe you’re like me and want the turkey gobbling to cease first. Or maybe you celebrate a different holiday altogether.

Happy Thanksgiving!


Amber

Read This, Made That {Cheesecloth Ghost}

In Say Boo!, Ben the ghost is practicing his scariest “boo” for Halloween night, but it comes out mixed up most of the time.  In case you were wondering, ghosts don’t say “moo” or “coo”, they say, “Boo!”  Even though we already made wispy ghosts, another ghost craft was in order for this story.

I’ve always wanted to try my hand at cheese cloth ghosts, but never attempted them.  I found simple directions at One Good Thing by Jillie to try.  I created a form using ball pit balls taped to paper towel rolls, which I secured onto paper plates.  Then, I covered the form with two layers of cheesecloth.  The quads helped by spraying the cheesecloth with liquid starch until they were soaked.  I set our soppy figures in the sun to try for 24 hours.  The next day, I dotted glue on the tops of the forms and let the quads stick googly eyes and oval mouths on them.  I think they are adorable!  In fact, I’ll try to pack them up to use for next year’s decor.

IMG_3282

Happy Halloween!

Amber

Read This, Made That {Paper Plate Jack-O-Lanterns}

After years of hating Halloween, the kids are helping me change my perspective. We live in one of the best neighborhoods for Halloween, and it’s high time I enjoy it. In fact, last spring as we searched for a new home, we felt a sense of relief knowing we would stay in our beloved neighborhood. It’s the type of community where families play outside together, take walks, ride bikes, and know the neighbors. On Halloween night, hundreds of children will line the sidewalks escorted by parents clad in costumes. Families living on cul-de-sacs will invite others to join them for snacks and activities. This neighborhood makes Halloween night exactly what it should be- filled with community fellowship, and I want the quads to experience every bit of it.

When October rolled around, a family friend gave each of the quads a Halloween themed book. Little did she know, these books would help stir the spirit of Halloween. As I read these toddler books, it brought to mind the nostalgic parts of Halloween, and the reasons kids adore it. As I read, I began explaining the process of trick-or-treating and other spooky traditions, increasing our anticipation of the holiday.  In addition to the books gifted to us, I scored a treasure trove of Scholastic books at our community garage sale, which resulted in a decent collection of Halloween themed toddler books.  Since I’m a sucker for thematic crafts and activities, we spent the month of October creating a gallery of Halloween themed art loosely tied to toddler literature.  Check out my post about literacy based crafts to see how I approach these.  We read several if not all of these books at least once daily.


Halloween books for toddlers and preschoolers


We kicked off our Halloween literacy based crafts with Five Little Pumpkins paired with  a paper plate jack-o-lantern craft. The book is actually a poem, and the quads now recite  it as I read, which melts my heart every single time.

To create the craft, each child painted a plate with orange tempera paint (mixed with a few drops of dish soap). When the paint was dry, I dotted glue on the plate where the face should go, and let them add facial features (pre-cut them from black construction paper). I finished it off by tracing their hands on green construction paper to create leaves and a stem.

Toddler craft: paper plate jack o lantern

Stay tuned to find out what other crafts make up our Halloween art gallery.  I’ll be posting a new one daily until Halloween.

Hugs!

Amber

Personalized Pumpkins

After visiting the Flower Mound Pumpkin Patch, we amassed a variety of pumpkins, which needed decorating, and of course personal touches.  Pumpkin carving is a festive tradition, but in the Texas heat they grow mold almost immediately, and you can’t appreciate them long-term.  Instead of carving, I prefer a little paint and a few stickers.

With the first found of pumpkins, we let each child choose a tempera paint color to slather on a pumpkin.  It was an utter mess, but they had a blast expressing their creative sides.  Plus, it was a full on sensory experience; they covered their arms, hands, and cheeks before they finished.  After our little art extravaganza, I used copious amounts of Shout and washed clothes multiple times to rid them of bright paint splatter.  Thankfully, there’s no remaining evidence of art on their clothes.

painted pumpkins painted pumpkins

For the second set of pumpkins, I created a monogram for each child using the same process I used to make cookies for Santa plates.

First, I printed individual letters in 300 pt French Script font from Microsoft Word.

DIY monogrammed pumpkin

Then, I flipped the paper over and rubbed pencil over the area where the letters were.

DIY monogram pumpkin

I pressed the letters, print side up onto a smooth part of the pumpkin and traced over it with heavy pressure using a pen.

DIY monogram pumpkin

This left a faint outline, which I filled in with a paint pen. It’s very faint in the picture, but there is a light outline of the “R” on the face of this pumpkin.

DIY monogram pumpkin


When I was finished, we had four handsome monogrammed pumpkins.  I let the kids loose with Halloween stickers so they could leave their own flare.

DIY Monogram pumpkins

The best part about pumpkin decorating is displaying them on the porch for others to admire.  The quads beamed with pride when I let them carry their own pumpkins to the porch.  I helped with arrangement of course.

IMG_0457

We placed the tempera paint pumpkins under the covered part of the porch since rain tends to wash them clean.  Each time we go out the front door, the kids point out their personalized pumpkins with their “letter”.

IMG_0463

Fall porch decor

On Halloween Eve, we’ll carve the largest pumpkins together and cross our fingers they last 24 hours.  What is your favorite way to decorate pumpkins?


Hugs!


Amber

Gather ‘Round the Family Table

When we were newlyweds, I was still in grad school while George was a novice in his field earning a small pay check.   That meant our apartment was furnished solely with hand me down pieces and thrift store finds.  There was no way we were going to let our nest LOOK like it was a thrift store, however.  Instead, we learned how to bring new life to dated or worn pieces.

Our first piece of furniture to renovate was a dining room table and chairs.  I can’t remember, but it may have cost $75 for all  five pieces.  The table was a classic, sturdy pedestal design with two leaves, but we didn’t care for the oak finish.  The chairs had lovely lines, but the upholstery was tattered and the wood frames were rickety.  After spying a Pottery Barn table far outside our budget, we used some paint, fresh fabric, and elbow grease to inspire our own design with our thrift store find.  This project was the first of many similar re-designs we’d tackle.

black Pottery Barn Inspired Table and chairs thrift store redo

After the purchase of our first house, our little Pottery Barn inspired table found a new spot in our dining room.  It was later relocated to our breakfast nook in that house.

Pottery Barn inspired black table, thrift store redo

The buffet behind the table was also a furniture redo we eventually painted solid black.  It is currently functioning as a changing table/ dresser for the boys nursery.

Countless meals were enjoyed around this table.  However, when the quads were old enough for spoon feeds we needed something to accommodate them.  Our solution was to build our own quad feeding table and store our original table in the attic.  With four infants being spoon fed, the quad table proved ideal.  I could easily reach each little birdie for meals, and clean up was a breeze.

quadruplet feeding table/ toddler table

This was the first time the quads ever sat in their table.  At the time, they weren’t sitting independently so I used baby towels to pad them in.

toddler table

Little dangling feet were always my favorite view of the quad table.

When we moved to our new house the quads were 22 months old and still getting good use out of the quad table.  By that time, they were self feeding using utensils and spoon feeds were a thing of the past.  Yet, we still used the table for instructional activities, story time, and art projects.

I could easily facilitate story time from the quad table.  However, the quads do reasonably well sitting in child sized chairs or in a semi circle on the floor too.

I could easily facilitate story time from the quad table. However, the quads do reasonably well sitting in child sized chairs or in a semi-circle on the floor too.

It was relatively simple to clean up after the messiest of art projects at the quad table.

It was relatively simple to clean up after the messiest of art projects at the quad table.

When the quad table was originally built, we hoped to get two to three years use from it. However, as the quads grew it became clear that the quad table’s days were numbered.  Harper grew dangerously close to the 30 pound weight limit for the quad table seats, and he seemed uncomfortable being crammed into it.  Furthermore, the quad table became a point of stress during meals.  All four of the quads could reach anything on the table, which meant they snatched food from each other (and our plates), poked each other with forks, and created numerous shenanigans.  Clearly, the quad table served it’s purpose and it was time to move onto something new.

DIY quadruplet feeding table/ toddler table

This photo was snapped the last night we used our beloved quad table. I’m amazed at how much they’ve grown.

Oh how they've grown!

Little dangling feet will always be my favorite view of the quad table.

In a pinch, we can pad the quads into adult sized chairs, but it’s not good for everyday use.  It’s difficult for the quads to see and reach their food, let alone use utensils.  Consequently, we piloted booster seats attached to our dining chairs.  After trying several designs, we realized booster seats were even more problematic than the quad table.  Booster seats nearly destroyed our dining chair’s upholstery and the quads could easily push their feet against the table and tip backwards.  We considered serving their meals at a child sized table, but that would mean we couldn’t enjoy family dinners.

Even when it was only two of us, George and I ate the majority of our dinners at the table together.  During family meals, we take time to converse with each other about the day’s events and future plans.  We take time to enjoy the meal before us and reconnect as a family.  Because family dinners are of the utmost importance to us, we needed another plan.   After dining out, it occurred to us that restaurant high chairs would be perfect.  They are easy to clean, sturdy, stackable, and include seat belts for safety.  Once I found decent priced chairs, I ordered four from Amazon Prime.

Since the quads still bash the table with their utensils, there was NO way we were spending money to buy a new kitchen table.  It was time for our very first dining table to return from storage.  However, the black paint was nearly a decade old and looked haggard.

We are gradually changing our color palate in the new house from dark colors to lighter hues and accepting them in cheery colors such as butter cream, aqua, and orange.  Our dark table was given a clean coat of aqua paint then distressed using a stain technique that could withstand quads.  In fact, we used the same color and technique we used on our coffee table.  We then painted the chairs white and distressed them with the same technique to give them an antique appearance.  The dingy crimson wall was covered by a soft gray, which effectively brightened the room.

Our accessories didn’t look quite right with the new wall color, but cans of chrome and sunshine spray paint helped coordinate the look.  And, a bold floral fabric on the chairs pulled the entire room together.  Ta da!

Thrift store table and chairs given a distressed finish using stain

We used glitzy letter decals to decorate each high chair.  Since the seat belts are adjusted differently for each child, it helps us remember whose chair is whose.  Plus, we move the chairs around and the quads enjoy searching for their new place at the table.

aqua table, antique white chairs, gray wall

Aside from the fact that I adore the fresh new look of our breakfast nook, it is working beautifully.  Since it’s a traditional family style table, we face each other for conversation.  (I should record some of our dinner conversation with the quads…they are generally humorous).  Also, the center of the table is outside the reach of little hands.  This allows us to serve food from the table instead of getting up to refill little plates thousands of times.  Seriously, with the quad table I’d get up every few seconds to bring more food to the quads and I rarely sat down to enjoy my meal.  Another bonus of the new set up is we can move the high chairs to create space between kiddos or away from the table itself (this is handy if someone is starting to make a mess with their plate).

When we have company join us for dinner, we have room for a few extra chairs so we can all dine together.  Nisey and Grandpa enjoyed dinner with us on Grandparent’s Day last Sunday, and there was ample room for the eight of us.

family dinner

IMG_0165

I was slightly sad to see our quad table go, but it has been re-homed to a family with infant quads. Knowing it will help feed another set of quads makes my heart happy. In fact, this family plans to pass it down to the next generation so who knows how many quad families may enjoy our table.

Where do you dine?

Hugs!

Amber


P.S. This post contains affiliate links.  Please visit my disclaimer page if you’d like more information about links.