Read This, Made That {Wispy Ghost}

I have fond memories of listening to Curious George books as a child.  There’s something about that curious little monkey that’s been touching children for generations.  In fact, George’s “Original Adventures” began publication in 1941 (source Wikipedia).  It’s no surprise that Curious George Goes to a Costume Party became a family favorite among our Halloween book collection.  In this story, George attends his first costume party, and accidentally startles party goers as he appears to be a ghost.

In the spirit of this book, we loosely used an idea from Happy Hooligans to make cotton ball ghosts.  To create our ghosts, I pulled cotton balls into thin wisps.  Next, I squirted glue onto black construction paper into the shape of a ghost and let the quads stick the wisps over the glue.  Finally, I let them choose a pair of googly eyes to stick on the top and a pre cut black oval for a mouth.

cotton ball ghost toddler craft

Instead of using black googly eyes, I let the kids choose their own color. Rylin naturally chose pink…

hugs!

Amber

Psst….If you give one of our projects a try, we’d love to see your handiwork.  You can share them on our Facebook site.

Read This, Made That {Candy Corn}

In this cute little tale, 10 Trick-or-Treaters, the children’s cache of candy is displayed on the final page for a counting game.  The iconic candy corn was in the mix and naturally inspired our next craft.

To create our masterpieces, I cut orange construction paper into triangle shapes with rounded edges.  Next, I taped the triangles into the bottom of a shallow pan.  I dunked about 4-5 marbles into white tempera paint, dropped them into the pan, then let each child tilt the pan.  In time, the marble made its way across the paper several times over creating a striped effect.  I then dropped 4-5 marbles dipped in yellow paint and repeated the process.  When we were done rolling marbles, I thought they looked boring.  We added a dusting of orange glitter for sparkle.

After our works of art were complete, everyone sampled candy corn for the first time.  For a sweet and salty snack we also paired candy corn with salted peanuts.  Delicious!

Candy Corn craft: cut orange paper into triangles then roll marbles dipped in white and yellow paint over the paper


Do you have a favorite seasonal candy?

Hugs!

Amber

Read This, Made That {Paper Plate Jack-O-Lanterns}

After years of hating Halloween, the kids are helping me change my perspective. We live in one of the best neighborhoods for Halloween, and it’s high time I enjoy it. In fact, last spring as we searched for a new home, we felt a sense of relief knowing we would stay in our beloved neighborhood. It’s the type of community where families play outside together, take walks, ride bikes, and know the neighbors. On Halloween night, hundreds of children will line the sidewalks escorted by parents clad in costumes. Families living on cul-de-sacs will invite others to join them for snacks and activities. This neighborhood makes Halloween night exactly what it should be- filled with community fellowship, and I want the quads to experience every bit of it.

When October rolled around, a family friend gave each of the quads a Halloween themed book. Little did she know, these books would help stir the spirit of Halloween. As I read these toddler books, it brought to mind the nostalgic parts of Halloween, and the reasons kids adore it. As I read, I began explaining the process of trick-or-treating and other spooky traditions, increasing our anticipation of the holiday.  In addition to the books gifted to us, I scored a treasure trove of Scholastic books at our community garage sale, which resulted in a decent collection of Halloween themed toddler books.  Since I’m a sucker for thematic crafts and activities, we spent the month of October creating a gallery of Halloween themed art loosely tied to toddler literature.  Check out my post about literacy based crafts to see how I approach these.  We read several if not all of these books at least once daily.


Halloween books for toddlers and preschoolers


We kicked off our Halloween literacy based crafts with Five Little Pumpkins paired with  a paper plate jack-o-lantern craft. The book is actually a poem, and the quads now recite  it as I read, which melts my heart every single time.

To create the craft, each child painted a plate with orange tempera paint (mixed with a few drops of dish soap). When the paint was dry, I dotted glue on the plate where the face should go, and let them add facial features (pre-cut them from black construction paper). I finished it off by tracing their hands on green construction paper to create leaves and a stem.

Toddler craft: paper plate jack o lantern

Stay tuned to find out what other crafts make up our Halloween art gallery.  I’ll be posting a new one daily until Halloween.

Hugs!

Amber

Personalized Pumpkins

After visiting the Flower Mound Pumpkin Patch, we amassed a variety of pumpkins, which needed decorating, and of course personal touches.  Pumpkin carving is a festive tradition, but in the Texas heat they grow mold almost immediately, and you can’t appreciate them long-term.  Instead of carving, I prefer a little paint and a few stickers.

With the first found of pumpkins, we let each child choose a tempera paint color to slather on a pumpkin.  It was an utter mess, but they had a blast expressing their creative sides.  Plus, it was a full on sensory experience; they covered their arms, hands, and cheeks before they finished.  After our little art extravaganza, I used copious amounts of Shout and washed clothes multiple times to rid them of bright paint splatter.  Thankfully, there’s no remaining evidence of art on their clothes.

painted pumpkins painted pumpkins

For the second set of pumpkins, I created a monogram for each child using the same process I used to make cookies for Santa plates.

First, I printed individual letters in 300 pt French Script font from Microsoft Word.

DIY monogrammed pumpkin

Then, I flipped the paper over and rubbed pencil over the area where the letters were.

DIY monogram pumpkin

I pressed the letters, print side up onto a smooth part of the pumpkin and traced over it with heavy pressure using a pen.

DIY monogram pumpkin

This left a faint outline, which I filled in with a paint pen. It’s very faint in the picture, but there is a light outline of the “R” on the face of this pumpkin.

DIY monogram pumpkin


When I was finished, we had four handsome monogrammed pumpkins.  I let the kids loose with Halloween stickers so they could leave their own flare.

DIY Monogram pumpkins

The best part about pumpkin decorating is displaying them on the porch for others to admire.  The quads beamed with pride when I let them carry their own pumpkins to the porch.  I helped with arrangement of course.

IMG_0457

We placed the tempera paint pumpkins under the covered part of the porch since rain tends to wash them clean.  Each time we go out the front door, the kids point out their personalized pumpkins with their “letter”.

IMG_0463

Fall porch decor

On Halloween Eve, we’ll carve the largest pumpkins together and cross our fingers they last 24 hours.  What is your favorite way to decorate pumpkins?


Hugs!


Amber

Flower Mound Pumpkin Patch {Spot to Visit with Tots}

Lists of places to take toddlers in Dallas Fort Worth

You may recall several months ago, I shared a listing of toddler friendly places we’ve visited with the quads.  After writing that post I was eager to begin a new list, but a compilation of ten places may take another year.  Instead of waiting for a list I’m starting a series, sharing as we go.

Last weekend we joined our local mothers of multiples club at the Flower Mound Pumpkin Patch, and I believe we began a new fall family tradition.  George had to work, but Nisey and Poppa joined us for the experience and helped me manage four two year olds sans strollers.  Here’s the scoop:

Flower Mound Pumpkin Patch

Flower Mound Pumpkin Patch

Location:

Double Oak Ranch
5100 Cross Timbers Rd
Flower Mound TX 75028
(817) 430-4536

Hours:

Seasonal from October 1st – 31st
9:00 am – 7:00 pm

Cost:

Parking is $5 and ALL activities (e.g. train ride, hayride, corn mazes, bounce houses, photo opportuniites) are included

Buses and walk-ins are $1

Favorite Features:

Our crew enjoyed running through the rows and rows of pumpkins as well as the hayride.  For older kids, there are bounce houses and corn mazes.


Flower Mound Pumpkin Patch Flower Mound Pumpkin Patch

Flower Mound Pumpkin Patch

Running in a pumpkin patch can be dangerous business.

The pumpkin patch is a fantastic place for snapping photos.  During our visit it was overcast, which made for great fall pictures.

Flower Mound Pumpkin Patch


There are hundreds of character cut outs perfect for photo ops.  Our attempts to convince the quads to pose with the cut outs were futile, however.

Flower Mound Pumpkin Patch

Since the quads were unwilling to sit next to the cutouts, this is the only picture we snapped of them. This is a mere fraction of the cut outs we admired.  Literally every popular children’s character is represented somewhere on the farm.

There isn’t a petting zoo, but we had a blast watching the farm animals.  The main attraction? Horses snacking on pumpkins of course.

Flower Mound Pumpkin Patch

Flower Mound Pumpkin Patch

Tips:

On weekdays only drinks are sold on site, so pack snacks or a picnic to enjoy during your stay.  On Saturday and Sunday, vendors sell seasonal favorites such as kettle corn, grilled burgers, corny dogs (Fletcher’s!), and pumpkin bread.

Flower Mound Pumpkin Patch

After nibbling at our picnic lunch, these four gobbled bright, festive cupcakes provided by our local moms of multiples club.

Radio Flyer wagons are provided free of charge, you can borrow one to cart any bags, snacks, ect as well as any pumpkins you plan to purchase.  No need to bring your own wagon!

DSCN0864

Bathrooms are port-o-potties so plan ahead the best you can…I personally avoid those at all costs.

The Flower Mound Pumpkin Patch gave us a fantastic, nostalgic fall experience. What is your favorite fall activity?

hugs!

Amber

10 Spots to Visit with Tots in Dallas Fort Worth

Because the quads were born nine weeks early we took extreme precautions their first year of life to protect them from potentially fatal germs.  It was difficult being homebound most of the time, but we do not regret that time since we did not have a single sick visit to the pediatrician until 13 months.  It’s been a year since we lifted our “lock down” restrictions and have been on a mission to explore the greater Dallas Fort Worth Metro area ever since.  It’s always a challenge getting out and about with four toddlers, but a worthwhile mission.  With each new adventure the quads learn just a bit more about the world around them.

10 places to take babies, toddlers, and preschoolers in the Dallas Fort Worth area

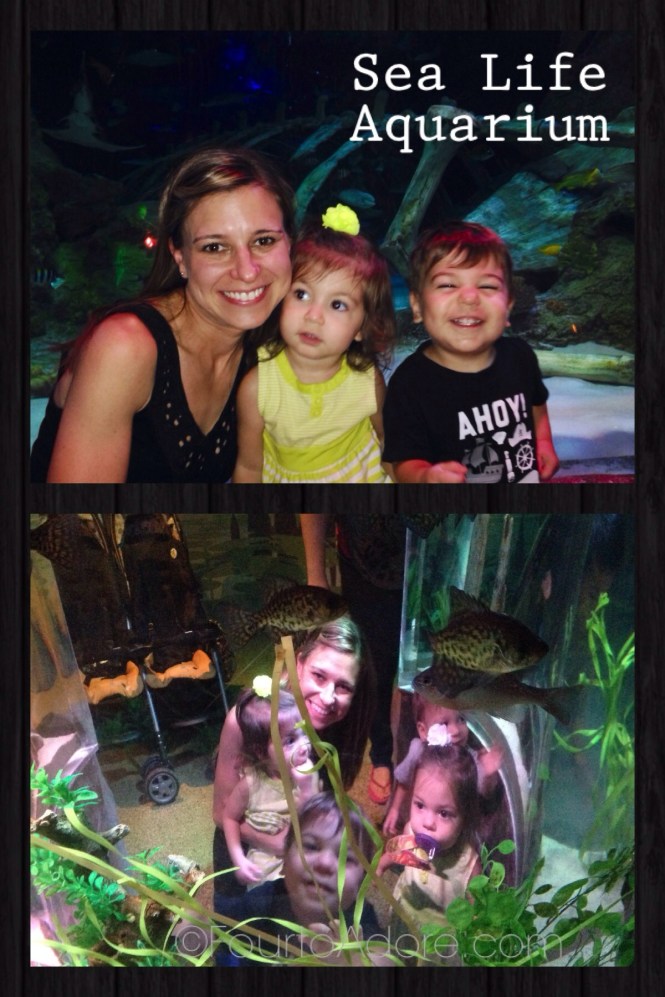
1. Sea Life Aquarium

IMG_2830.JPG

Sea Life Aquarium

Location:

Grapevine Mills Mall
3000 Grapevine Mills Parkway
Grapevine,Texas 76051

Hours:

Monday – Saturday 10:00 am – 7:30 pm
Sunday 11:00 am – 5:30 pm

Cost:

Adults $20

Children 3 and up $16

Children 2 and under FREE

Favorite Features:

Seeing the fish that were featured in Finding Nemo (Dori, Nemo, and Marlin)

360 degree aquarium

Touching the sea stars

The toddler slide in the play area

Tips:

Arrive early and go on a weekday if possible as the aquarium becomes crowded easily.

Look for coupons.  We were able to get $4 off each adult ticket with a single coupon.

Pack a picnic lunch to enjoy in the food court of the mall, or grab lunch in the food court.  After you buy aquarium tickets you are allowed reentry during the same day.

The aquarium is stroller friendly so bring one along if you have young toddlers who may tire easily.

2. Celebration Party & Event Center

Celebration Party & Event Center Celebration Party & Event Center Celebration Party & Event Center

Location:

5950 Park Vista Circle #140, Keller, TX 76244

Hours:

Tuesday-Friday 10:00 am – 2:00 pm

Cost:

12 months and up $5

Adults accompanying children FREE

Under 12 months FREE

Favorite Features:

Children’s town made up of a fire house, police station, hair salon, restaurant, movie theater, day care, and hospital

Toddler sized bounce houses

Cozy coupe cars

Tips:

If you may go frequently, consider buying a punch card ($40 for ten punches).  It can be used with multiple children and will save you money over time.

All children must have a signed waiver to play.  You can sign it online ahead of time to save you time in the center.

You can bring your own food and drinks so pack a picnic or snacks to enjoy.

Shoes aren’t allowed in the bounce house area so skid proof socks are a great way to keep your little one’s feet clean.

Arrive early to avoid crowds and go during the weekday free play times.

If you have a child who receives ECI services, ask your case manager about their monthly play dates.  Admission is discounted for ECI families during the play date.

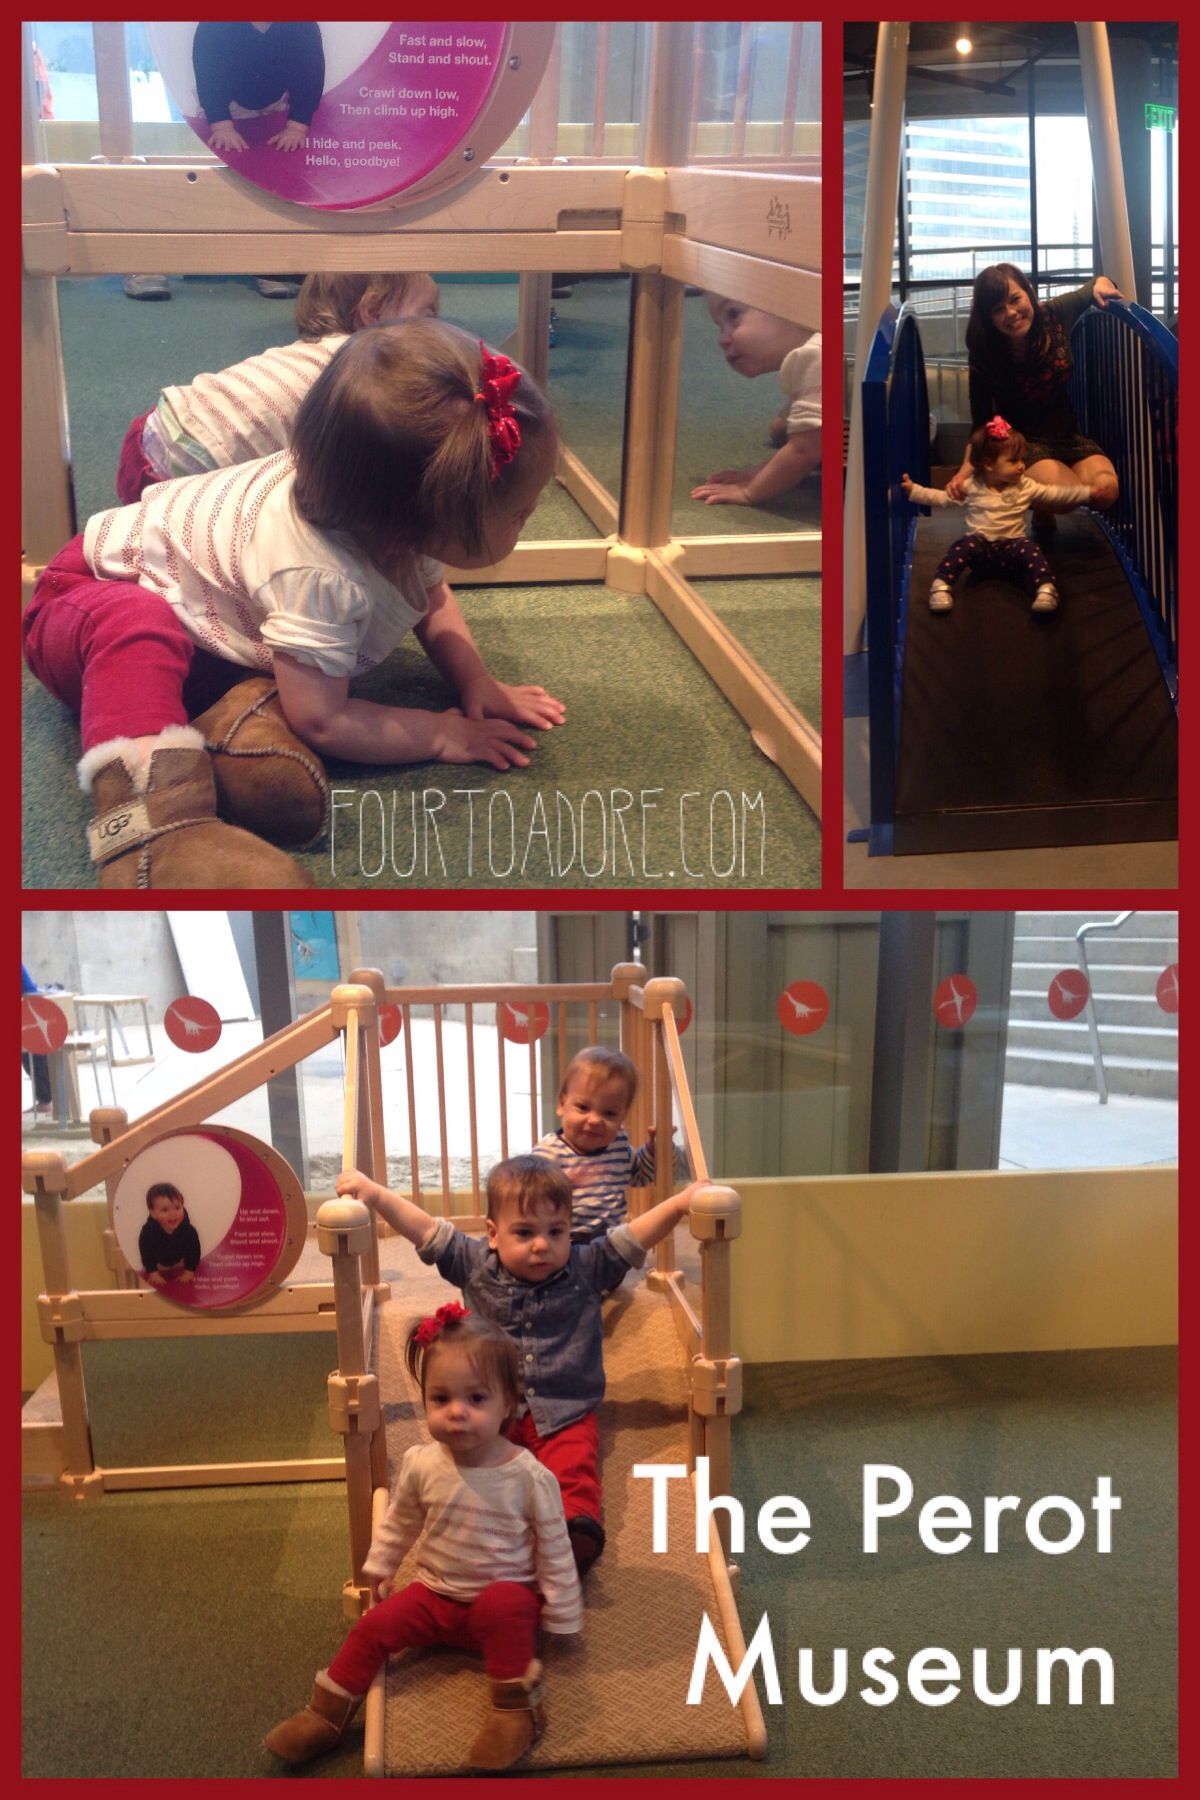
3. Perot Museum of Nature & Science

 The Perot Museum

Location:

Hours:

Monday-Saturday: 10:00 am – 6:00 pm
Sunday noon-6:00 pm 
Thursday Night Late Nights: 5:00 -9:00 pm

Cost:

Prices vary depending on which exhibits you choose.  General exhibit admission is as follows,

Adults $15

Children 2-11 $10

Seniors 65+ $12

Youth 12-17 $12

Children under 2 FREE

Best Features:

The children’s museum located on the first floor was most appreciated by the quads.  They splashed in the water table and loved the side area.

Tips:

Purchase your tickets online ahead of time.  Your ticket is valid for the entire day after your reservation time, so choose an early time even if you are going later.  (e.g. if you choose 12:00 pm, you will not be allowed entry until 12:00 pm or later.  So don’t expect to enter even at 11:59 am).

The Perot has elevators, but they tend to become extremely crowded at there is a long wait time.  Therefore it is not ideal for strollers.  I do not plan to bring the quads back until they can manage walking distances and do not need strollers.

No outside food or drink is allowed in the museum area, but there is a lovely concrete park with splash pad that would be great for a picnic.  With your ticket, re entry is permitted during the same day.  Therefore, you could leave the museum for a picnic lunch and return later in the day.

Check to make sure the museum is not closed for a private event.  It was closed the original date we planned to visit.
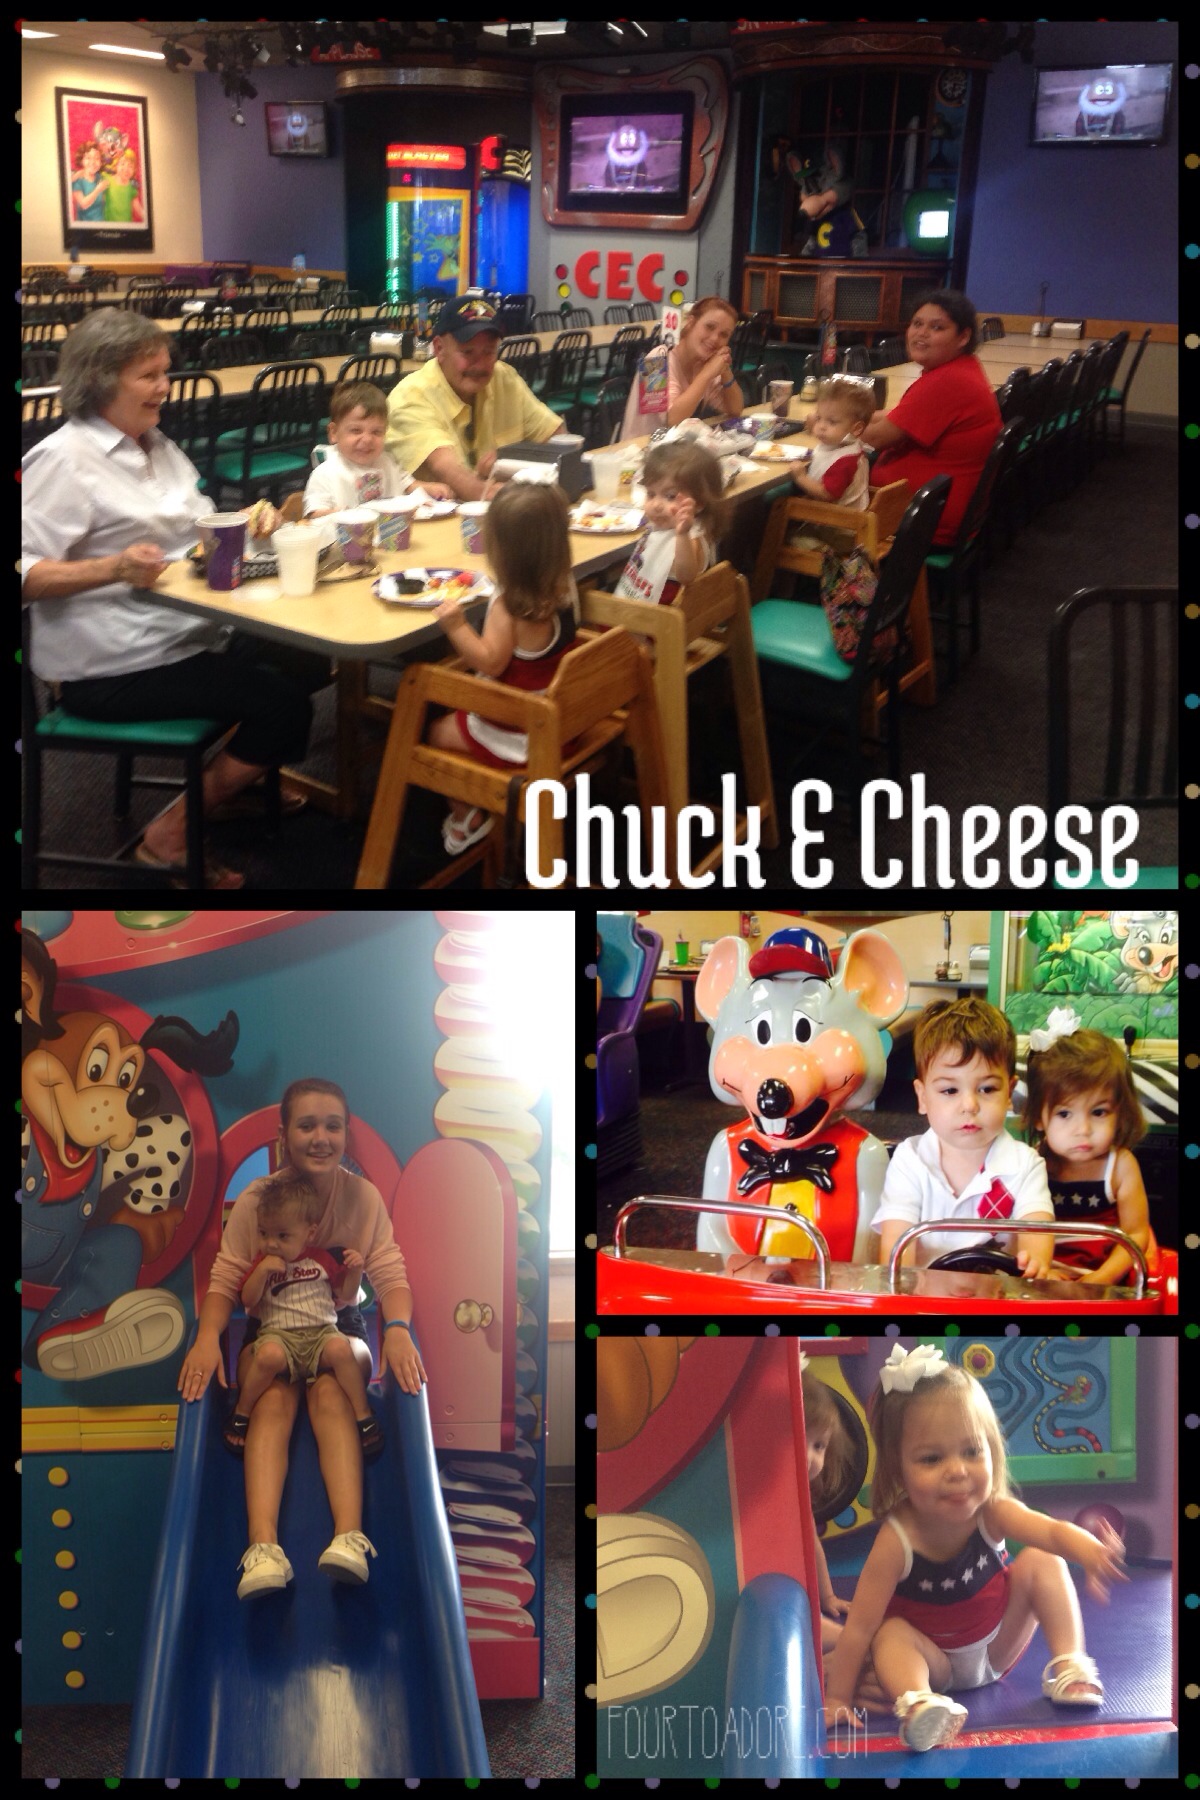
4. Chuck E. Cheese

Chuck E. Cheese

Location:

There are multiple locations, check for your nearest location.

Hours:

Varies by location

Cost:

Technically, entry is free.  In order to play games, you’ll need to purchase tokens, and you may choose to order food from the menu.

Best Features:

Dancing time with Chuck E. Cheese (the quads loved chasing him and playing follow the leader)

The toddler play area/ slide

Tips:

Complimentary bibs are provided so no need to pack one (or more) in your diaper bag.

Remember, you don’t have to buy a meal to play at Chuck E. Cheese.  I’d suggest going when it’s not a mealtime, and either order a small snack to enjoy or eat prior to arrival.  Going when it’s not a mealtime means it’ll be less crowded and you will likely spend less money on food.  You can buy tokens and enjoy the games and play area even if you don’t buy food.

If you sign up for the Chuck E. Club, you’ll receive discounts, and a calendar with 10 free tokens.
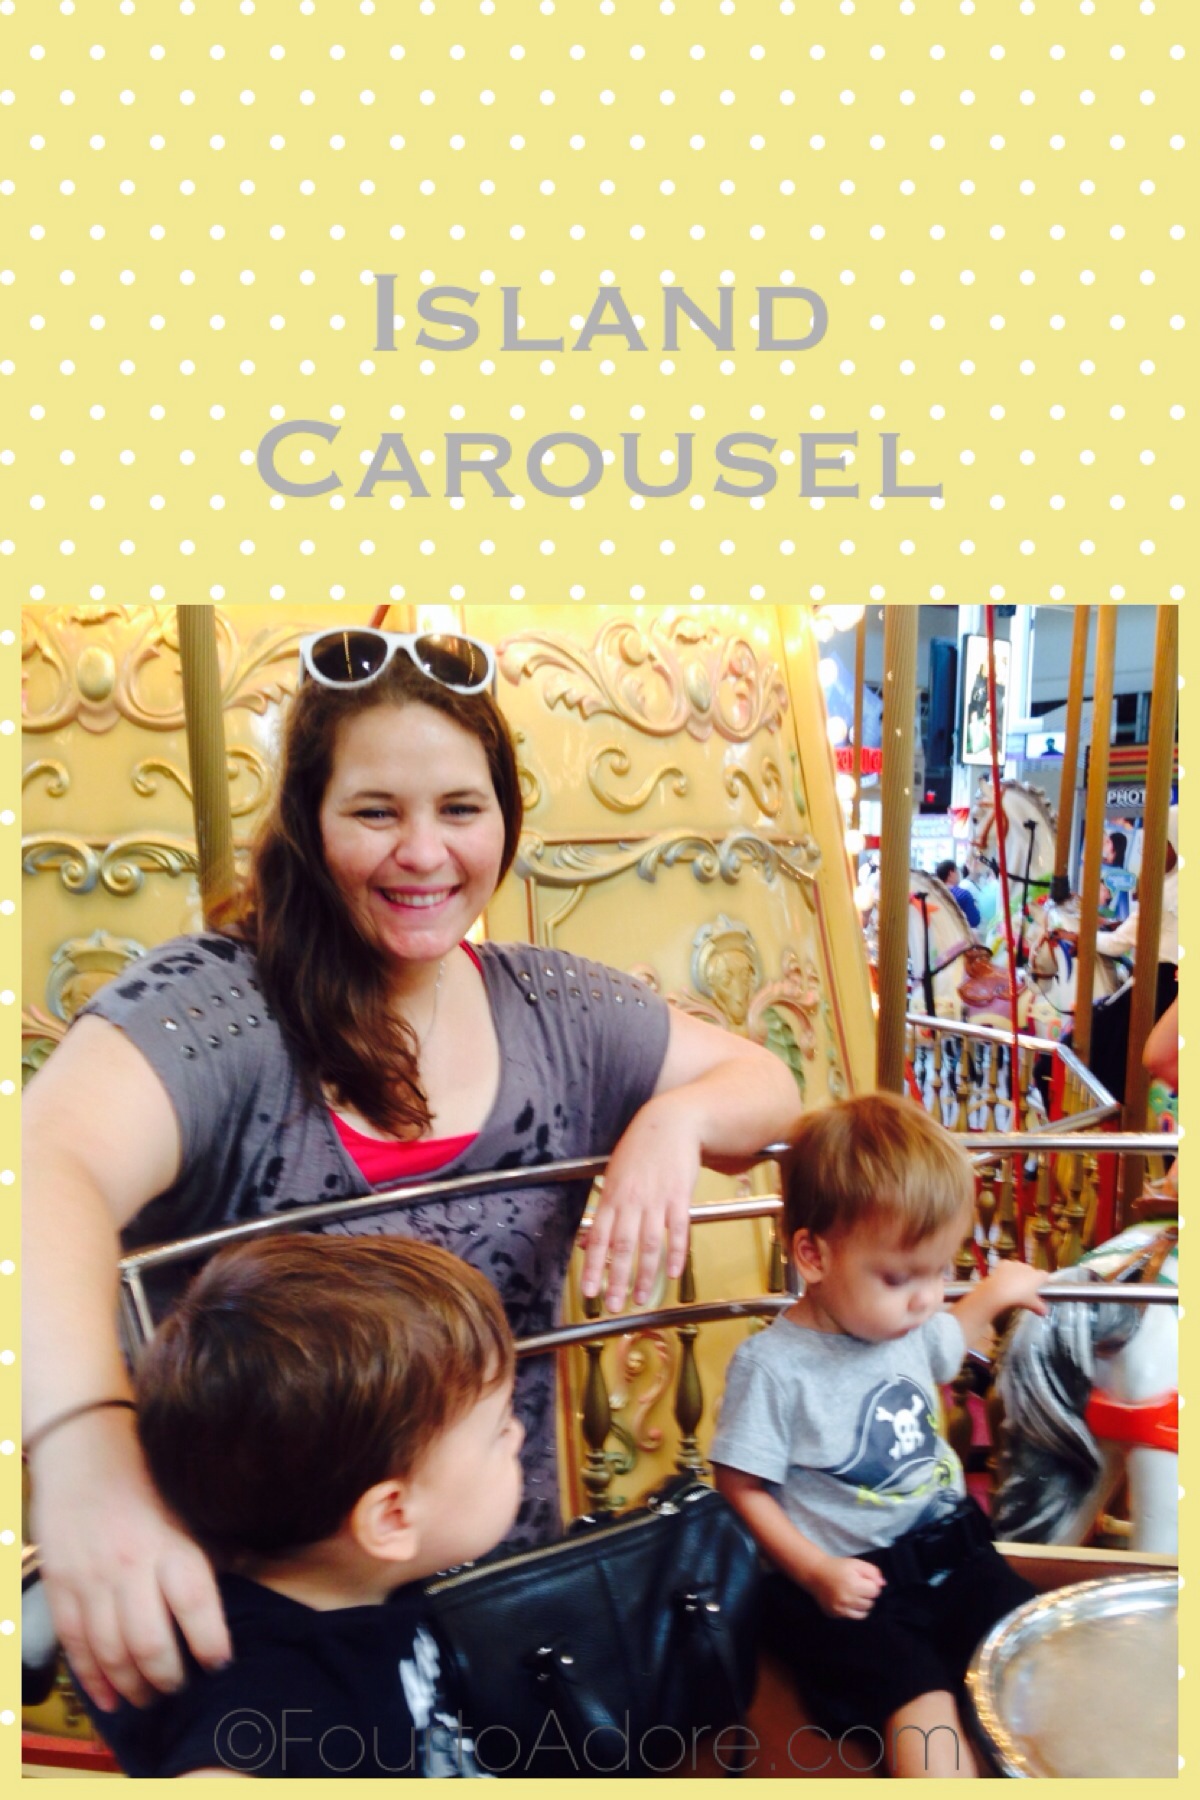
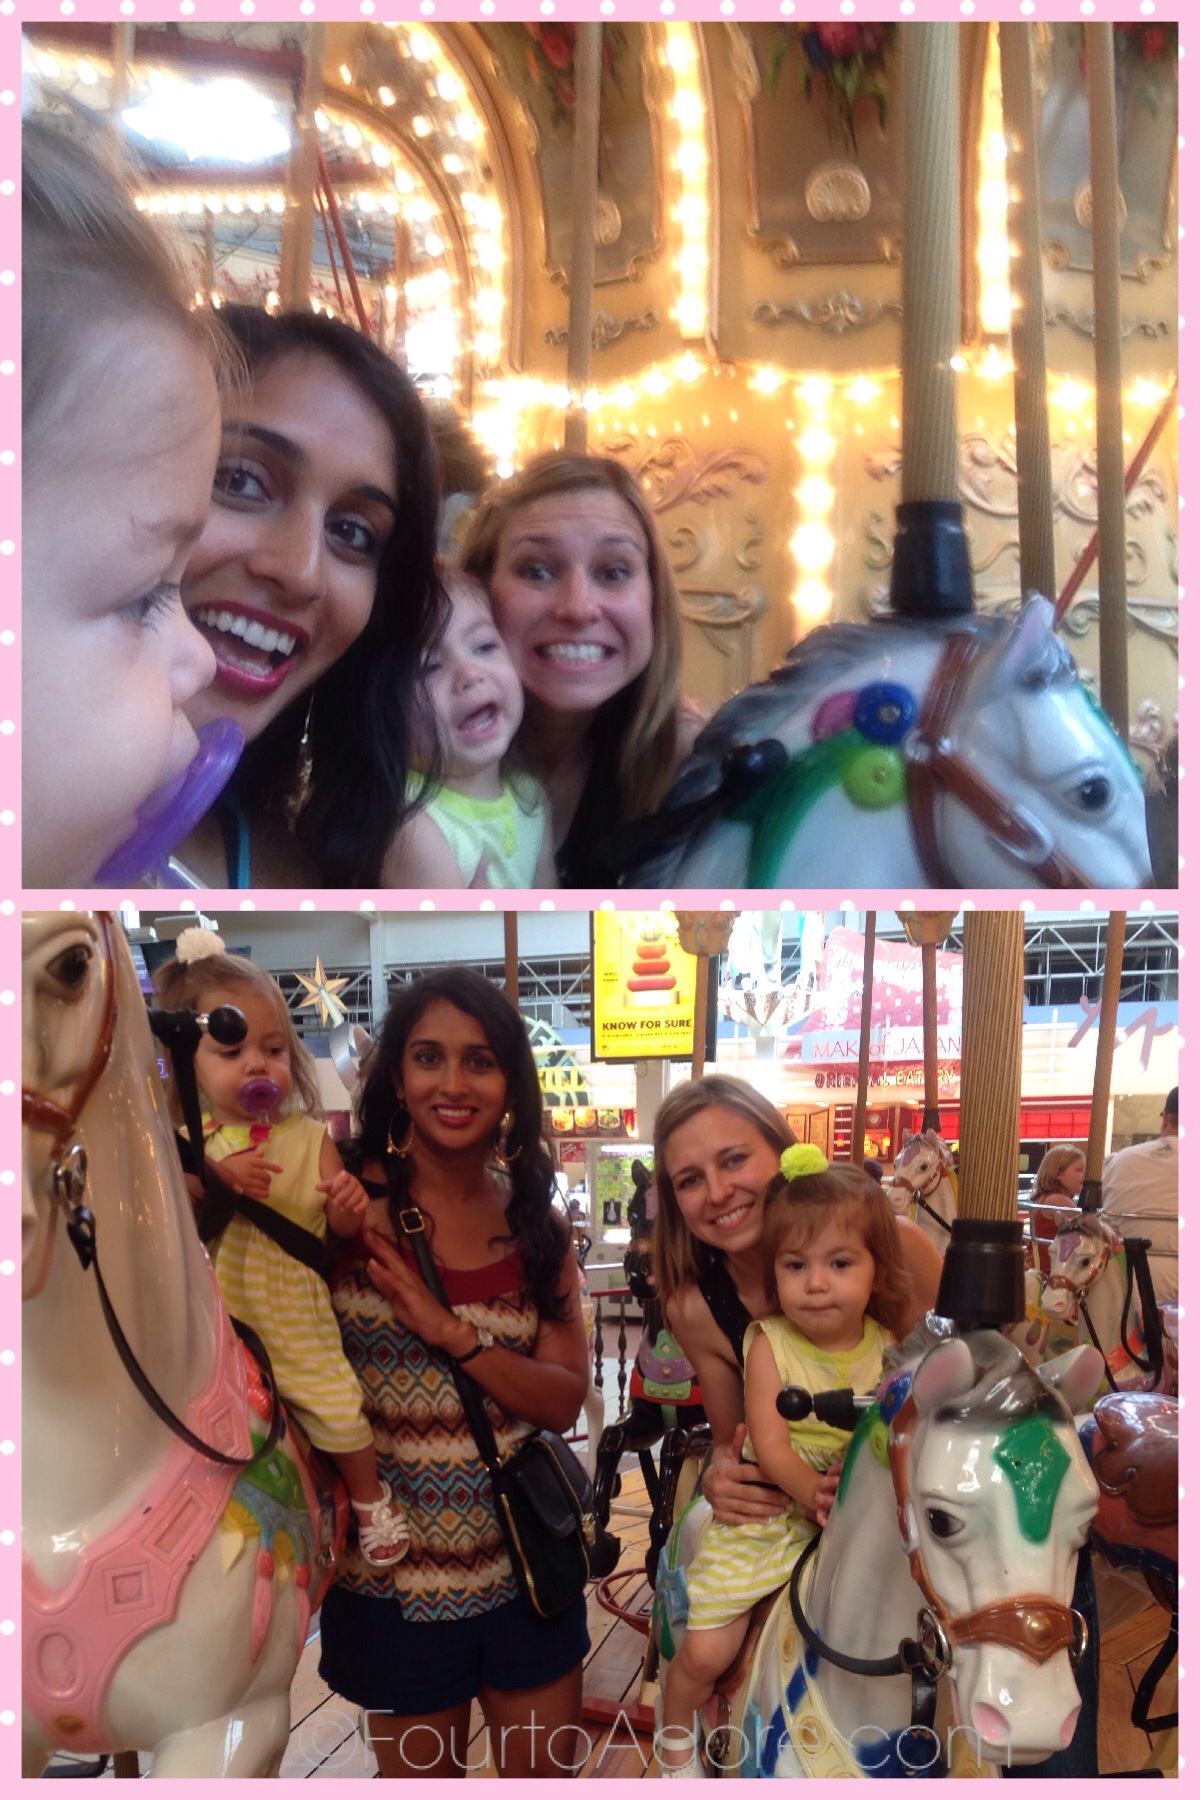
5. Island Carousel 

Island Carousel Island Carousel

Location:

Grapevine Mills Mall

3000 Grapevine Mills Parkway Grapevine, TX

(there are many other locations nationwide)

Hours:

Monday – Saturday 10:00 am – 9:00 pm

Sunday 11:00 am – 7:00 pm

Cost:

Children 2 and up $2 per ride

Adults riding with a child are free

Best Features:

Carousels are nostalgic!

It’s located close to the Sea Life Aquarium and Rainforest Cafe so you can stop by if you are already visiting Grapevine Mills.

Tips:

If you have multiple children or plan to visit often, don’t forget to get a frequent rider punch card.  Your 11th ride is free.

If your child has never ridden a carousel, you may want to choose a stationary horse or sleigh seat.

6. Paradise Pond

Paradise Pond

Location:

First Baptist Church Grapevine

301 E. Texas Street

Grapevine, TX 76051

Hours:

Thursday & Friday mornings 9:00-11:00 am (arrive at 9:00 sharp because they close the doors when they are at capacity)

Cost:

$1.00 per person (ALL ages, babies & adults)

Best Features:

Play areas are sectioned off by picket fences, which makes keeping an eye on babies and toddlers easy.

They have a limit to the number of guests per day so it doesn’t get too crowded.

Tips:

Shoes are not allowed in the play area, and socks are required.  They have loaner socks available, but you’ll want to pack your own.  If you feel generous, and want to support the ministry, I suspect they’d appreciate new packages of white socks, especially in toddler sizes.

The area is designated for ages 2 to 6th grade.  There are plenty of areas for smaller babies to play with close supervision.  Older children, especially pre teens would not likely find this play area entertaining.

There is a required Liability Release Form that can be printed and completed at home.

Girls wearing dresses are not allowed in the jungle gym or bounce house, so dress your children accordingly.
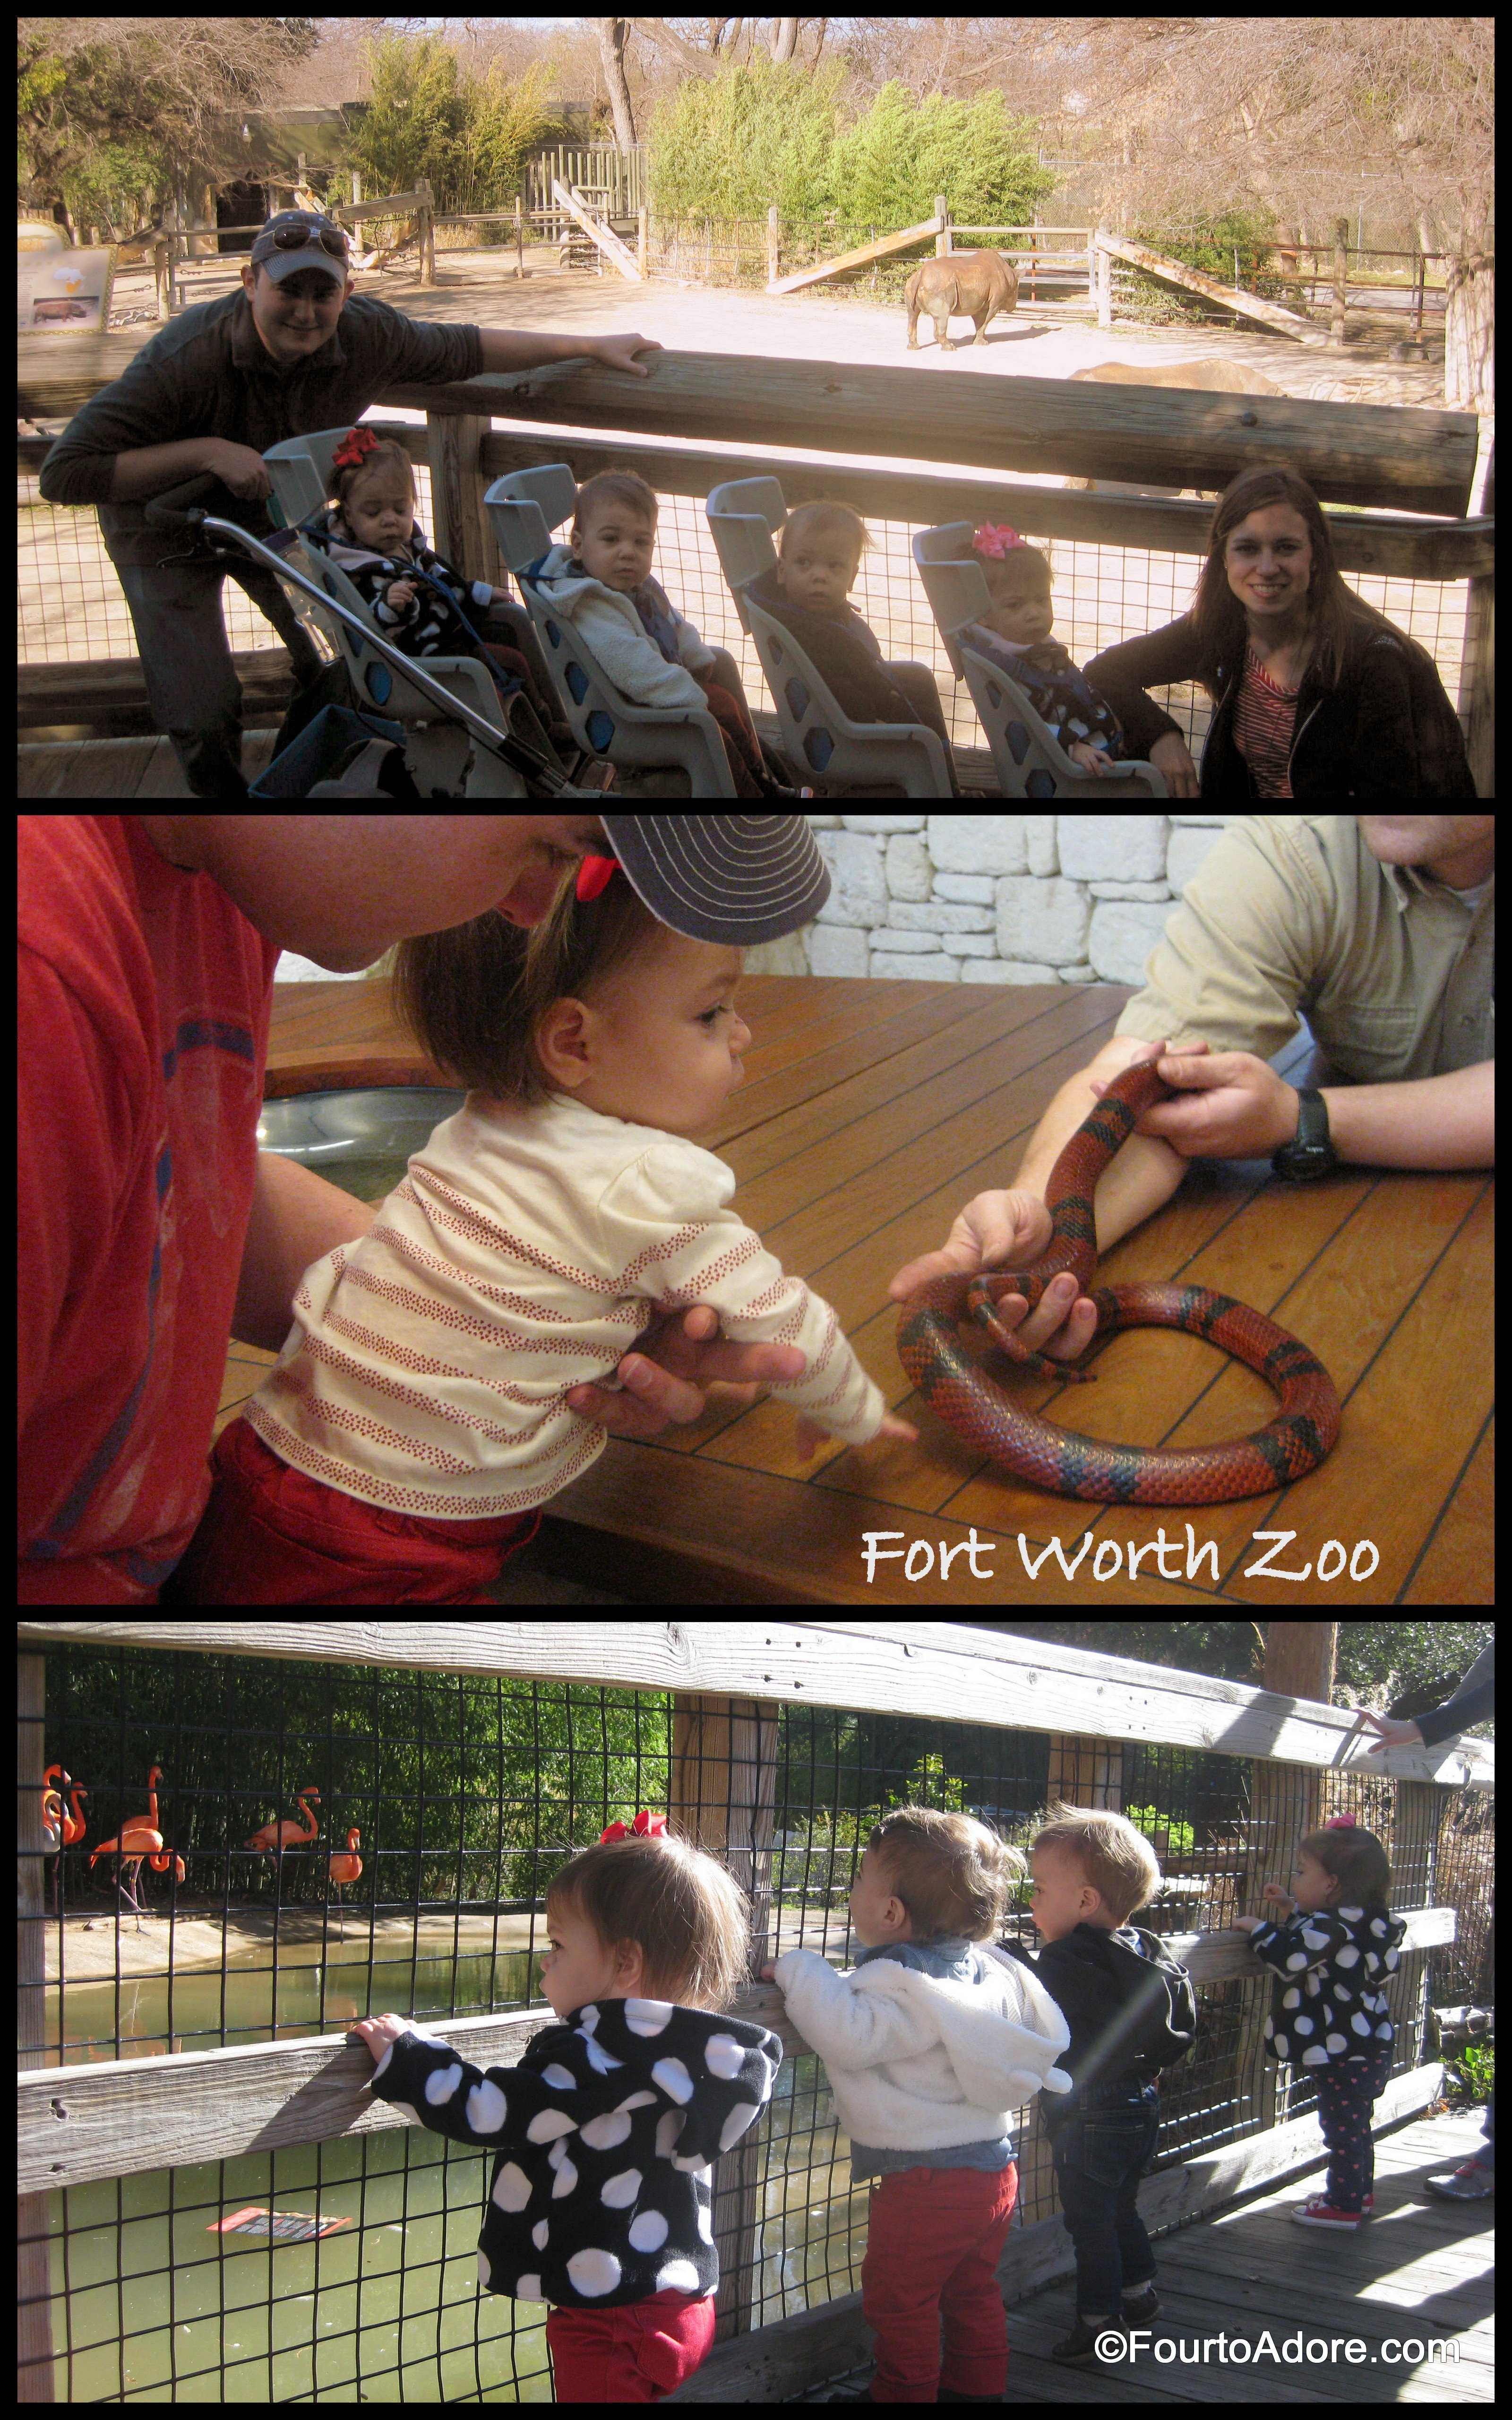
7. Fort Worth Zoo

Fort Worth Zoo

Location:

1989 Colonial Pkwy, Fort Worth, TX 76109

Hours:

open 365 days per year

10:00 am – 5:00 pm (hours may vary on holidays)

Cost:

Adults (13+) $12

Children (3-12) and Seniors (65+) $9

Children 2 & under FREE

Parking $5/ vehicle

Best Features:

MOLA (museum of living art), which houses the reptiles and fish

the food court is open to MOLA, which creates an entertaining back drop for family meals

There is a toddler and children’s petting zoo and play area that looked great, but we did not have time to visit this trip

Tips:

If possible, visit on a Wednesday when admission is half price.

Check for coupons, local employers often have access to discounted tickets as well.

The zoo is stroller friendly so be sure to bring one if you have little ones who will tire from lots of walking.

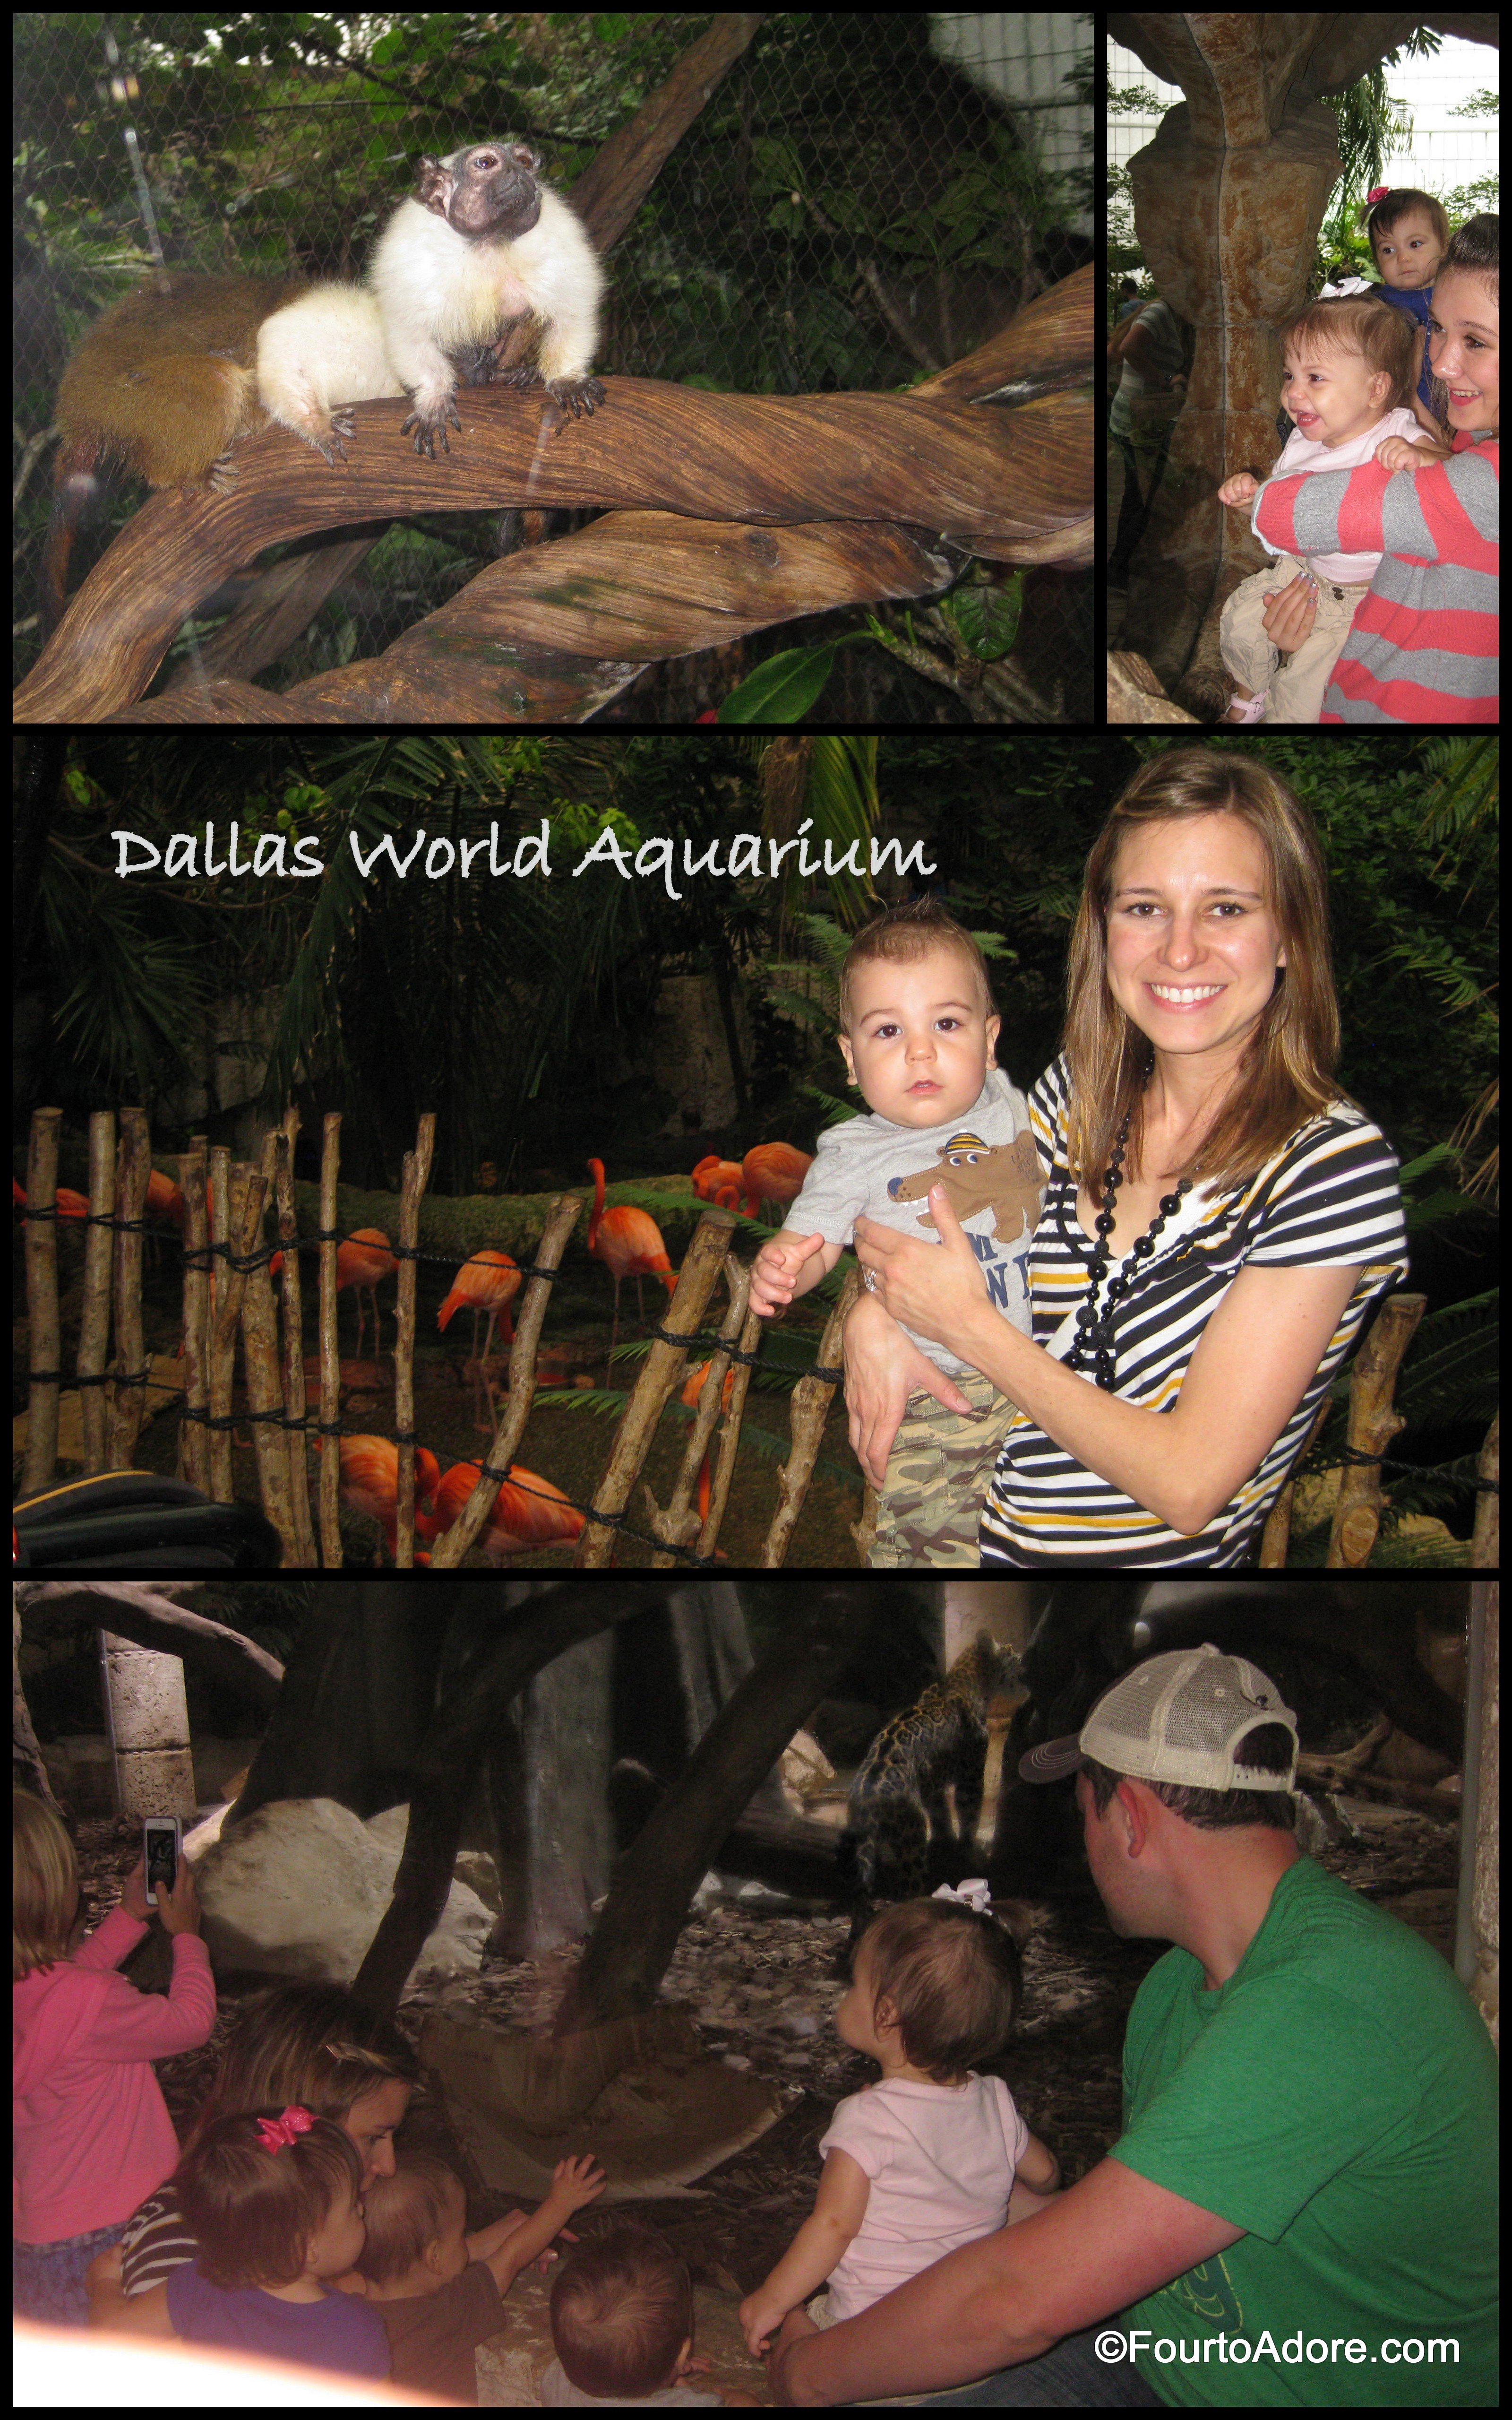
8. Dallas World Aquarium

Dallas World Aquarium

Location:

1801 N Griffin St, Dallas, TX 75202

Hours:

9:00 am – 5:00 pm daily

Closed Thanksgiving and Christmas

Cost:

Adult  (13+) $20.95

Child (2-12) $12.95

Under 2 FREE

Senior (65+) – $16.95

Best Features:

The majority of the facility is indoors and climate controlled so it’s a great place to visit if it’s rainy, too hot, or cold.

Despite being an “aquarium”, a significant portion of the facility is made of rainforest creatures.  The quads most appreciated the monkeys.
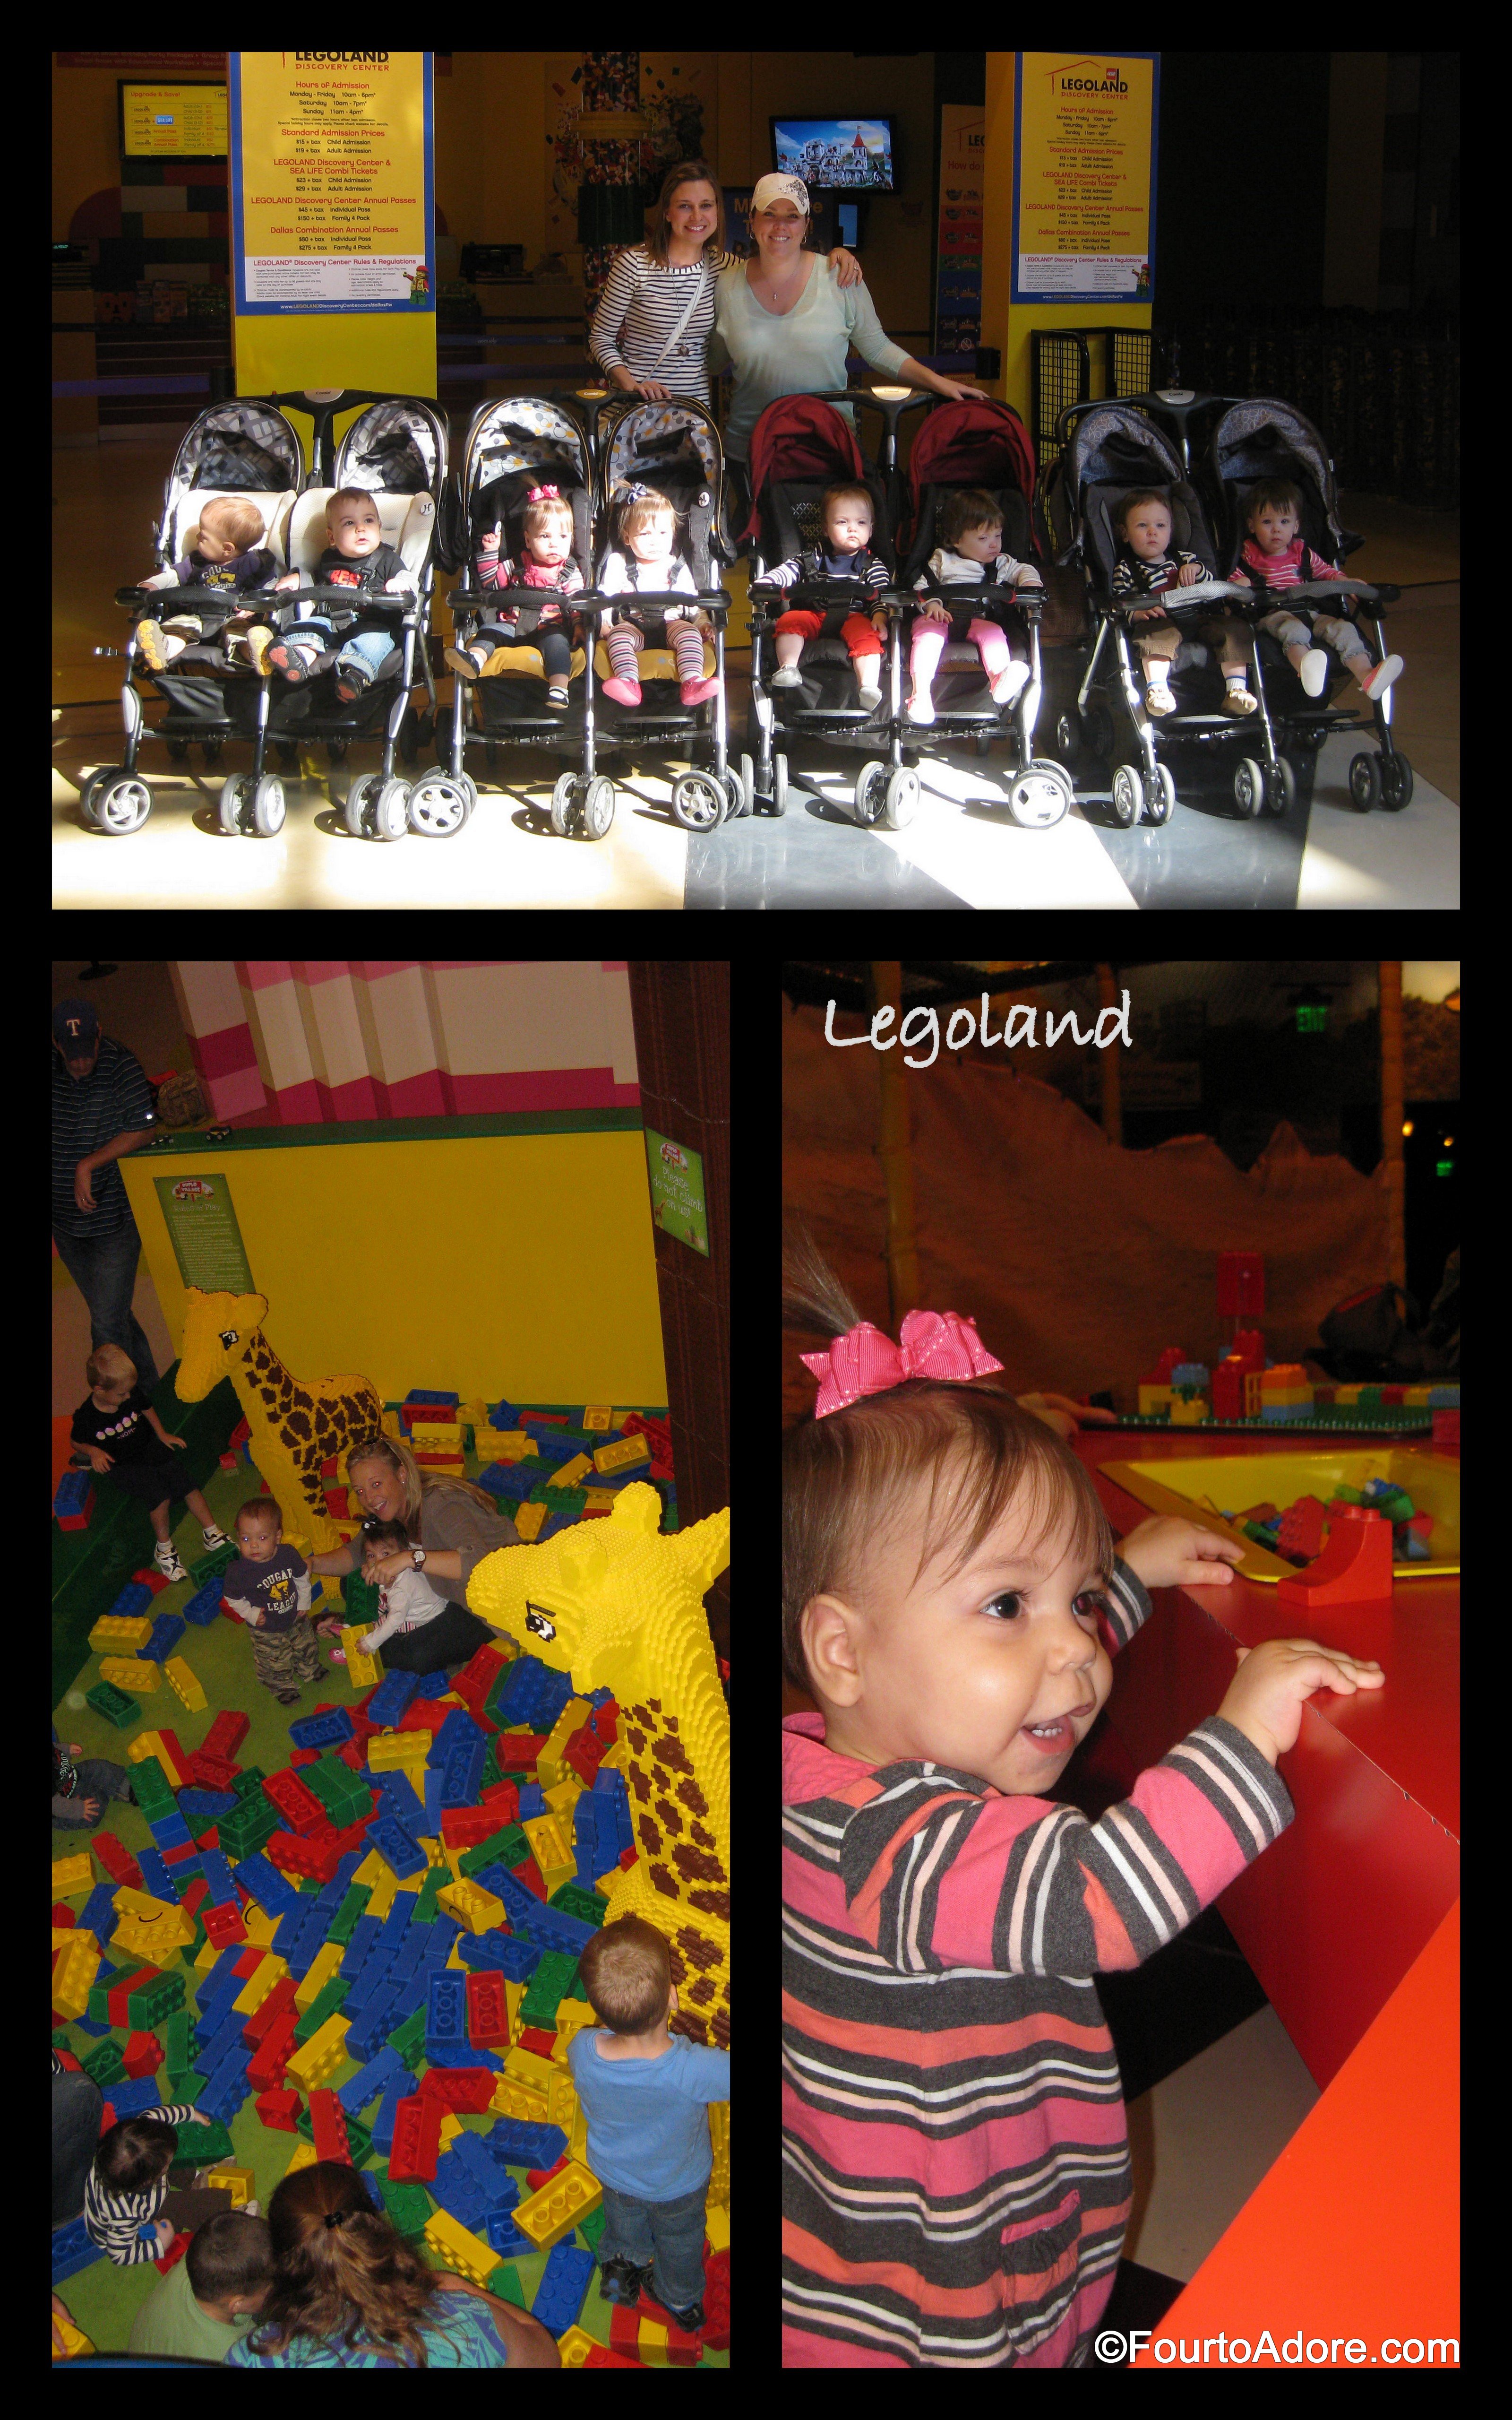
9. Legoland

Legoland

Location:

Grapevine Mills Mall

3000 Grapevine Mills Parkway, Grapevine, TX 76051

Hours:

Monday – Friday: 10:00am – 6:00pm

Saturday  10:00am – 7:00pm

Sunday 11:00am – 4:00pm

Cost:

Children 2 & under FREE

2 and up $18

Best Features:

The Lego miniature of Dallas-Fort Worth was by far our favorite attraction.

Tips:

Look for coupons, especially if you are also interested in visiting the Sea Life Aquarium.  There are often discounts if you buy tickets together.

If you don’t score a coupon, you can save money by booking tickets online the day before.

There is no reentry and outside food and drinks are not permitted so plan accordingly.

Allow about 2-3 hours for your visit.

While babies and toddlers are welcome to play, Legoland would likely be most appreciated by children over three.

10. Old Town Lewisville Playtown

Old Town Lewisville Playtown

Location: 

Vista Ridge Mall

2401 S. Stemmons Freeway
Lewisville, Texas 75067

Hours:

Open during mall hours, except for cleaning at 3:00 pm

Cost:

FREE

Best Features:

The entire play area is soft sided, which is ideal for new walkers, and even crawling babies.

Everything is toddler sized and not too tall for younger babies.

The price is unbeatable!!!!

Tips:

Visit early in the day, or after the 3:00 pm cleaning so the area is fresh.

There are so many more places on my list….The Dallas Arboretum….The Botanical Gardens….The Dallas Zoo….AND at some point we plan to travel outside of our metro area for a legit vacation.  I’d like to wait until the quads are potty trained and sleeping in beds before we take that plunge.

What’s the best place to visit in your hometown?

hugs!

Amber

PS- If you can’t get enough of Four to Adore, don’t forget to follow us on Facebook, Twitter, and Pinterest!

Easy Literacy Based Crafts for Toddlers

Any craft can be literacy based, all you need to do is read a related book first, and introduce new vocabulary/ concepts. Pairing books with crafts helps make concepts and vocabulary salient for little ones.

Last week Rylin casually informed me that she’s not a baby.  She very earnestly said, “Mommy, I not a baby.” as she furrowed her brow.  It was like daggers to the heart, but she was right.  The quads aren’t really babies anymore.  They are transforming into children with opinions, thoughts, and voracious appetites for learning.  They never cease to amaze me with bits of knowledge they absorb.  I want to nurture this love of learning, and literacy in particular so I’ve begun literacy based crafts.  It sounds fancy, but I promise it’s simple.

Part of our day is devoted to semi structured learning activities such as flash cards, songs, and story time.  A few times a week we do a craft, most typically one I remember doing from my days in the classroom and sometimes a Pinterest find.  Crafts in themselves are fantastic for toddlers; they can teach direction following, concepts (e.g. shapes, colors, counting, alphabet recognition), develop fine motor skills, and inspire creativity.    However, children learn and recall new concepts best when associations are presented to them.  Therefore, I’m now pairing our craft activities with literature (aka toddler appropriate board books).  When I have a craft project I’d like to do, I peruse our library to find a book that coordinates with it (or a favorite book inspires a craft).  I read the book to the quads as I present new vocabulary and concepts related to the book.  As I read, I also ask many “wh” questions (e.g. who, what, when, where).  Of course, these questions are all asked with toddlers in mind.  For instance, I may say, “what animal is this?”  I also try to help the quads draw connections between the book and their world by pointing out things in their environment or that they’ve seen other places.  Following the story, we do the craft, which I hang in the quads new “art gallery” (aka a wall in their playroom).  As days and weeks pass, I continue to ask the quads about their art and the corresponding story.  When I re-read the story, I bring up their art and they proudly tell me about it.

Does it still seem complicated?  I assure you, it’s not!  Here are two recent crafts:

1. Coffee Filter Butterflies

I remembered doing this craft while working in a daycare and found two books from our shelf related to butterflies.  We happened to have The Very Hungry Caterpillar and Caterpillar Spring, Butterfly Summer so I chose those for our literature. Any book related to caterpillars or insects would suffice.

Vocabulary Introduced: Butterfly, Caterpillar, Cocoon

“Wh” Questions: What did the caterpillar eat? What did the caterpillar turn into? Where did the caterpillar sleep?

Butterfly Summer and The Very Hungry Caterpillar were both in our library so I pulled them for this activity.

First, the quads scribbled on their coffee filters with maker.  I used Sharpie to write their names.

First, the quads scribbled on their coffee filters with maker. I used Sharpie to write their names.

I sprayed the coffee filters with water to make the marker run, creating a watercolor effect.  Then I pinched the middles together and wrapped them with pipe cleaners to create our butterflies.

I sprayed the coffee filters with water to make the marker run, creating a watercolor effect. After the filters were dry, I pinched the middles together and wrapped them with pipe cleaners to create our butterflies.

Simple toddler craft: coffee filter butterflies.  Scribble on coffee filters with washable marker, spray with water, allow filter to dry then pinch together with a pipe cleaner.

I love how every time I ask the quads what a butterfly used to be they say, “caterpillar”.

2. Muddy Car Tracks

One of the quad’s favorite books is Little Blue Truck.  Again, it reminded me of working in day care and painting with car wheels.  I read the book as well as another related to cars and spent time discussing mud.  It was fitting that it was a rainy day so we peered out the window and watched the raindrops create mud in the yard.  Afterwards, I explained that my plate was covered in mud (brown tempera paint), and our toy cars got stuck.  The quads then had a great time dislodging the cars and creating muddy tracks on construction paper.  It’s been at least three weeks since we did this project, and the quads still talk about their muddy tracks, and tires getting stuck.

Vocabulary introduced: mud, stuck, tracks, tires

“Wh” Questions: What does blue truck say?  Who helped push the trucks? Where were the trucks stuck?

The Little Blue Truck was ideal for introducing the concept of mud.  However, any book related to vehicles would work for this project, and the paint could be any color to create tracks.

For this project we used: construction paper, tape, brown tempera paint, and Little People cars.

Toddler craft: roll cars through paint to create tracks.  Brown paint looks like mud.

I taped the edges of the paper down to keep it in place as they rolled cars.

Chikldren's art gallery wall using picture frames.

This is our new art gallery wall in the playroom. I used the frames from our old study, and found another to expand it. The quads LOVE seeing their materpieces and telling about them. It probably doesn’t hurt that I constantly ask them to talk about their art.

Anytime we do a craft, I try to keep it simple using basic supplies we already have, most of which I collected from the Dollar Tree.  There’s no need to make things complex or expensive for toddlers.

What is your favorite toddler craft and/ or book?  Any we should try?


Hugs,


Amber


This post may contain affiliate links.  For more information, please visit my disclaimer page.  

Mama’s Coffee Break

Once the babies became mobile, I attempted “Pack ‘n’ Play” time.  It is a Babywise concept that I’ve seen my cousins implement beautifully with their singletons for years.  In fact, Jennifer, wrote a fantastic, easy to follow explanation of how to integrate it into a daily routine. With four babies, it became a challenge.  At first, I simply added a Pack ‘n’ Play to our morning “rotation”.  I put one baby in the Pack ‘n’ Play with novel toys, one in a Jumparoo, one in an Exersaucer, and the fourth enjoyed individual time with me.  Every 10-15 minutes, I rotated the babies to a new station so they all got to experience each activity.  It wasn’t exactly the same as I’d seen my cousins use Pack ‘n’ Play time, but it worked relatively well.  That was, until the quads learned to walk.  At that point, when one baby was in the Pack ‘n’ Play the others either whined to join them or the contained one wailed to escape.  I then nixed the notion of Pack ‘n’ Play time.  After all, the concept was to promote independent play while allowing mom a bit of time to accomplish other things.  That was not happening.  It became more of stress, and I hated keeping a giant Pack ‘n’ Play set up in our already cramped quarters.  About a month ago, I folded up our Pack ‘n’ Play and stuffed into the boys’ closet.

Ideally, Pack 'n' Play time would look like this, with each of the quads taking a turn.

Ideally, Pack ‘n’ Play time would look like this, with each of the quads taking a turn with a puzzle or other interesting toy.  I don’t know why I didn’t take “honest” pictures as well.  You know, the ones with three screaming babies pressing their noses to the side of the Pack ‘n’ Play or one baby tossing the toys out and wailing.  I just didn’t.

As 18 months approached, so did the dreaded morning nap drop.  Seriously, as our friends with same age multiples dropped this nap, I clung to it dearly.  Morning nap has never been long, but it is “me time”.  When the quads go down for morning nap, I make sure to take care of me.  It’s when I get dressed, brush my teeth, sip my coffee, catch up on emails, and perhaps tackle a few chores.  It does wonders for the rest of our day.  I feel better and have far more patience than when morning nap goes awry.  The time inevitably flies, but I savor every last second of it.

By 17.5 months, it was apparent that morning nap was headed out the door forever.  EEEKS!!!  Yet, the babies still seemed to need rest time as much as I needed the quick recharge.  Someone would request it saying “night night”, and another would curl up with a blankie on the floor.  Rest was still needed.  However, if I allowed them to continue with a 45-60 minute morning nap, then our afternoon was horrendous.  No one slept in the afternoon and everyone was cantankerous.  If we totally skipped morning nap, everyone was cranky and still didn’t nap well in the afternoon (even if afternoon nap was earlier).

Clearly, it was time to evolve.  Instead of going cold turkey on dropping morning nap, I instituted Quiet Time, which is my adapted version of Pack ‘n’ Play Time.   Rather than darkening the nurseries for nap, I left the windows open and lamps illuminated.  I also selected a novel toy (preferably a coveted one) and a few books for each crib, encouraging the quads to explore them.  At first, we had Quiet Time at ten sharp when morning nap would normally occur.  The quads generally played happily in their cribs for the first 10-15 minutes then drifted off to sleep.  It was nice, but still often interfered with afternoon nap.  Over a few weeks, I gradually moved Quiet Time back and afternoon nap a bit earlier.  We are still transitioning, but instead of dropping morning nap I believe we will integrate Quiet Time into our schedule for a long time.  At this point, Quiet Time is only 30 minutes long, and if they fall asleep it’s only a catnap that doesn’t impact the afternoon nap.  It is refreshing for all five of us.  The quads each get time with a preferred toy that cannot be snatched.  Plus, I have just a few moments to enjoy a warm cup of coffee.  I expect that as they get older, it will evolve to independent playtime in their rooms or another quiet place.  I believe we all need a little peace in our day!

Sometimes, they get a bit of shut eye.

Sydney was so tired, she sprawled out on her side as she continued to play.

To spice things up, I also let the quads chose a different crib.  They seem to enjoy the new scenery and crib soothers.

To spice things up, I also let the quads chose a different crib. They seem to enjoy the new scenery and crib soothers.  Also, since we are in the groove of this new routine, I offer them 2-3 choices as to what toys they want in their crib.  It really helps when they feel some ownership over their time.

Quiet time makes everyone happy!

Quiet time makes everyone happy!

Do you have time to yourself each day?  If so, what do you chose to do?

hugs!

Amber

Cookies for Santa

Last year, the when the babies were newborns, they had a surprise visit from Santa.  We scored some precious pictures of Santa snuggling sleeping babies that we will treasure forever.  This year, the babies are far more aware of Santa.  They point him out in pictures and say “ho ho ho” whenever they spy him.  That meant we needed to make sure they got to see him in person again.  Yet, I was hesitant to wait in a long line with four toddlers to see the big guy and maybe get a picture.  Plus, I’m still a bit nervous about germ exposure this time of year.  Our dear friends, made sure seeing Santa would not be an ordeal and arranged for him to make another home visit, but this time I was prepared and had cookies for Santa awaiting his arrival.

During Icemagedon, I felt a bit crafty and found tutorials for making decorated plates using Sharpie markers and Dollar Tree plates.  I combined one tutorial explaining how to do the lettering, and another explaining how to cure Sharpie onto a plate.  Then I used acrylic craft paint to create lights with the babies’ thumbprints.  I was very pleased with the result, and found it perfect for Santa’s visit.  I also made Santa our favorite sugar cookie recipe, which was a crowd pleaser.  In fact, a week later, the babies still point to the spot where the cookies were and sign, “more, please”.

01-IMG_8013

After baking my piece, I was afraid the thumbprints would wash off so I added a top coat of Mod Podge as a sealant. I do NOT recommend doing this. At the end of the evening, one of our friends washed it in warm water, which melted the Mod Podge and caused peeling. The next day in an effort to “fix” it, I peeled the majority of the remaining Mod Podge off and re did the thumbprints. It is now a “surface wash with damp cloth” piece.  I’m sure you could make a similar piece at a ceramics shop that’s dishwasher safe, but this was made with found materials and cost me zilch!

Before Santa arrived, I showed the babies pictures from last year and talked to them about Santa more than usual, but I still wasn’t sure how they’d react.   Santa is notorious for startling toddlers.  Thankfully, they greeted Santa just like every other visitor to our home, with big grins.

Keeping with last year’s tradition, we snapped individual pictures of each baby with Santa.

Rylin was the only one hesitant to sit on Santa's lap.  A cookie did the trick.

Rylin was the only one hesitant to sit on Santa’s lap. A cookie did the trick.

Harper

Harper

Sydney

Sydney

Mason

Mason

Santa needed a little help holding all four babies so George and I joined him.

Santa needed a little help holding all four babies so George and I joined him.

Since we were at home, the babies enjoyed playing with Santa after our obligatory pictures were snapped.

Santa couldn't help but pinch Mason's adorable cheeks.

Santa couldn’t help but pinch Mason’s adorable cheeks.

Rylin eventually warmed up to Santa just like all other visitors.

Rylin eventually warmed up to Santa just like all other visitors.

14-IMG_8080 12-IMG_8071

19-IMG_8093

As Christmas approaches, take time to enjoy your family and friends and don’t let it become a time of stress.  Merry Christmas!

hugs!


Amber

Over The Summer… {sensory play}

over the summer button

Since I work in the public school system, I enjoy a brief summer break.  I don’t mean to complain, but summer breaks are not June-July-August like the good ol’ days; they are now a mere couple of weeks.  Just like with everything, all good things must eventually come to an end, and my summer break is officially over.  Sniff, sniff!

As a bit of a department tradition, on the first day of “school” we swap stories of our summer break, which usually consist of travel across country or abroad.  It’s always reminiscent of grade school days where the teacher assigns the infamous essay, “Over the summer…” and you recant the events of summer.  While a few of my colleagues were brave enough to travel with toddlers in tow, George and I knew that taking four babies on a road trip would be nothing but drama.  However, that doesn’t mean we sat home on our duffs all summer.  We had plenty of adventures right from home and around town.  Stay tuned for our mini-series of sharing what we did over the summer.

While at home, I tried to expose the babies to a variety of sensory play opportunities.  Some were a huge success, others a flop.  Nonetheless, they are all worth remembering, even if they include what NOT to do.

One day I was solo with the babies and they were not particularly content staying indoors at home.  I had really been wanting to do water play with them, but knew that taking them outside myself was not a stellar idea.  Instead, I set up shop in our master bathroom.  I filled a shallow tub with water and brought in new toys purchased for the babies’ birthday party.  To prevent the bathroom from transforming into a Slip ‘n’ Slide, I set an old quilt underneath the tub.  Since the babies aren’t generally permitted in our bathroom, they had a fantastic time splashing and making note of their new surroundings.

Part of the fun was the water, the other was being in a foreign room of the house.

Part of the fun was the water, the other was being in an otherwise forbidden room of the house.

Harper was the only baby who wanted IN the water tub.

Harper was the only baby who wanted IN the water tub.

Perhaps my favorite sensory activity of all was Cool Whip smearing.  I dressed the babies in swim suits and sat them at the quad table where I slapped a dollop of Cool Whip and a few drops of food coloring in front of each baby.  It didn’t take them long to figure out this was great fun and delicious too.  Sydney was hesitant to experiment since she’s not keen on getting messy, but she too joined in on the action.  Since I had a helper with me that day, we transferred the babies outdoors for a dip in the baby pool following this royal mess.

Mason enjoyed leaning forward to dab his nose in the Cool Whip.

Mason enjoyed leaning forward to dab his nose in the Cool Whip.

I thought it was interesting how each of the babies had a different pattern in their Cool Whip swash.

I thought it was interesting how each of the babies had a different pattern in their Cool Whip swash.  Some made vertical motions while others moved horizontally or even both directions.

Of course, half the fun of Cool Whip play is eating it!

Of course, half the fun of Cool Whip play is eating it!

Sydney was hesitant to get her hands dirty, but eventually patted the creamy stuff.

Sydney eventually patted the creamy stuff.

While this activity wasn’t as exciting for the babies, I loved the mess-free play!  I stumbled across this idea somewhere on Pinterest.  I slipped a piece of card stock into gallon bags and squirted Tempera paint in the bag, and taped them to the quad table.  For added dimension, I tossed a few sequins and a bit of glitter in the bags.  It entertained the babies for quite a while as they slapped, squished and patted the bags.  I don’t recommend using Duct tape, however.  George was not pleased to find it took bits of the finish off the table.

Each baby approached their work in a unique way.

Harper didn’t much enjoy this one, but at least he didn’t complain.

Rylin really loved smearing and patting.

Rylin really loved smearing and patting.

For the babies’ party, I reused our water play tub as a make shift sand box.  At the party, but it wasn’t a popular station.  If given a choice, kids apparently prefer water over sand.  However, I wasn’t letting a good bag of play sand go to waste so each of our babies got a turn experiencing the “beach”.

Harper may have taken a teeny taste of sand...

Harper may have taken a teeny taste of sand…

Needless to say, some babies enjoyed the sand more than others...

Needless to say, some babies enjoyed the sand more than others…

One night George and I had an abundance of left over angel hair pasta noodles so it became time for yet another sensory play activity.

Rylin tackled spaghetti with reckless abandon!

Rylin tackled spaghetti with reckless abandon!

Sydney delicately touched just one strand of spaghetti at time.

Sydney delicately touched just one strand of spaghetti at a time.

This final activity was perhaps not my brightest moment.  I searched for paint with water books (you know, the ones that look similar to coloring books with paint around the edges that brighten with a wet brush?).  Instead, I found coloring books with water paint strips attached to the top.  I thought it could work.  Just like when I worked in preschool, I taped the paper to the table and used a large sponge brush dipped in water.  First, I demonstrated dragging the damp brush across the top and over the paper, but the babies didn’t agree with this method.  This is when our previous edible sensory play activities interfered.  Instead of following my lead, the babies tore bits of paper off the table and proceeded to sample them.  When Rylin attempted to eat more than the paper, she did not appreciate being reprimanded.  There’s probably a good reason the recommended age for paint with water is three and up.  I think we’ll save this for a few more years.  In the meantime, maybe we’ll try that edible finger paint recipe I pinned.

Look closely at the tip of Rylin's paint brush.  Do you notice anything?

Look closely at the tip of Rylin’s paint brush. Do you notice anything?

Stay tuned for more in this series: DIY projects, parents getaway, and Friday field trips.  How did you spend your summer?

hugs!

Amber

PS- If you can’t get enough of Four to Adore, don’t forget to follow us on Facebook, Twitter, and Pinterest!